How To Replace Grout In Shower Tiles
Grout, the material that fills the spaces between tiles, is essential for a shower's structural integrity and water resistance. Over time, grout can crack, crumble, discolor, and become susceptible to mold and mildew growth. Replacing damaged grout is crucial for maintaining a clean, hygienic, and structurally sound shower. This process involves carefully removing the old grout, cleaning the tile surfaces, and applying new grout. While it can be a time-consuming task, it is a manageable DIY project that can significantly improve the look and longevity of a shower.
Before embarking on this project, it is important to gather the necessary tools and materials. Proper preparation streamlines the process and minimizes potential errors.
Gathering Tools and Materials
The success of grout replacement hinges on having the right tools at hand. The following items are generally required:
Grout Removal Tool: This is perhaps the most important tool. Options include manual grout saws, oscillating multi-tools with grout removal attachments, and grout removal bits for rotary tools. The choice depends on personal preference and the extent of the grout damage. A manual grout saw is generally less aggressive and offers more control, while power tools are faster but require more caution to avoid damaging the tiles.
Utility Knife: Useful for scoring the edges of the grout, especially in corners and along the shower surround.
Hammer and Chisel (Optional): For extremely stubborn grout or for removing large chunks of cracked grout. Use with extreme care to prevent tile damage.
Vacuum Cleaner: Essential for removing dust and debris created during the grout removal process.
Shop Towels or Sponges: For cleaning tiles and wiping away excess grout.
Mixing Bowl and Stir Stick: For mixing the new grout.
Grout Float: A rectangular tool with a rubber or foam surface used to press grout into the tile joints.
Grout Sponge: A specialized sponge with rounded edges designed for cleaning grout haze from tile surfaces.
Clean Water: For mixing grout and cleaning tools.
Safety Glasses: To protect eyes from flying debris.
Dust Mask: To prevent inhalation of grout dust.
Gloves: To protect hands from grout and cleaning solutions.
Grout Sealer: To protect the new grout from moisture and stains.
Painter's Tape (Optional): To protect adjacent surfaces like shower doors or fixtures.
New Grout: Choose the appropriate type of grout for your shower. Cement-based grout is the most common, but epoxy grout offers superior stain and water resistance, although it is more expensive and harder to work with. Consider the color of the existing grout or choose a new color to refresh the shower's appearance. Pre-mixed grout is available, but it is often less durable and more expensive than mixing the grout yourself.
Once all tools and materials are assembled, the next step involves removing the old grout.
Removing the Old Grout
Grout removal is the most labor-intensive part of the process. Patience and careful technique are key to avoiding damage to the tiles.
Preparation: Begin by thoroughly cleaning the shower area. Remove any soap scum, mildew, or other debris. Ensure the area is completely dry before starting grout removal.
Softening the Grout (Optional): Some professionals recommend softening the grout with a grout softening solution prior to removal. This can make the process easier, especially with older, hardened grout. Follow the manufacturer's instructions carefully.
Using a Grout Saw: Hold the grout saw at a comfortable angle and apply steady, even pressure. Work along the grout line, carefully removing the grout in small sections. Avoid applying excessive force, which can scratch or chip the tiles. Focus on removing the bulk of the grout, leaving a small amount near the tile edges to be removed later with more precision.
Using an Oscillating Multi-Tool: Attach the grout removal blade to the oscillating multi-tool. Start the tool at a low speed and gradually increase the speed as needed. Guide the blade along the grout line, keeping it centered between the tiles. Avoid pressing too hard, as this can damage the tiles. The oscillating motion of the tool can generate significant dust, so ensure both safety glasses and a dust mask are worn.
Using a Rotary Tool: Attach the grout removal bit to the rotary tool. Set the tool to a low speed and carefully guide the bit along the grout line. Rotary tools can be very aggressive, so use a light touch and avoid dwelling in one spot for too long. Practice on a less visible area first to get a feel for the tool's handling.
Corners and Edges: Use a utility knife to carefully score the grout along the corners and edges of the shower surround. This will help prevent chipping or cracking the tiles. Use a manual grout saw or a fine-tipped grout removal bit to remove the grout in these delicate areas.
Vacuuming and Cleaning: As grout is removed, immediately vacuum up the dust and debris. This will improve visibility and prevent the dust from settling on other surfaces. Periodically wipe down the tiles with a damp sponge to remove any remaining grout residue.
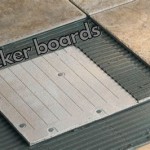
Inspecting the Substrate: Once all of the old grout has been removed, inspect the substrate beneath the tiles. Look for any signs of water damage, such as mold, rot, or crumbling. If water damage is present, it must be repaired before installing new grout. This may involve replacing damaged backer board or framing.
After the old grout is completely removed and the area has been thoroughly cleaned, it is time to apply the new grout.
Applying the New Grout
Proper grout application is crucial for creating a durable, water-resistant seal. Take the time to mix the grout correctly and apply it evenly.
Mixing the Grout: If using dry grout powder, follow the manufacturer's instructions carefully. Add water gradually to the powder, mixing with a stir stick until a smooth, consistent paste is formed. The grout should be thick enough to hold its shape but still pliable enough to spread easily. Avoid adding too much water, as this can weaken the grout and make it more prone to cracking.
Applying the Grout: Scoop a generous amount of grout onto the tile surface. Use a grout float to press the grout firmly into the grout lines. Hold the float at a 45-degree angle and work diagonally across the tiles, ensuring that all the joints are completely filled. Apply enough pressure to force the grout into the spaces and remove any air pockets.
Removing Excess Grout: After applying the grout, immediately remove any excess grout from the tile surfaces. Angle the grout float and scrape it across the tiles, removing the bulk of the excess grout. Work diagonally to avoid pulling grout out of the joints.
Initial Cleaning: After allowing the grout to set for the time specified by the manufacturer (usually 15-30 minutes), begin the initial cleaning. Dampen a grout sponge with clean water and wring it out thoroughly. Gently wipe the tile surfaces, removing the grout haze. Rinse the sponge frequently in clean water. Avoid using too much water, as this can wash out the grout from the joints.
Final Cleaning: After another hour or two, when the grout has hardened further, perform a final cleaning. Use a clean, damp grout sponge to remove any remaining grout haze. Buff the tiles dry with a clean cloth. Inspect the grout lines and touch up any areas that appear thin or uneven.
Curing the Grout: Allow the grout to cure for at least 24-72 hours before using the shower. During this time, keep the shower area well-ventilated. Some manufacturers recommend misting the grout with water periodically to promote proper curing.
Sealing the Grout: Once the grout has fully cured, apply a grout sealer. This will help protect the grout from moisture, stains, and mildew growth. Follow the manufacturer's instructions carefully. Apply the sealer evenly to the grout lines, using a small brush or applicator. Allow the sealer to dry completely before using the shower. Reapply the sealer periodically, as needed.
Replacing grout in shower tiles can be a rewarding DIY project that enhances the appearance and functionality of the bathroom. The steps outlined above, when executed with precision and care, result in a professional-looking and long-lasting grout repair. While it requires an investment of time and effort, this endeavor can save significant costs compared to hiring a professional contractor. Proper maintenance and regular cleaning will further extend the life of the new grout and maintain a clean and healthy shower environment.

How To Prevent Expensive Bathroom Shower Tile And Grout Repair Promaster Home Handyman

Is Ed Grout A Problem Repair Easy The Medic

How To Regrout Bathroom Tile In 5 Easy Steps True Value

How Do I Know If Need To Regrout My Shower The Grout Medic

Can I Put New Grout Over My Old The Medic

How To Fix Holes In Shower Grout The Experts

How To Repair Ed Bathroom Grout

Where Should Grout And Caulk Be Installed In A Tile Shower

How To Prevent Expensive Bathroom Shower Tile And Grout Repair Promaster Home Handyman

How To Repair Ed Tile Grout An Easy Guide The Lived In Look
Related Posts