How to Replace Drop Ceiling Tiles with Drywall
Replacing drop ceiling tiles with drywall offers a more seamless and aesthetically pleasing finish, eliminating the grid system and providing a smooth surface ideal for painting or wallpaper. It's a project that can be tackled by a homeowner with some DIY skills. This guide outlines the steps involved in replacing drop ceiling tiles with drywall, ensuring a successful transformation.
1. Preparation and Materials
Before starting the project, gather the necessary materials and tools. Here's a comprehensive list:
- Drywall: Choose drywall panels that correspond to the ceiling dimensions. Consider using fire-resistant drywall for added safety in kitchens and bathrooms.
- Drywall screws: Select screws designed for drywall installation, ensuring they are long enough to secure the panels to the joists.
- Drywall joint compound: This compound is used to smooth over seams and screw heads for a seamless finish.
- Drywall tape: Use paper or fiberglass tape to reinforce seams and prevent cracking.
- Joint compound knife: Apply the joint compound smoothly and evenly.
- Level: Ensure the drywall panels are installed straight and level.
- Measuring tape: Accurately measure the ceiling area and cut the drywall panels to size.
- Utility knife: Cut the drywall panels precisely to fit the ceiling area.
- Safety glasses: Protect your eyes from dust and debris.
- Dust mask: Avoid inhaling drywall dust.
- Gloves: Protect your hands during the installation process.
- Ladder: Access the ceiling safely and comfortably.
After gathering the essential materials, it's crucial to prepare the work area:
- Clear the room: Remove all furniture and belongings from the area below the ceiling. Cover any remaining items with drop cloths.
- Turn off power: Disconnect the electrical supply to the room to prevent accidental shocks during the process.
- Remove the drop ceiling: Carefully dismantle the existing drop ceiling, removing all tiles and the supporting grid system. Ensure you disconnect any light fixtures or other components attached to the ceiling.
- Inspect the joists: Before installing the drywall, check the condition of the joists. If any signs of damage or rot are present, they will need to be repaired before proceeding.
2. Installing the Drywall
Once the drop ceiling is removed and the joists are inspected, you can begin installing the drywall panels:
- Measure and cut: Measure the ceiling area and carefully cut the drywall panels to fit. It's advisable to start with the center panel and work outwards, ensuring the panels align with the joists.
- Attach the panels: Use drywall screws to secure the panels to the joists. Ensure the screws are driven at least 1/2 inch into the joist and spaced approximately every 12 inches.
- Seams and screw heads: Apply drywall joint compound to the seams between the panels and cover the screw heads. Use a joint compound knife to spread the compound smoothly and evenly.
- Apply tape: Embed drywall tape into the joint compound, pressing firmly to ensure the tape adheres securely. Apply a thin layer of compound over the tape to create a smooth surface.
- Finish the seams: After the first layer of joint compound dries, apply a second layer to further smooth the seams. Repeat this process for a third layer, achieving a flawless finish.
- Sand the seams: Once the final layer of joint compound dries completely, use a sanding block to smooth out any imperfections and create a consistent surface.
3. Finishing Touches
After the drywall installation is complete, ensure a professional-looking finish:
- Prime the ceiling: Apply a coat of primer to the entire ceiling. This helps to seal the surface and creates a smooth base for the paint.
- Paint the ceiling: Choose a paint that suits your desired aesthetic and apply it using a roller. Multiple coats may be necessary for complete coverage.
- Reinstall light fixtures: After the paint dries, reattach any light fixtures that were removed during the process. Ensure the electrical connections are secure and the wiring is correctly installed.
- Clean up: Thoroughly clean up the work area, removing any debris or leftover materials.
Replacing drop ceiling tiles with drywall transforms the room's appearance, creating a more unified and elegant look. By following these steps, you can complete the project successfully and enjoy the benefits of a seamless ceiling.

Ceiling Upgrade W Armstrong Ceilings Replace Drop Tiles Easy

Drop Ceiling Or Drywall Which One Should You Choose

How To Easily Update An Ugly Drop Ceiling

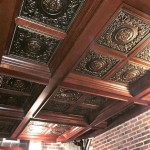
Diy Coffered Ceilings With Moveable Panels Renovation Semi Pros

Updating An Old Ceiling Ceilings Armstrong Residential

Ceiling Upgrade W Armstrong Ceilings Replace Drop Tiles Easy

Drop Ceiling Tiles Installation Tips Diy Family Handyman

How To Easily Install A Drop Ceiling Ron Hazelton

Basement Ceilings Drywall Or A Drop Ceiling Fine Homebuilding

Drop Ceiling Installation How To Install A Homeserve Usa
Related Posts