Ceiling Tiles in a Mobile Home Park: A Comprehensive Guide to Replacement
Mobile homes, a popular and affordable housing option, often feature ceiling tiles as an economical and stylish ceiling covering. However, over time, these tiles may become damaged, stained, or outdated, requiring replacement. If you find yourself in need of replacing ceiling tiles in your mobile home, this comprehensive guide will provide you with step-by-step instructions and essential tips to ensure a successful and hassle-free project.
Materials and Tools You'll Need
Before embarking on your ceiling tile replacement journey, gather the necessary materials and tools to make the process smooth and efficient:
- New ceiling tiles
- Safety glasses
- Utility knife
- Spackling knife
- Stepladder or small ladder
- Caulk gun
- Caulk
- Tape measure
- Pencil
Step-by-Step Replacement Instructions
Follow these steps to replace your ceiling tiles seamlessly:
1. Preparation
Begin by donning your safety glasses to protect your eyes from dust and debris. Clear the area around the ceiling tiles you intend to replace by removing any furniture or objects that may obstruct your workspace.
2. Remove Existing Tiles
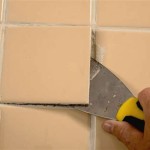
Use a utility knife to carefully cut around the perimeter of the old ceiling tile. Avoid damaging the ceiling joists by cutting only through the tile itself. Gently pry the tile loose using a spackling knife or your fingers and remove it.
3. Measure and Cut New Tiles
Measure the space where the old tile was removed and transfer the measurements to your new tile. Use a utility knife to cut the new tile to the exact size required.
4. Place New Tiles
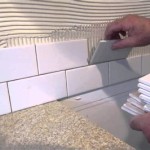
Align the new tile with the exposed ceiling joists and carefully slide it into place. Ensure that the edges fit snugly against the surrounding tiles.
5. Secure Tiles
Apply a generous bead of caulk along the edges of the new tile where it meets the ceiling joists. Use your finger or a small tool to smooth out the caulk and create a tight seal.
6. Repeat
Repeat steps 2-5 for each ceiling tile that needs replacement until the entire ceiling is covered.
Tips for Successful Replacement
Consider these tips to enhance your ceiling tile replacement project:
- Always wear safety glasses.
- Use a sharp utility knife to ensure clean cuts.
- Avoid overtightening the tiles, as this can damage the ceiling joists.
- Use a caulk gun with a fine nozzle to apply caulk accurately.
- Allow the caulk to dry completely before moving furniture or objects back into the room.
- If you encounter any damaged ceiling joists, seek professional assistance immediately.
Conclusion
Replacing ceiling tiles in a mobile home is a straightforward task that can be accomplished with the right tools, materials, and a little patience. By following the instructions and tips outlined in this guide, you can restore the beauty and functionality of your mobile home's ceiling. Remember to prioritize safety, take your time, and enjoy the satisfaction of a successful DIY project.

Mobile Home Ceiling Panels Replacement Repair Or Rebuild

Mobile Home Ceiling Panels Replacement Repair Or Rebuild

How To Repair And Replace Ceiling Panels For Mobile Homes The Home Dealer

How Can You Fix A Mobile Home Ceiling Hometalk

How Do I Repair Mobile Home Ceiling Hometalk

Mobile Home Ceiling Panels Replacement Repair Or Rebuild

Mobile Home Ceiling Panels Replacement Repair Or Rebuild

Mobile Home Ceiling Panels Replacement Repair Or Rebuild

Mobile Home Ceilings Guide Gypsum Ceiling Panels Living

Upgrading And Installing Mobile Home Ceiling Ideas Trusscore
Related Posts


