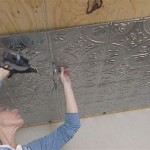
How to Replace Ceiling Tiles Around Sprinkler Heads
Replacing ceiling tiles around sprinkler heads requires careful attention to detail to ensure both the aesthetic appeal of the ceiling and the functionality of the fire suppression system. A poorly installed tile can obstruct the sprinkler's spray pattern, rendering it ineffective in the event of a fire. This article provides a comprehensive guide to safely and effectively replacing ceiling tiles around sprinkler heads, covering essential tools, necessary precautions, and step-by-step instructions.
Before initiating the replacement process, it is crucial to understand the type of ceiling tile and the specific sprinkler head configuration. There are various types of ceiling tiles, including mineral fiber, fiberglass, and gypsum, each with unique properties affecting their handling and cutting. Sprinkler heads also come in different designs: recessed, concealed, and pendant, each requiring a slightly different approach for tile installation.
Key Point 1: Safety Precautions and Preparations
Safety should always be the top priority when working around sprinkler systems. Accidental activation of a sprinkler head can cause significant water damage and potentially trigger a false alarm. Therefore, certain precautions are essential to prevent such occurrences.
Firstly, consult with the building's fire safety personnel or a qualified fire protection technician before commencing any work near the sprinkler system. They can provide valuable insights into the system's specific characteristics and any relevant safety protocols. Obtain their approval before moving forward.
Secondly, visually inspect the sprinkler head and the surrounding area for any signs of damage or corrosion. If any issues are identified, report them to the appropriate authorities immediately. Do not attempt to repair or tamper with the sprinkler head itself.
Thirdly, always use appropriate personal protective equipment (PPE) during the entire process. This includes safety glasses to protect the eyes from debris, gloves to protect the hands, and a dust mask or respirator to prevent inhalation of airborne particles from the ceiling tiles.
Fourthly, ensure the work area is well-lit. Adequate lighting will improve visibility and reduce the risk of accidents. Use a portable work light if necessary.
Finally, gather all the necessary tools and materials before starting the replacement. This will minimize distractions and ensure a smooth and efficient workflow. Essential tools and materials include:
- New ceiling tile
- Utility knife or sharp knife
- Measuring tape
- Pencil or marker
- Straight edge or ruler
- Circular saw or hole saw (optional, depending on the sprinkler head type)
- Ladder or scaffolding
- Safety glasses
- Gloves
- Dust mask or respirator
Key Point 2: Removing the Old Ceiling Tile
The process of removing the old ceiling tile requires a delicate touch to avoid damaging the sprinkler head or the surrounding tiles. It is important to proceed slowly and methodically.
Begin by carefully lowering the old ceiling tile from the grid. If the tile is stuck, gently wiggle it back and forth to loosen it. Avoid excessive force, as this could damage the grid or the sprinkler head.
Once the tile is lowered, inspect the area around the sprinkler head. Note how the old tile was cut or shaped to accommodate the sprinkler head. This will serve as a template for the new tile.
If the old tile is in multiple pieces, carefully remove each piece, ensuring no debris falls onto the sprinkler head. Use a soft brush or vacuum cleaner with a brush attachment to remove any dust or debris from the sprinkler head and the surrounding area.
Dispose of the old ceiling tile properly, following local regulations regarding waste disposal. Some ceiling tiles may contain asbestos or other hazardous materials, requiring special handling.
With the old tile removed, take detailed measurements of the distance from the grid edges to the center of the sprinkler head. These measurements will be crucial for accurately cutting the new tile.
Key Point 3: Cutting and Installing the New Ceiling Tile
Cutting the new ceiling tile to accommodate the sprinkler head is a critical step that requires precision and attention to detail. An improperly cut tile can compromise the fire safety system's effectiveness and detract from the ceiling's aesthetic appearance.
Transfer the measurements taken earlier onto the new ceiling tile. Use a pencil or marker and a straight edge to draw the outline of the required cutout. Double-check the measurements to ensure accuracy.
Depending on the type of sprinkler head, the method of cutting the tile will vary. For pendant sprinkler heads, a circular cutout is typically required. A hole saw of the appropriate diameter can be used for this purpose. Alternatively, a utility knife can be used to carefully score and cut around the circle. Multiple passes with light pressure are recommended for a cleaner cut.
For recessed or concealed sprinkler heads, a different approach may be necessary. These types of sprinkler heads often require a square or rectangular cutout to accommodate the surrounding trim or escutcheon. Use a utility knife and a straight edge to carefully cut along the marked lines. Again, multiple passes with light pressure are recommended.
After cutting the tile, test the fit around the sprinkler head. The tile should fit snugly but not too tightly. There should be a small gap (approximately 1/8 inch) between the tile and the sprinkler head or escutcheon to allow for expansion and contraction due to temperature changes. This gap also prevents the tile from exerting pressure on the sprinkler head, which could affect its operation.
If the tile does not fit properly, make small adjustments with the utility knife until the desired fit is achieved. Avoid removing too much material, as this can create unsightly gaps and compromise the tile's stability.
Once the tile fits correctly, carefully lift it into place and insert it into the grid. Ensure the tile is properly seated and aligned with the surrounding tiles. Avoid pushing the tile too hard, as this could damage the grid or the tile itself.
Inspect the finished installation to ensure the tile is level and the sprinkler head is unobstructed. The sprinkler head should be visible and free from any obstructions that could impede its spray pattern.
If necessary, use a small amount of adhesive to secure the tile in place. Choose an adhesive that is compatible with the ceiling tile material and the grid system. Apply the adhesive sparingly and only in areas where it is needed to prevent the tile from shifting.
Finally, clean up any debris or dust from the work area. Dispose of any waste materials properly.
Following these steps, the replacement of ceiling tiles around sprinkler heads can be accomplished safely and effectively, ensuring both the aesthetic integrity of the ceiling and the proper functioning of the fire suppression system. Regular review of these guidelines and adherence to all safety precautions are crucial for maintaining a safe and compliant environment.

How To Install Ceiling Tile With Sprinkler Head In The Middle Skill Stacking
How Do I Remove The Sprinkler Head Trim Ceiling Tile Replacement Contractor Talk Professional Construction And Remodeling Forum

How To Install Ceiling Tile With Sprinkler Head In The Middle Breakdown Skill Stacking

How To Install Ceiling Tiles On Sprinklers Wiht Flex Drop

How To Remove And Replace A Ceiling Tile With Fire Sprinkler

How To Cut A Sprinkler Head Into Ceiling Tile

How To Install Ceiling Tiles On Sprinklers Wiht Flex Drop

How To Remove And Replace A Ceiling Tile With Fire Sprinkler

Regulations Codes Standards Q A Ceiling Tile Replacement

Ceiling Tile Sprinkle Hole Cutting Tricks
Related Posts


