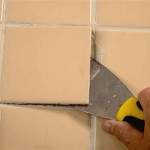
Tile grout can be a tricky element to maintain in a home. It can become cracked, discolored and stained over time. Repairing tile grout can be a time consuming task, but it is a job that can be done with the right tools and a bit of elbow grease. Here are some tips to help you restore your tile grout to its former glory.
The first step in repairing tile grout is to remove the existing grout. This can be done with a grout saw or grout removal tool. Carefully work the tool back and forth across the grout line, being careful not to gouge the tile or scratch the surrounding surfaces. If the grout is too stubborn to remove, you may need to use a grout-removing chemical.
Once the old grout has been removed, you will need to thoroughly clean the area to remove any debris and dirt. Use a vacuum cleaner to suck up any loose particles, then clean the area with a damp cloth. Let the area dry completely before continuing.
Next, you will need to apply a new grout sealer. This will help protect the grout from staining and water damage. Be sure to read the instructions on the package to ensure proper application. Once the sealer has been applied, allow it to dry completely before continuing.
Finally, you will need to apply the new grout. Make sure you mix it according to the instructions on the package. Use a trowel to apply the grout in a thin, even layer. Smooth the grout with a damp sponge and let it dry completely. Once the grout is dry, you can seal it with a grout sealer to protect it from staining and water damage.
Repairing tile grout can be a time consuming task, but it is a job that can be done with the right tools and a bit of elbow grease. With a little bit of patience and effort, you can make your old tile grout look new again.


Related Posts


