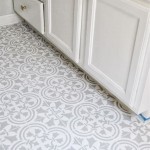
How To Repair Grout In Shower Floor Tiles
Maintaining the integrity of shower floor grout is crucial for preventing water damage and preserving the aesthetic appeal of the bathroom. Deteriorated grout can lead to leaks, mold growth, and structural issues if left unaddressed. This article provides a comprehensive guide to repairing grout in shower floor tiles, outlining the necessary tools, materials, and step-by-step procedures.
Assessment and Preparation: Begin by thoroughly assessing the condition of the existing grout. Identify areas with cracks, crumbling, discoloration, or missing grout. These areas will require attention. Clean the shower floor thoroughly using a tile and grout cleaner to remove soap scum, mildew, and dirt. A stiff-bristled brush can be helpful in this process. Allow the shower floor to dry completely before proceeding.
Tools and Materials: Gather the necessary tools and materials before starting the repair process. These include a grout removal tool (e.g., grout saw, rotary tool with a grout removal bit), safety glasses, dust mask, gloves, shop vacuum, grout sealant, grout float, bucket, sponge, mixing utensil, and new grout. Select a grout that is specifically designed for use in wet areas, such as sanded grout for wider joints (1/8 inch or larger) and unsanded grout for narrower joints.
Grout Removal: Wearing safety glasses and a dust mask, carefully remove the damaged grout. Utilize a grout saw or rotary tool with a grout removal bit to meticulously remove the deteriorated grout from the joints. Avoid damaging the surrounding tiles during this process. A shop vacuum can be used to remove the dust and debris generated during grout removal.
Mixing the Grout: Follow the manufacturer's instructions on the grout packaging for proper mixing procedures. Generally, this involves adding water to the dry grout powder in a bucket and mixing thoroughly until a smooth, paste-like consistency is achieved. Allow the grout to slake (rest) for the recommended time, typically 5-10 minutes. This allows the grout to hydrate fully.
Grout Application: Using a grout float, apply the mixed grout to the joints, working in small sections. Hold the float at a 45-degree angle and press the grout firmly into the joints to ensure complete filling. Remove excess grout from the tile surface with the edge of the float, working diagonally across the tiles.
Cleanup: After allowing the grout to haze over (approximately 15-20 minutes), use a damp sponge to clean the excess grout from the tile surface. Rinse the sponge frequently and wring it out well to avoid leaving too much water on the tiles. Multiple passes with the sponge may be necessary to achieve a clean finish. Avoid washing the grout directly out of the joints.
Drying and Curing: Allow the grout to dry and cure completely according to the manufacturer's instructions, typically 24-72 hours. Avoid using the shower during this period to prevent disturbing the newly applied grout.
Sealing the Grout: Once the grout has cured, apply a grout sealant to protect it from moisture, staining, and mildew growth. Follow the sealant manufacturer's instructions for application and drying times. Regularly sealing the grout will extend its lifespan and maintain its appearance.
Maintenance: Regular cleaning of the shower floor and periodic resealing of the grout are essential for maintaining the long-term integrity of the tiled surface. Avoid using harsh chemicals that can damage the grout or tiles. Promptly address any cracks or damage to the grout to prevent further deterioration and potential water damage.
By following these steps, one can successfully repair grout in shower floor tiles, restoring the functionality and aesthetics of the shower while preventing potential water damage. The careful attention to detail and use of appropriate materials will ensure a durable and long-lasting repair.

How To Prevent Expensive Bathroom Shower Tile And Grout Repair Promaster Home Handyman

Is Ed Grout A Problem Repair Easy The Medic

How To Repair Ed Tile Grout An Easy Guide The Lived In Look

How To Fix Holes In Shower Grout The Experts

Quick Fix Repair Ed Bathroom Grout

Can I Put New Grout Over My Old The Medic

Fix Ed Missing Tile Grout In A Few Easy Steps Hometalk

Can I Regrout My Shower Floor Here Are 3 Reasons You Should Not The Grout Medic Of Central New Jersey

How To Repair Ed Tile Grout An Easy Guide The Lived In Look

How To Prevent Expensive Bathroom Shower Tile And Grout Repair Promaster Home Handyman
Related Posts

