How to Repair Bathroom Tiles in a Shower: A Step-by-Step Guide
Maintaining a pristine and functional bathroom is crucial for a comfortable and aesthetically pleasing home. One essential component of any bathroom is the shower, and its tiles play a vital role in its overall appearance and functionality. However, over time, shower tiles can become damaged due to various factors such as moisture, wear and tear, or accidental impact. If you find yourself in need of repairing bathroom tiles in your shower, this comprehensive guide will provide you with the necessary steps to restore them to their former glory.
Before embarking on the repair process, it's essential to assess the extent of the damage. Minor cracks or chips can often be repaired using simple techniques, while more severe damage may require professional assistance. Once you have determined the severity of the damage, gather the necessary materials and tools, which may include:
- Replacement tiles (matching the existing tiles in size, color, and texture)
- Tile adhesive
- Grout
- Tile spacers
- Grout float
- Sponge or damp cloth
- Safety glasses
With the necessary materials at hand, you can proceed with the repair process:
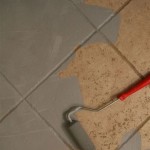
Step 1: Remove the Damaged Tile
Using a utility knife or a flat-head screwdriver, carefully remove the damaged tile by gently prying it away from the surrounding tiles. Be cautious not to damage the adjacent tiles or the wall beneath.
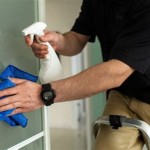
Step 2: Clean the Area
Thoroughly clean the area where the damaged tile was removed using a damp sponge or cloth. Remove any remaining adhesive or grout from the surface and allow it to dry completely.
Step 3: Apply Adhesive to the Replacement Tile
Spread a thin layer of tile adhesive evenly onto the back of the replacement tile. Follow the manufacturer's instructions for the specific adhesive you are using.
Step 4: Insert the Replacement Tile
Carefully insert the replacement tile into the empty space, aligning it with the surrounding tiles. Use tile spacers to ensure even spacing.
Step 5: Grout the Tile
Once the adhesive has set according to the manufacturer's instructions, apply grout to the gaps between the tiles using a grout float. Use a damp sponge or cloth to remove excess grout and smooth out the surface.
Step 6: Clean and Seal
After the grout has fully dried, use a damp sponge or cloth to clean the surface. Allow the tiles to dry completely and apply a sealant to protect them from moisture and stains.
By following these steps, you can effectively repair bathroom tiles in your shower, restoring them to their original condition. Remember to approach the repair process with patience and attention to detail, and don't hesitate to seek professional assistance if the damage is significant or beyond your skill level.

Repair Fallen Tile Reinstall Shower With Simple Fix Re Install Bath No Grout

How To Repair Broken Tile Part One

How To Fix Shower Tiles Falling Off Wall Diy

How To Prevent Expensive Bathroom Shower Tile And Grout Repair Promaster Home Handyman

How To Quickly Repair Bathroom Shower Tiles 6 Steps

How To Replace Damaged Shower Surround Tile

How To Fix Ed Tile From Hairline Fractures Major Fissures

How To Diy Repair Your Leaking Shower Without Removing Tiles United Trade Links

Water Damage Behind Shower Tiles

How To Remove Bathtub Shower Wall Tiles
Related Posts