How to Remove Tile From Concrete Floor
Removing tile from a concrete floor is a common home improvement task, often undertaken when renovating bathrooms, kitchens, or other tiled areas. This project can range from relatively straightforward to significantly challenging, depending on the type of tile, the adhesive used, and the condition of the underlying concrete. While it can be a labor-intensive process, with the proper tools, techniques, and precautions, it is achievable for many homeowners.
Before beginning any tile removal project, careful assessment of the situation is crucial. This includes determining the type of tile (ceramic, porcelain, stone, etc.), the type of adhesive (thin-set mortar, mastic, epoxy), and the condition of the concrete subfloor. Inspecting the grout lines for cracks or weaknesses can also provide clues about the bond between the tile and the concrete. Understanding these factors will inform the approach and the tools needed for the job.
Safety is paramount during tile removal. Wear appropriate personal protective equipment (PPE) at all times, including safety glasses, work gloves, and a dust mask or respirator. Tile removal generates a significant amount of dust and debris, and some older tiles or adhesives may contain hazardous materials like asbestos. Eye protection is critical to prevent chips of tile or debris from causing injury. Gloves will protect hands from sharp edges and potential irritants. A respirator is essential for filtering out harmful airborne particles.
Proper preparation of the work area is also important. Cover nearby surfaces with plastic sheeting to protect them from dust and debris. Secure the sheeting with painter's tape. Open windows and doors to provide adequate ventilation, and consider using a fan to circulate air. If possible, seal off the work area from the rest of the house with plastic sheeting to minimize the spread of dust and debris.
Key Point 1: Gathering the Necessary Tools and Materials
Having the right tools readily available is essential for efficient and effective tile removal. The specific tools needed will depend on the type of tile and adhesive being used, but a basic toolkit should include:
Hammer: A standard claw hammer can be used for breaking tiles and prying them up.
Chisel: A cold chisel or a masonry chisel is necessary for working underneath tiles and breaking the adhesive bond. Different sizes and angles of chisels can be useful for various situations.
Scraper: A floor scraper with a long handle can be used to remove remaining adhesive residue from the concrete surface. Both hand-held and powered scrapers are available.
Pry bar: A pry bar provides leverage for lifting tiles, especially larger ones, after the adhesive bond has been weakened.
Grout removal tool: A grout saw or grout removal tool is used to remove grout from around the tiles before attempting to remove them. This can be a hand tool or a power tool with a specialized grout removal attachment.
Angle grinder with diamond blade (optional): An angle grinder with a diamond blade can be used to score the grout lines, making grout removal easier. Use caution and wear appropriate PPE when operating an angle grinder.
Wet/dry vacuum: Essential for cleaning up dust and debris during and after the removal process. A shop vacuum with a HEPA filter is recommended.
Bucket and sponge: For cleaning up spills and wiping down surfaces.
Safety glasses, work gloves, and dust mask/respirator: As mentioned, these are crucial for personal protection.
Plastic sheeting and painter's tape: For protecting surrounding areas from dust and debris.
Garbage bags or containers: For disposing of tile and adhesive debris.
Knee pads: Prolonged kneeling can be uncomfortable, so knee pads can significantly improve comfort during the project.
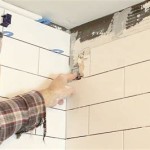
Key Point 2: Removing the Tile
The process of removing tile involves several steps, and the specific approach may vary depending on the circumstances:
Grout Removal: The first step is to remove the grout surrounding the tiles. This can be done using a grout saw, a grout removal tool, or an angle grinder with a diamond blade. Carefully run the tool along the grout lines, removing as much of the grout as possible. Be mindful not to damage the surrounding tiles or the concrete subfloor. If using an angle grinder, use light pressure and avoid prolonged contact with the tile to prevent overheating and chipping.
Breaking the Tile (If Necessary): If the tiles are difficult to remove intact, it may be necessary to break them into smaller pieces. Use the hammer and chisel to carefully break the tile. Start by scoring the tile with the chisel and then strike it firmly with the hammer. Work from the center of the tile outwards. Exercise caution to avoid flying debris.
Chiseling Under the Tile: Once the grout is removed and the tile is broken (if necessary), use the chisel and hammer to work underneath the tile and break the adhesive bond. Position the chisel at an angle under the edge of the tile and strike it firmly with the hammer. Continue working around the edges of the tile until it begins to loosen. A pry bar can be used to provide additional leverage for lifting the tile.
Removing the Tile: Once the adhesive bond is broken, carefully lift the tile from the floor. If the tile is still partially adhered, continue using the chisel and hammer to loosen the remaining adhesive. Avoid applying excessive force, which could damage the concrete subfloor.
Repeat the Process: Repeat the steps above for each tile until all the tiles have been removed.
Dealing with Stubborn Tiles: Some tiles may be particularly difficult to remove. In these cases, consider using a heat gun to soften the adhesive. Apply heat to the tile for several minutes, then try using the chisel and hammer to break the bond. Alternatively, a specialized tile removal tool, such as a demolition hammer with a chisel attachment, can be used for stubborn tiles. These tools provide more power and leverage, making the removal process easier.
Key Point 3: Removing Adhesive Residue and Preparing the Subfloor
After the tiles have been removed, there will likely be adhesive residue remaining on the concrete subfloor. Removing this residue is essential for creating a smooth and even surface for installing new flooring.
Scraping the Adhesive: Use a floor scraper to remove as much of the adhesive residue as possible. Apply firm, even pressure and work in a consistent direction. Both hand-held and powered scrapers can be used. Powered scrapers can be more efficient for large areas or particularly stubborn adhesive.
Using Chemical Adhesive Remover: If scraping alone is not sufficient, a chemical adhesive remover can be used. Choose a remover that is specifically designed for the type of adhesive being removed. Follow the manufacturer's instructions carefully, including wearing appropriate PPE. Apply the remover to the adhesive residue and allow it to dwell for the recommended time. Then, use the scraper to remove the softened adhesive.
Grinding the Concrete (If Necessary): In some cases, it may be necessary to grind the concrete subfloor to remove any remaining adhesive residue or to level the surface. Use a concrete grinder with a diamond grinding wheel. Wear appropriate PPE, including a respirator, and use a wet/dry vacuum to control dust. Grinding can also remove minor imperfections in the concrete surface, creating a smoother and more even substrate for new flooring.
Cleaning the Subfloor: Once the adhesive residue has been removed, thoroughly clean the concrete subfloor. Use a wet/dry vacuum to remove any remaining dust and debris. Then, scrub the floor with a mild detergent and water. Rinse thoroughly and allow the floor to dry completely before installing new flooring.
Repairing Concrete Damage: Inspect the concrete subfloor for any cracks, holes, or other damage. Repair any damaged areas with a concrete patching compound or self-leveling underlayment. Follow the manufacturer's instructions carefully. Allow the repair material to dry completely before installing new flooring.
Applying a Primer (If Necessary): Depending on the type of new flooring being installed, it may be necessary to apply a primer to the concrete subfloor. A primer will improve adhesion and prevent moisture migration. Choose a primer that is compatible with both the concrete subfloor and the new flooring. Follow the manufacturer's instructions carefully.
Removing tile from a concrete floor is a multi-step process that requires careful planning, the right tools, and attention to detail. By following these guidelines and taking the necessary precautions, homeowners can successfully complete this project and prepare their floors for new coverings.

How To Remove Ceramic Tile And Thinset The Nifty Nester

Removing Tile And Thinset From Concrete Sawdust Girl

How To Remove Tile From A Concrete Floor

How To Remove Floor Tiles From Concrete Our Guide

How To Remove Tile From Concrete Floor Central Florida Dust Free Flooring Removal Llc

Removing Tile From A Concrete Slab

How To Remove Tile Flooring Yourself With Tips And Tricks All Things Thrifty

How To Remove Tile Floor A Diy Guide

Guide How To Remove Tile From Concrete Floor Alliance Flooring Directory

The Best Way To Remove Thinset From A Cement Foundation House Of Hepworths
Related Posts