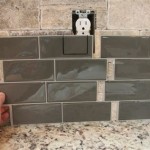
How to Remove Silicone Sealant From Tiles With Vinegar
Silicone sealant is a ubiquitous material found in bathrooms, kitchens, and various other areas requiring a waterproof and airtight seal. Its durable and flexible properties make it ideal for preventing water damage and maintaining hygiene around sinks, bathtubs, showers, and tiled surfaces. However, silicone sealant degrades over time, becoming discolored, cracked, or even developing mold. When this happens, it's necessary to remove the old sealant and replace it with a fresh application. While specialized silicone removal products are available, a readily accessible and cost-effective alternative for tackling this task is household vinegar.
Vinegar, specifically white vinegar, contains acetic acid, a mild organic acid that can soften and weaken the bond between the silicone sealant and the tile surface. This process allows for easier removal without causing significant damage to the underlying tiles. Using vinegar requires patience and a systematic approach, but it can be an effective method, especially for smaller areas or when dealing with relatively new sealant. This article outlines the necessary tools, precautions, and step-by-step instructions for successfully removing silicone sealant from tiles using vinegar.
Gathering the Necessary Tools and Materials
Before initiating the removal process, gathering the appropriate tools and materials is crucial for efficiency and safety. The following items are recommended:
- White Vinegar: This is the primary agent for softening the sealant. Ensure it is standard white vinegar with an acetic acid concentration of around 5%.
- Spray Bottle: This will facilitate even application of vinegar to the sealant.
- Utility Knife or Razor Blade Scraper: A sharp blade is essential for scoring and cutting through the bulk of the sealant.
- Plastic Scraper or Putty Knife: Used for gently lifting and scraping off the softened sealant. Avoid metal scrapers, as they can scratch the tile surface.
- Soft Cloth or Sponge: For applying vinegar and wiping away residue.
- Gloves: To protect hands from prolonged exposure to vinegar and potential skin irritation.
- Safety Glasses: To protect eyes from splashes of vinegar or dislodged sealant particles.
- Old Toothbrush or Scrub Brush: For scrubbing away stubborn residue.
- Paper Towels: For cleaning up spills and drying the tiles.
- Heat Gun or Hair Dryer (Optional): Gentle heat can further soften the sealant, supplementing the vinegar's action.
By having these tools and materials readily available, the process of removing the silicone sealant becomes more streamlined and less prone to delays or complications.
Preparing the Area and Applying Vinegar
Proper preparation of the work area is essential for minimizing mess and ensuring effective application of the vinegar. Start by thoroughly cleaning the area around the silicone sealant with a damp cloth or sponge. This removes any loose debris, dirt, or soap scum that might hinder the vinegar's penetration. Ensuring the tiles are clean allows the vinegar to come into direct contact with the sealant, maximizing its effectiveness.
Next, fill the spray bottle with white vinegar. Liberally spray the vinegar directly onto the silicone sealant, ensuring it is thoroughly saturated. Focus on the edges where the sealant meets the tile, as this is where the bond needs to be weakened. Allow the vinegar to dwell on the sealant for at least 15-30 minutes. This soaking period allows the acetic acid in the vinegar to penetrate the silicone and begin to break down its adhesive properties. For particularly stubborn sealant, extending the soaking time to an hour or more may be necessary. Consider reapplying vinegar periodically to keep the sealant consistently saturated.
For enhanced penetration of the vinegar, consider using a heat gun or hair dryer on a low setting. Gently apply heat to the sealant for a few minutes after applying the vinegar. The warmth helps to expand the silicone, allowing the vinegar to seep deeper into the material. Be cautious not to overheat the tile or sealant, as excessive heat can damage certain tile types or cause the sealant to melt and become even more difficult to remove.
After the soaking period, test a small, inconspicuous area of the sealant. Use the plastic scraper to gently attempt to lift the sealant away from the tile. If the sealant is softened and peels away relatively easily, proceed to the next step. If it remains stubbornly adhered, reapply vinegar and allow it to soak for a longer duration.
Removing the Softened Silicone Sealant
Following the vinegar soaking period, the next step involves physically removing the softened silicone sealant. Using the utility knife or razor blade scraper, carefully score along the edges of the sealant where it meets the tile. The goal is to sever the remaining bond between the sealant and the tile without scratching the tile surface. Apply gentle pressure and maintain a consistent angle with the blade. Avoid digging the blade into the tile itself, as this can cause irreparable damage. Instead, focus on slicing through any remaining adhesive residue.
Once the edges are scored, use the plastic scraper or putty knife to gently lift and peel away the softened sealant. Start at one end and work your way along, applying steady pressure. If the sealant is particularly thick, it may be necessary to remove it in sections. Avoid pulling on the sealant too forcefully, as this can cause it to tear and leave behind stubborn remnants. If the sealant resists peeling, reapply vinegar to the affected area and allow it to soak for a few more minutes. The key is to work methodically and avoid rushing the process.
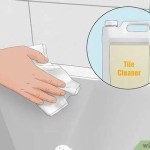
After removing the bulk of the sealant, some residue is likely to remain on the tile surface. To remove this remaining residue, apply more vinegar to a soft cloth or sponge and gently scrub the affected area. An old toothbrush or scrub brush can be helpful for reaching into corners and crevices. The acetic acid in the vinegar will help to dissolve the remaining silicone, making it easier to wipe away. Rinse the area with clean water and dry it thoroughly with a paper towel. Inspect the tiles carefully for any remaining residue and repeat the scrubbing process as needed.
For persistent residue, consider using a specialized silicone sealant remover. These products contain stronger solvents that can effectively dissolve and remove stubborn silicone. Always follow the manufacturer's instructions carefully and test the product in an inconspicuous area first to ensure it does not damage the tile surface.
After the sealant has been removed and the area is clean and dry, it is ready for the application of new silicone sealant. Ensure the new sealant is applied properly to create a watertight seal and prevent future water damage.
The process of removing silicone sealant with vinegar requires patience and diligence. By following these steps carefully and using the appropriate tools, one can successfully remove old sealant and prepare the surface for a fresh application, ensuring a clean and watertight seal.

The Ingredient You Ll Want To Have On Hand When Removing Silicone Caulk

Silicone Sealant Mold Gets Eradicated Completely Quickly With Natural Cleaning Tip Daily Express Us

How To Remove Silicone Caulk Simple Steps For Removal Correct Caulking

How To Remove Silicone Sealant From Tiles Homey And Adhesive

Cleaner Shares Inexpensive Method To Remove Silicone Mould From Bathroom Express Co

Remove Caulk In Seconds Guaranteed Method

How To Remove Mold From Caulk 6 Simple Solutions

How To Remove Silicone From Tiles Easy Step By Guide

How To Remove Silicone Sealant From Tile Glass Metal And Wood

How To Remove Silicone Caulk Simple Steps For Removal Correct Caulking
Related Posts