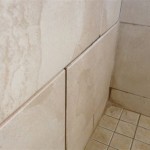
Removing old tile from your home can be a daunting task, but with the right tools and techniques, you can easily get the job done. Whether you are looking to renovate your bathroom, kitchen, or any other area, it is important to know the proper steps for removing old tile. With this guide, you’ll be able to take on this project with confidence.
Before starting, make sure to have the proper safety gear. Wear gloves, safety goggles, and a dust mask to protect yourself from chips of tile and dust. Make sure the area is well ventilated, as you will be dealing with potentially hazardous materials.
Start by removing the grout that is in between the tiles. You can use a grout saw or chisel to do this. Be sure to take precaution when using these tools and take your time to ensure the job is done correctly. Once all the grout has been removed, you can then start to remove each individual tile.
The easiest way to remove the tile is to use a chisel and hammer. Place the chisel in the corner of the tile and gently tap it with a hammer to begin loosening the tile. Once the tile starts to come loose, you can then use a tile lifter to remove it entirely. Be sure to take precaution when using the chisel and hammer and be sure to keep the area clean.
Once all of the tiles have been removed, you can now start to prepare the area for the new tile. You will want to make sure the area is clean and free of any dirt or debris. Use a vacuum to remove any small pieces of tile or dust. If the area is not level, you can use a self-leveling compound to make sure it is even. With the area properly prepared, you can now begin to install the new tile.


:max_bytes(150000):strip_icc()/woman-removing-old-tiles-645377785-5852d2215f9b586e02d2ee25.jpg)


Related Posts


