How to Remove Bathroom Wall Tile Without Breaking It
Removing bathroom wall tile without breaking it requires patience, the right tools, and a methodical approach. While it's not an easy task, with the proper techniques and precautions, you can salvage the tile for reuse or disposal, saving you time and money. This article guides you through the process, providing detailed steps and tips for a successful tile removal endeavor.
1. Assess the Tile and Adhesive
Before starting, it's crucial to assess the tile and adhesive. This step helps determine the best removal method and potential challenges. Here's what you need to consider:
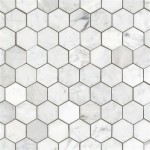
- Tile Type: Ceramic, porcelain, and glass tiles are generally more durable and can be removed intact. However, natural stone tiles, like marble or travertine, can be more delicate and may require extra care.
- Adhesive Type: The type of adhesive used to install the tile significantly affects the removal process. Thinset mortar, commonly used in wet areas, can be more challenging to remove compared to mastic adhesive.
- Tile Condition: Check for any cracks, chips, or loose tiles. These might indicate weak adhesion and require a different approach.
Knowing the tile and adhesive properties helps you choose the right tools and techniques for a successful removal.
2. Gather the Necessary Tools
To remove bathroom wall tile without breaking it, you'll need the following tools:
- Utility Knife: For cutting through caulk and grout lines.
- Chisel: For prying loose tiles and removing hardened mortar.
- Hammer: For tapping the chisel and loosening the tile.
- Pry Bar: For lifting and separating tiles from the wall.
- Putty Knife: For scraping off adhesive residue.
- Safety Glasses: To protect your eyes from flying debris.
- Gloves: To protect your hands from sharp edges and dust.
- Dust Mask: To prevent inhaling dust particles.
- Bucket and Water: For cleaning and dampening the tile surface.
- Optional: Tile removal tool, grout saw, and a small trowel for cleaning.
Ensure you have all the necessary tools before starting the removal process to avoid delays and ensure a smooth workflow.
3. Remove the Caulk and Grout
Begin by carefully removing the caulk and grout surrounding the tiles. Use a utility knife to score the caulk along the edges of each tile. Apply gentle pressure to lift and remove the caulk. For removing grout, use a grout saw or a scraper to carefully remove the grout lines. Be careful not to damage the surrounding tile.
Here are some tips for removing caulk and grout:
- Use a Sharp Knife: A sharp utility knife will make the process easier and prevent damage to the tile.
- Work in Sections: Remove the caulk and grout in small sections to avoid overloading the tool.
- Apply Pressure Gradually: Apply pressure gradually, starting with light pressure and increasing as needed. Be careful not to break the tile.
Removing caulk and grout exposes the edges of the tiles and prepares them for removal.
4. Loosen and Remove the Tiles
Once the caulk and grout are removed, you can start removing the tiles. There are two main methods for removing tiles:
- Chisel and Hammer Method: Use a chisel and hammer to loosen the tiles. Position the chisel beneath the tile and gently tap it with the hammer. Work your way around the tile, gradually loosening it from the wall. Once the tile is loose, use a pry bar to carefully lift it off the wall. Be sure to use a soft-faced hammer to avoid damage to the tile.
- Tile Removal Tool Method: A tile removal tool is specifically designed to pry tiles off the wall. It's typically easier to use than a chisel and hammer, especially for larger tiles. Position the tool beneath the tile and gently lever it upwards. Work your way around the tile until it comes loose.
Both methods require patience and careful techniques. It's essential to apply pressure evenly and avoid using excessive force to prevent breaking the tiles. If you notice any resistance, reassess the situation and try a different approach to ensure a successful removal.
5. Remove the Adhesive
After removing the tiles, focus on removing the adhesive residue from the wall surface. Use a putty knife or a scraper to remove any excess adhesive. If the adhesive is stubborn and difficult to remove, you can use a chemical adhesive remover. Apply the remover according to the manufacturer's instructions and allow it to sit for a few minutes before scraping off the adhesive.
Here are some tips for removing the adhesive:
- Work in Sections: Remove the adhesive in small sections to avoid overloading the putty knife or scraper.
- Use a Sharp Blade: A sharp blade will make the process easier and prevent damage to the wall.
- Apply Pressure Gradually: Apply pressure gradually, starting with light pressure and increasing as needed. Be careful not to damage the wall surface.
- Clean the Area: Once you have removed the adhesive, use a damp cloth to clean the wall surface.
Removing the adhesive is critical for creating a clean surface for future renovation or retiling.
6. Inspect the Wall
After removing the tiles and adhesive, inspect the wall for any damage. If there are any cracks or holes, you may need to repair them before retiling or applying a new finish. You can use a patching compound or drywall compound to fill in any gaps or cracks. Apply the compound according to the manufacturer's instructions and allow it to dry completely before sanding and priming.
Inspecting the wall ensures it's ready for the next step in your renovation project.
7. Dispose of the Tiles Properly
Once you have removed all the tiles, dispose of them properly. Check with your local waste management facility for guidelines on how to dispose of tile waste. Some facilities may have specific requirements for disposal, and you may need to separate the tile from other construction materials. The tiles disposed of may require special treatment, so make sure to follow the proper disposal process for your region.
Proper disposal of tiles and construction waste ensures a safe and environmentally responsible approach to renovation projects.
By following these steps and tips, you can successfully remove bathroom wall tile without breaking it. It's crucial to be patient, work meticulously, and choose the right tools and techniques for a smooth and efficient process. Remember that safety comes first, so wear appropriate safety gear, utilize the tools correctly, and work with care to avoid any accidents during the removal process.

How To Remove Floor And Wall Tiles Without Breaking Them

Easy Diy Guide On Removing Tiles From Walls Fantastic Handyman Au

How To Remove A Tile Backsplash Homeserve Usa

How To Remove Wall Tiles

Remove Wall Tiles Without Damaging Plasterboard

How To Remove Wall Tiles 11 Steps With Pictures Wikihow

How To Remove Floor Tiles Without Breaking Them Ideas By Mr Right

How To Remove Tile Without Breaking

The Best Way To Remove Old Shower Tile

Preparing Walls For Tiling Removing Old Tiles Bathroom Guru
Related Posts