How To Remove Bathroom Floor Tiles Without Breaking Them
Removing bathroom floor tiles without breaking them requires careful planning and execution. This task can be challenging, especially if the tiles are old or adhered with strong adhesive. However, with the right tools and techniques, it is possible to salvage tiles for reuse or resale. This article will outline the steps involved in removing bathroom floor tiles safely and effectively, while minimizing breakage.
1. Prepare the Workspace
Before starting the tile removal process, it is essential to prepare the workspace for safety and efficiency. This involves clearing the bathroom floor of any furniture, fixtures, or personal items. Ensure adequate ventilation by opening windows or using a fan to remove dust particles. It is advisable to wear protective gear such as gloves, eye protection, and a dust mask to prevent injuries and minimize exposure to any potential hazards.
Next, identify the location of the tile's grout lines. Grout is the material used to fill the gaps between tiles and provides stability to the tile installation. To determine the extent of the grout lines, use a utility knife or a grout saw to carefully remove a small section of grout. This will reveal the extent of the grout line and help you understand the tile's size and placement.
2. Tools and Materials
Having the right tools and materials is crucial for successful tile removal. The following list outlines the necessary equipment:
- Utility knife or grout saw: For removing grout lines.
- Chisel: For breaking the adhesive bond between the tile and the subfloor.
- Hammer: To drive the chisel into the adhesive.
- Pry bar: For lifting and removing the tiles.
- Bucket: For collecting the debris.
- Dustpan: For cleaning up the debris.
- Safety glasses: To protect your eyes from flying debris.
- Gloves: To protect your hands.
- Dust mask: To prevent inhaling dust particles.
3. Removal Process
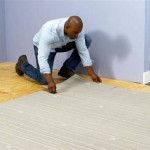
Once the workspace is prepared and the necessary tools are gathered, it's time to begin the removal process. Start by removing the grout along the edges of the tiles using a utility knife or grout saw. This will create a gap between the tiles, allowing you to insert a pry bar or chisel. Be cautious not to damage the surrounding tiles during this process.
Next, use a chisel and hammer to gently break the adhesive bond between the tile and the subfloor. Insert the chisel under the tile at an angle and tap it with the hammer. Work your way around the tile, progressively breaking the adhesive. Once the adhesive is sufficiently weakened, you can pry the tile up using a pry bar.
If the adhesive is particularly stubborn, you can use a heat gun to soften it. However, be careful not to overheat the tile as it can cause it to crack or break. Once the adhesive is softened, you can use a chisel and hammer or a pry bar to remove the tile.
Continue this process for each tile until you have removed all of the tiles in the bathroom. Once the tiles are removed, clean up the debris and dispose of it properly. Remember to wear protective gear throughout the entire process.

How To Remove Floor Tiles Without Breaking Them Ideas By Mr Right

How To Remove Floor And Wall Tiles Without Breaking Them

How To Remove Tile Without Breaking

How To Remove Tile Without Breaking

How To Remove Tile The Easy Way Be Your Own Handyman Home

Easy Diy Guide On Removing Tiles From Walls Fantastic Handyman Au

How To Remove Ceramic Tile And Thinset The Nifty Nester

How To Remove Tile Without Breaking It

How To Remove A Tile Floor

How To Remove Tile Flooring Yourself With Tips And Tricks Removal Ceramic Floor
Related Posts