How To Put Down Self Adhesive Vinyl Floor Tiles In Bathroom
Self-adhesive vinyl floor tiles are a popular choice for bathroom renovations due to their affordability, ease of installation, and water resistance. They offer a stylish and practical alternative to traditional tiles, requiring no grout and minimal specialized tools. This article will guide you through the process of installing self-adhesive vinyl floor tiles in your bathroom, covering essential steps and considerations for a successful project.
1. Preparing the Subfloor
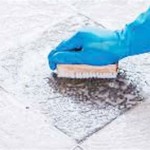
A smooth and clean subfloor is crucial for a successful installation. Begin by removing any existing floor coverings, ensuring the surface is free from debris, dirt, and grime. If the subfloor is uneven, consider leveling it with a self-leveling compound or using a thin layer of plywood for a smooth surface. Any cracks or gaps in the subfloor should be patched with appropriate materials.
Next, it is important to ensure the subfloor is dry and free from moisture. Bathrooms are prone to humidity, and any moisture trapped beneath the tiles can lead to warping, delamination, and mold growth. If necessary, apply a moisture barrier sealant to the subfloor to prevent moisture from seeping through. Allow the sealant to dry completely before proceeding.
2. Measuring and Cutting
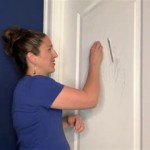
Before laying down the tiles, carefully measure the bathroom floor area. This will help you determine the number of tiles needed and any necessary adjustments for corners, edges, and obstacles. Once you have a clear layout, use a utility knife or a specialized tile cutter to trim the tiles to the desired dimensions. A straight edge and a pencil can be used to mark cutting lines for precise cuts.
When cutting tiles, ensure that the blade is sharp and the surface is stable. For curved areas or intricate designs, consider using a jigsaw or a rotary tool with a cutting disc. It is recommended to make test cuts on scrap tiles before cutting the actual tiles needed for your project.
3. Installing the Tiles
Start by laying the tiles in a dry run to visualize the final arrangement and ensure a proper fit. Once you are satisfied with the layout, remove the protective backing from the first tile and position it on the floor. With the adhesive side exposed, firmly press the tile down, ensuring it is evenly adhered to the subfloor. Repeat this process for each tile, working your way across the room.
If you need to make adjustments to the tile placement during installation, gently peel it up and reposition it. The self-adhesive backing provides a forgiving installation process, allowing for minor adjustments. However, once the tile is firmly pressed down, it is difficult to remove without damaging the adhesive.
4. Finishing Touches
After laying all the tiles, use a roller to firmly press down on each tile, ensuring a strong bond to the subfloor. This will also help to remove any air bubbles trapped underneath. For areas that require trimming, use a sharp utility knife or a tile cutter to create the desired shape. Ensure the cut edges are clean and flush with the surrounding tiles.
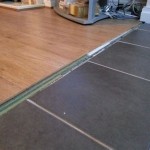
For a more professional look, consider adding transition strips or trim pieces around the perimeter of the bathroom. These pieces conceal the edges of the tiles and provide a finishing touch to the installation. They are available in a variety of styles and materials to blend seamlessly with your bathroom design.
Allow the adhesive to fully cure according to the manufacturer's instructions. This typically takes 24 to 48 hours, depending on the type of adhesive and the ambient temperature. Avoid walking on the tiles during this time to prevent them from being dislodged or damaged.
Finally, install any necessary bathroom fixtures, such as a toilet, sink, or shower. When choosing fixtures, consider their weight and ensure the subfloor is strong enough to support them. If necessary, consult a professional contractor for advice on proper installation techniques for bathroom fixtures.

Where Do You Start When Laying Down L Stick Tile Flooring Help

How To Install Groutable Vinyl Tile

Handy How To Guide For Installing L Stick Tile Over Linoleum

How To Install L And Stick Vinyl Tiles Houseful Of Handmade

How To Install Vinyl L And Stick Tile Flooring Bathroom On Tiles Floor

Diy L And Stick Vinyl Floor Tile Stickers The Turquoise Home

Diy Grouted Vinyl Floor Tiles Show Off Decorating And Home Improvement Blogdiy Blog

Diy L And Stick Vinyl Floor Tile Stickers The Turquoise Home

How To Grout L And Stick Tiles A Easy Floor Update 50 One Afternoon Of Work Diy Flooring On Bathroom

Floorpops L Stick Vinyl Floor Tiles Review Tips Home Decor Blog
Related Posts