How To Prepare Hardie Board For Tile
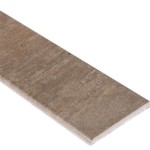
Hardie board is a versatile and durable cement-based product that is often used as a backer board for tile installations. While Hardie board is a great choice for this application, it is important to properly prepare the surface before tiling to ensure a successful installation.
Here are the essential steps for preparing Hardie board for tile:
1. Clean the Hardie Board
The first step is to clean the Hardie board to remove any dirt, dust, or debris that may interfere with the adhesion of the tile. This can be done using a mild detergent and water solution and a soft-bristled brush or sponge. Rinse the Hardie board thoroughly with clean water and allow it to dry completely before proceeding.
2. Prime the Hardie Board
Priming the Hardie board helps to create a more porous surface that will allow the thinset mortar to adhere better to the Hardie board. There are a variety of primers available specifically designed for cement-based backer boards, so be sure to choose one that is compatible with Hardie board.
3. Install Cement Board Tape
Cement board tape is a self-adhesive mesh tape that is used to reinforce the joints between Hardie board panels. This helps to prevent the joints from cracking or failing, which can lead to tile failure. Apply the cement board tape over the joints between the Hardie board panels, making sure to press it firmly into place.
4. Apply Thinset Mortar
Thinset mortar is a type of adhesive that is used to bond tile to the backer board. Apply a thin layer of thinset mortar to the Hardie board using a notched trowel. Be sure to spread the thinset mortar evenly and to cover the entire surface of the Hardie board.
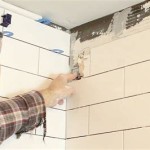
5. Install the Tile
Now you are ready to install the tile on the Hardie board. Press the tile firmly into the thinset mortar, making sure to align the tiles evenly. Use a level to ensure that the tiles are installed level and flat.
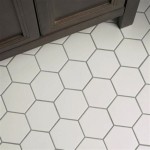
6. Grout the Tile
Once the tile is installed, you can grout the joints between the tiles. Grout is a type of mortar that is used to fill in the joints between tiles and to provide a smooth, finished surface. Apply the grout to the joints using a grout float and press it firmly into place. Allow the grout to dry completely before cleaning it off.
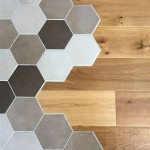
7. Seal the Tile
Once the grout is dry, you can seal the tile to protect it from moisture and stains. There are a variety of tile sealers available, so be sure to choose one that is compatible with the type of tile you have installed.
By following these steps, you can ensure that your Hardie board is properly prepared for tile installation. This will help to ensure a successful installation that will last for many years to come.

Easily Install Cement Board To Prep For Tile Installation

How To Install Cement Board For Tile Projects Diy Family Handyman

How To Install Hardie Backer Cement Board On Floors James Pros

How To Install Cement Board On A Floor Diy Family Handyman

Hardie Backer Boards Everything You Need To Know Walls And Floors

Easy Preparation For Tiling Using Hardieboard Cement Board

Hardiebacker Installation

How To Install Hardie Board For Floor Tile

How To Install Cement Board The Home Depot

How To Prepare Subfloor For Tile George Ceramic
Related Posts