How to Prepare Backer Board for Tile Installation in a Shower
Backer board is a crucial component in shower construction, providing a stable and moisture-resistant surface for tile installation. Proper preparation of the backer board is essential for ensuring a long-lasting and watertight shower. This article outlines the steps involved in preparing backer board for tile installation in a shower.
1. Choosing the Right Backer Board
Several types of backer board are available, each with its own advantages and disadvantages. The most common options include cement board, densifying mortar board, and waterproof membrane backer board. Cement board is a durable and affordable option, while densifying mortar board provides added moisture resistance. Waterproof membrane backer board offers a seamless water barrier and is often preferred for high-moisture areas. The specific choice will depend on the shower's design, budget, and local building codes.
When selecting backer board, consider the following factors:
- Moisture Resistance: Ensure the board is rated for wet areas and shower applications.
- Thickness: The thickness should be sufficient to provide structural support for the tile installation.
- Size and Shape: Choose board dimensions and shapes that are suitable for the shower's design and layout.
- Manufacturer's Recommendations: Follow the manufacturer's instructions regarding installation methods and compatibility with other materials.
2. Installing the Backer Board
Once the backer board is chosen, it needs to be installed correctly. This involves ensuring proper framing, spacing, and securing the board to the studs. Instructions vary depending on specific backer board types; however, general installation steps are as follows:
- Prepare the Framing: The shower framing should be made of treated lumber and properly spaced to accommodate the backer board dimensions. The framing must be plumb and level to ensure a smooth and even surface for the tile.
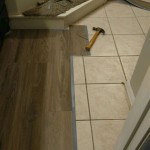
- Cut and Fit: Cut the backer board to size using a scoring and snapping utility knife or a circular saw equipped with a fine-toothed blade. Ensure the cut edges are clean and square.
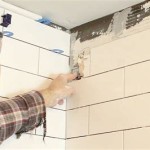
- Secure the Board: Attach the backer board to the framing using screws or nails recommended by the manufacturer. Screws should be galvanized and long enough to penetrate the framing at least 1 inch. Leave a gap of 1/8 inch between the boards for expansion and movement.
- Apply Waterproofing: Apply a waterproof sealant or membrane to the seams and joints between backer board panels to prevent water from seeping into the wall cavity.
- Reinforce Corners: Secure corners with specialized corner beads or mesh tape to provide additional strength and support.
3. Preparing the Surface for Tile Installation
After the backer board is installed and waterproofed, it is essential to prepare the surface for tile installation. This involves ensuring the surface is smooth, flat, and ready to receive the adhesive.
- Sanding: Smooth out any rough edges or uneven areas using a fine-grit sandpaper. This will ensure a smooth surface for the tile adhesive.
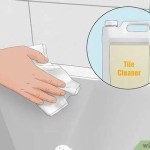
- Cleaning: Thoroughly clean the board using a damp cloth and mild detergent. Remove any dust, debris, or loose particles to ensure proper adhesion.
- Priming: Apply a primer to the backer board to enhance adhesion and prevent the tile adhesive from absorbing into the board.
- Setting the Tiles: Once the primer is dry, you can proceed with the tile installation using a suitable mortar adhesive appropriate for shower applications.
By following these steps, you can ensure that the backer board in your shower is properly prepared for tile installation. This will contribute to a durable, watertight, and aesthetically pleasing shower. It's important to consult with a professional if you have any doubts or require further assistance.

The Best Way To Waterproof Your Shower Before Tiling Inspired Hive

How To Install Shower Surround Tile Backer Board Durock Or Cement Part 1

How To Install Cement Board For Tile Projects Diy Family Handyman

How To Install Goboard Tile Backer Board Diytileguy

How To Install Cement Board For Tile Bower Power

Cement Backer Board For Shower A Pro Busts All The Myths

How To Install Shower Backerboard Hardieboard Cement Proper Installation Diy

Installing Cement Board In The Bathroom

The Best Way To Waterproof Your Shower Before Tiling Inspired Hive

Proper Way To Set Wallboard For Shower
Related Posts