How to Prepare Hardie Board for Tile Installation
Hardie board, a fiber cement siding material, offers a durable and versatile surface for exterior applications. When used as a substrate for tile installation, Hardie board requires proper preparation to ensure a successful and long-lasting installation.
1. Inspect and Clean the Hardie Board
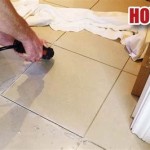
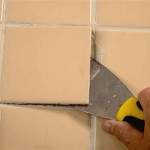
Before proceeding with any preparation, thoroughly inspect the Hardie board for any defects or damage. Repair or replace any damaged areas as necessary. Use a stiff brush to remove dirt, debris, and any existing paint or coatings.
2. Apply Backer Board Adhesive
Apply a thin layer of backer board adhesive to the Hardie board surface using a notched trowel. Use an adhesive designed specifically for Hardie board and tile applications. The adhesive provides a strong bond between the backer board and the Hardie board.
3. Install Backer Board
Carefully place the backer board over the Hardie board, ensuring proper alignment and full coverage. Press the backer board firmly into the adhesive, using a rubber float or roller to remove any air pockets. Allow the adhesive to cure according to the manufacturer's instructions.
4. Apply Mortar Bed
Spread a thin layer of mortar bed over the backer board using a notched trowel. Use a mortar mix that is suitable for exterior tile installations. The mortar bed provides a strong and level base for the tiles.
5. Install Tiles
Place the tiles into the mortar bed, pressing them firmly to achieve full contact. Use spacers to ensure even spacing between the tiles. Allow the mortar to cure properly before proceeding with grouting.
6. Grout and Seal
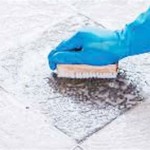
Apply grout to the spaces between the tiles, using a grout float or squeegee. Allow the grout to set, then clean off any excess. Seal the grout and tiles to prevent staining and moisture absorption.
Additional Tips
Here are some additional tips for preparing Hardie board for tile installation:
- Use a moisture-resistant backer board for exterior installations.
- Stagger the joints between the backer boards and tiles for added strength.
- Allow ample time for the materials to cure before using the tiled surface.
- Consider using a waterproofing membrane under the Hardie board for increased protection.
- Seek professional guidance if you are unsure about any aspect of the preparation process.
By following these steps and tips, you can effectively prepare Hardie board for tile installation, ensuring a durable and visually appealing finish for your exterior space.

Easily Install Cement Board To Prep For Tile Installation

How To Install Cement Board For Tile Projects Diy Family Handyman

How To Install Cement Board On A Floor Diy Family Handyman

Easily Install Cement Board To Prep For Tile Installation

How To Install Cement Backer Board For Floor Tile Installation The Home Depot

Easily Install Cement Board To Prep For Tile Installation

How To Install Hardie Backer Cement Board On Floors James Pros

Taping And Prepping Cement Board Joints

How To Install Cement Board For Tile Bower Power

How To Prepare A Subfloor For Tile Installation The Home Depot
Related Posts