Essential Aspects of Prepping Hardie Board for Tiling
Hardie board is a versatile cement fiberboard widely used as a substrate for tile installations due to its durability and resistance to moisture. Proper preparation is crucial to ensure a strong and lasting bond between the tile and the Hardie board. Here are the essential steps involved in prepping Hardie board for tiling:
1. Inspection and Cleaning:
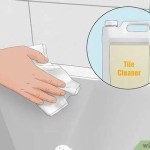
Inspect the Hardie board for any damage, cracks, or imperfections. Clean the surface thoroughly using a mild detergent solution and a stiff brush to remove dirt, grease, or other contaminants that can affect adhesion.
2. Priming:
Apply a bonding primer specifically designed for cement fiberboards. Priming enhances the adhesion of the thinset or mortar used to set the tiles. Allow the primer to dry as per the manufacturer's instructions.
3. Flattening:
Hardie board may have slight undulations or imperfections. Use a flat trowel or a sanding block to flatten the surface, ensuring it is level and smooth. This step helps prevent lippage or unevenness in the tiled surface.
4. Scoring:
To improve the mechanical bond between the Hardie board and the thinset, score the surface using a utility knife or a scoring tool. Make shallow, parallel lines spaced about 1/4 inch apart. Scoring allows the thinset to penetrate the Hardie board's surface, creating a strong bond.
5. Water Pre-wetting:
Before applying the thinset, pre-wet the Hardie board with clean water. Wetting the surface helps prevent the Hardie board from absorbing moisture from the thinset too quickly, which could weaken the bond. Allow the surface to damp dry before proceeding with tiling.
6. Thinset Selection:
Choose a thinset or mortar specifically designed for cement fiberboards. These thinsets typically have enhanced bonding properties and are formulated to withstand the expansion and contraction of Hardie board. Follow the manufacturer's instructions for mixing and applying the thinset.
7. Thinset Application:
Apply the thinset to the Hardie board using a notched trowel. Hold the trowel at a 45-degree angle and work the thinset into the scored grooves. Ensure that the thinset is evenly distributed and covers the entire surface.
8. Tile Installation:
Place the tiles on the thinset and press them firmly to ensure proper contact. Use spacers to maintain uniform grout lines. Allow the tiles to set for the recommended time before grouting.
Additional Tips:
- Use a trowel with appropriate notches to ensure sufficient thinset coverage.
- Allow ample drying time for the primer and thinset before proceeding with tiling.
- Consider using a latex additive in the thinset to enhance its flexibility and bond strength.
- Protect the tiled surface from foot traffic and moisture during the curing process.

How To Install Cement Board On A Floor Diy Family Handyman

How To Install Cement Board For Tile Projects Diy Family Handyman

Taping And Prepping Cement Board Joints

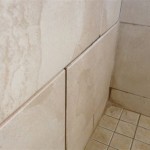
Hardiebacker Installation

How To Install Cement Board For Tile Projects Diy Family Handyman

The Best Way To Waterproof Your Shower Before Tiling Inspired Hive

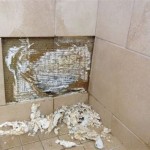
Installing Cement Board In The Bathroom

How To Install Cement Board For Tile Bower Power

How To Install Hardie Backer Cement Board On Floors James Pros

How To Install Cement Board For Tile Bower Power
Related Posts