How to Prep Cement Board for Tile
Preparing cement board for tile is a crucial step in ensuring a durable and professional-looking tile installation. Cement board provides a stable and moisture-resistant surface for tile adhesion, but it requires proper preparation to optimize its performance.
Gather Necessary Tools and Materials
Before starting, gather the following tools and materials:
- Notched trowel
- Thin-set mortar
- Cement board screws
- Screw gun
- Caulk gun
- Backer rod
- Silicone caulk
Inspect the Cement Board
Inspect the cement board for any cracks, holes, or damaged edges. If any issues are found, replace the affected boards before proceeding.
Taper Edges
Use a sharp utility knife or a cement board taper to create a tapered edge along the cut edges of the cement board. This will allow thin-set mortar to fill the joint between the boards and create a smooth transition.
Install Cement Board Screws
Use cement board screws to secure the cement board to the subfloor. Screw into the studs every 6 inches along the edges and in the field. Countersink the screws slightly below the surface of the cement board.
Caulk Joints
Apply a thin bead of silicone caulk to the joints between the cement board panels. Use backer rod in wider joints to prevent the caulk from sinking. Smooth the caulk with your finger or a caulk tool.
Priming
For installations in wet areas such as bathrooms or showers, it is recommended to apply a thin layer of primer to the cement board. This will help prevent moisture absorption and improve the adhesion of the thin-set mortar.
Thin-Set Mortar Application
Spread a layer of thin-set mortar over the prepared cement board using a notched trowel. Create consistent grooves in the mortar to ensure proper adhesion of the tiles.
Tile Installation
With the thin-set mortar applied, you can now commence the tile installation. Press each tile firmly into the mortar and use a tapping block or hand float to level the tiles. Adjust the spacing and alignment as needed.
Grouting
Once the tiles are installed, allow the thin-set mortar to cure for the recommended time. Then, apply grout to the joints between the tiles. Use a grout float to press the grout into the joints and remove excess.
Sealing
After the grout has cured, seal the joints with a grout sealer. This will protect the grout from moisture and stains, ensuring the longevity of your tile installation.
By following these steps, you can properly prepare cement board for tile installation, ensuring a durable and aesthetically pleasing result.

How To Install Cement Board On A Floor Diy Family Handyman

How To Install Cement Board For Tile Projects Diy Family Handyman

Taping And Prepping Cement Board Joints

The Best Way To Waterproof Your Shower Before Tiling Inspired Hive

The Best Way To Waterproof Your Shower Before Tiling Inspired Hive

How To Install Cement Board For Tile Bower Power

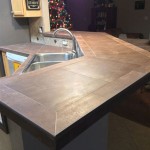
Outdoor Kitchen Cement Board And Tile Prep

Installing Cement Board In The Bathroom

Durock Cement Board Do S And Dont

How To Install Goboard Tile Backer Board Diytileguy
Related Posts