How to Lay Travertine Tile on Concrete Patio
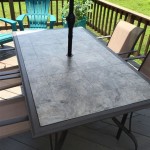
Transforming your concrete patio with elegant travertine tiles can elevate its aesthetics and functionality. Here's a comprehensive guide to help you achieve a professional-looking installation:
Materials and Tools
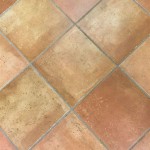
- Travertine tiles
- Concrete backer board
- Thin-set mortar (for bonding tiles to the backer board)
- Grout (for filling spaces between tiles)
- Tile cutter or wet saw
- Notched trowel
- Grout float
- Level
- Measuring tape
- Chalk line
Step 1: Prepare the Concrete Surface
Ensure the concrete patio is level, clean, and dry. Remove any existing debris or coatings. Use a concrete etching solution to enhance adhesion.
Step 2: Install the Concrete Backer Board
Cut the backer board to fit the patio area. Apply thin-set mortar to the concrete surface and press the backer board into place. Use screws or nails to secure it. Allow the thin-set to cure overnight.
Step 3: Layout the Tiles
Dry lay the travertine tiles on the backer board to determine the layout and placement of cuts. Use spacers to maintain consistent gaps between the tiles.
Step 4: Mix and Apply Thin-Set Mortar
Mix the thin-set mortar according to the manufacturer's instructions. Use a notched trowel to apply the mortar evenly to the backer board. Hold the notch size at a 45-degree angle to the surface.
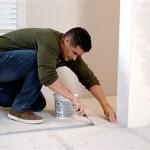
Step 5: Set the Tiles
Pick up a tile and carefully press it into place on the thin-set mortar. Use a level to check for levelness and adjust as needed. Tap the tile gently with a rubber mallet to secure it.
Step 6: Cut and Install Edge Tiles
Measure and mark the tiles that need to be cut to fit the edges. Use a tile cutter or wet saw to make clean cuts. Apply thin-set mortar and press the cut tiles into place.
Step 7: Grout the Joints
Once the thin-set has cured, mix the grout according to the manufacturer's instructions. Use a grout float to apply the grout to the spaces between the tiles. Work diagonally to force the grout into the gaps.
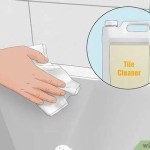
Step 8: Clean and Seal the Tiles
After the grout has dried, use a damp sponge to clean any excess grout from the tiles. Allow the tiles to dry completely. Apply a water-based sealant to protect the tiles from moisture and stains. Repeat the sealing process as recommended by the sealant manufacturer.
Tips:
- Rent a tile cutter for more precise cuts.
- Use a chalk line to guide your installations.
- Let the thin-set and grout cure completely before walking or placing heavy objects on the tiles.
- Consider using a color enhancer to enhance the appearance of the travertine tiles.
- Regularly clean the tiles with mild detergents and a soft cloth.

Diy Travertine Installation Techniques

A Guide To Installing Travertine Pavers Stone Depot

Installing Travertine Over Concrete

Travertine Paver Pool Deck Installation Part 1

Travertine Paver Pool Deck Installation Part 1

Diy Travertine Paver Inspirations For Summer Ready Patio

How To Lay Travertine Pavers Around Pool

How To Lay Travertine Pavers French Pattern

Travertine Tiles And Pavers

How To Lay French Pattern Travertine N Paving Centre
Related Posts