How to Lay Outdoor Floor Tiles on Concrete
Outdoor floor tiles offer a durable and aesthetically pleasing solution for patios, walkways, and pool decks. They provide a smooth, slip-resistant surface, enhance curb appeal, and withstand the elements. Laying outdoor floor tiles on concrete requires careful preparation, precise installation, and appropriate materials. This article will guide you through the process, ensuring a successful and long-lasting outcome.
Preparing the Concrete Substrate
Before laying the tiles, it's crucial to prepare the concrete substrate for optimal adhesion and longevity. This involves cleaning, leveling, and addressing any imperfections.
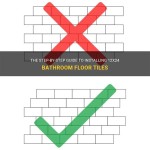
Begin by thoroughly cleaning the concrete surface with a pressure washer or stiff brush. Remove any loose debris, dirt, oil, or grease that might hinder adhesion. Next, assess the levelness of the concrete. Any significant unevenness will hinder the tiling process and impact the final appearance. If necessary, use a self-leveling compound to create a smooth, level surface. Fill any cracks or gaps with concrete patching compound, ensuring a solid foundation for the tiles. Allow the patching compound to cure completely before proceeding.
Installing the Tiles
Once the concrete substrate is prepared, you can begin installing the outdoor floor tiles. This process involves selecting the appropriate mortar, spreading it evenly, and placing the tiles with precision.
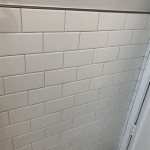
Choose a mortar specifically designed for outdoor use. This type of mortar is formulated to withstand extreme temperatures, moisture, and weather conditions. Use a notched trowel to spread the mortar, creating grooves that will help secure the tiles. The depth of the notches should match the thickness of the tile to ensure proper adhesion. Place the tiles on the mortar bed, pressing firmly and ensuring they are level and aligned. Use a rubber mallet to gently tap the tiles into place, eliminating any air pockets.
Grouting and Sealing
After the tiles are installed and the mortar has cured, you need to grout the spaces between them, providing a watertight seal and enhancing the aesthetic appeal.
Select a grout specifically designed for outdoor applications. This type of grout resists moisture, fading, and staining, ensuring long-term durability. Mix the grout according to the manufacturer's instructions and apply it using a grout float, pressing it firmly into the joints. After the grout has dried slightly, remove any excess with a damp sponge, cleaning the tiles thoroughly and ensuring even grout lines. Allow the grout to cure completely before proceeding to the final step.
Sealing the Tiles
The final step involves sealing the tiles, protecting them from stains and moisture.
Choose a penetrating sealer specifically designed for outdoor tile surfaces. This type of sealer penetrates deep into the pores of the tile, creating a barrier against water, oil, and dirt. Apply the sealer according to the manufacturer's instructions, using a brush or roller to ensure even coverage. Allow the sealant to dry completely before applying any additional coats if recommended. Sealing the tiles will maintain their appearance and extend their lifespan.

Can You Lay Outdoor Tiles Over Concrete Premier Porcelain

Concrete Patio Transformation 7 Steps To Diy A New Outdoor Oasis

Concrete Patio Transformation 7 Steps To Diy A New Outdoor Oasis

Concrete Patio Transformation 7 Steps To Diy A New Outdoor Oasis

Diy The Right Way To Fit Outdoor Tiles World Of

Prepping For Outdoor Patio Tile Installation Jlc

How To Install Porcelain Outdoor Floor Tiles In Your Garden Royale Stones Blog

Outdoor Flooring Over Grass Or Dirt Interlocking Tiles

The Complete Guide To Choosing Best Outdoor Tile

Concrete Patio Transformation 7 Steps To Diy A New Outdoor Oasis
Related Posts