How To Lay Garage Floor Tiles
Garage flooring endures significant wear and tear from vehicles, foot traffic, and potential chemical spills. Installing durable tiles provides a protective layer, enhancing the garage's appearance and longevity. This guide outlines the process of laying garage floor tiles, offering a step-by-step approach for a successful installation.
Preparing the Garage Floor
Proper surface preparation is crucial for successful tile adhesion and longevity. This involves cleaning, repairing, and ensuring a level surface for optimal tile placement.
- Cleaning: Thoroughly clean the existing garage floor. Remove oil stains, grease, dirt, and debris using a degreaser and a stiff-bristled brush. For stubborn stains, a pressure washer may be necessary. Allow the floor to dry completely.
- Repairs: Inspect the floor for cracks, chips, or other damage. Fill any imperfections with a concrete patching compound, following the manufacturer's instructions. Allow the patching compound to cure completely.
- Leveling: Assess the floor for levelness. If any significant dips or uneven areas exist, use a self-leveling concrete compound to create a smooth and even surface. Follow the manufacturer's instructions for application and drying times.
- Moisture Mitigation: In areas with high moisture levels, consider applying a moisture barrier primer to prevent moisture from affecting the tile adhesive. This is particularly important for concrete slabs prone to moisture issues.
Choosing the Right Tiles
Selecting appropriate tiles is essential for a durable and long-lasting garage floor. Consider factors such as material, durability, and resistance to chemicals and impacts.
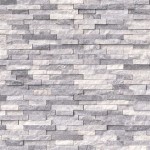
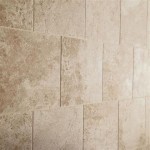
- Porcelain or Ceramic Tiles: These tiles offer excellent durability, resistance to stains, and ease of cleaning. Choose tiles specifically designed for floor use, as wall tiles are not suitable for heavy traffic areas.
- Interlocking PVC Tiles: Interlocking tiles are easy to install and offer good resistance to impacts and chemicals. They are also available in various colors and textures.
- Rubber Tiles: Rubber tiles provide excellent shock absorption and slip resistance, making them a good choice for workshops or garages where heavy objects are handled.
- Consider the Finish: Opt for tiles with a textured or matte finish for increased slip resistance, particularly in areas prone to moisture.
Gathering Necessary Materials and Tools
Having the necessary materials and tools readily available ensures a smoother and more efficient installation process.
- Tiles: Calculate the square footage of the garage to determine the required number of tiles. Add 10-15% extra to account for cuts and potential breakage.
- Adhesive: Select a high-quality tile adhesive specifically formulated for garage floor installations. Consider a modified thin-set mortar for enhanced bonding strength.
- Grout: Choose a grout that is resistant to stains, chemicals, and mildew. Epoxy grout offers superior durability and resistance compared to traditional cement-based grout.
- Tools: Gather essential tools such as a notched trowel, rubber mallet, tile spacers, tile cutter, safety glasses, gloves, and a bucket for mixing the adhesive and grout.
Laying the Tiles
Precise tile placement and proper adhesive application are critical for a visually appealing and structurally sound floor.
- Planning the Layout: Determine the starting point for laying the tiles. A central starting point often minimizes the need for small cuts at the edges. Dry-lay a few tiles to visualize the layout and ensure accurate measurements.
- Applying Adhesive: Apply the adhesive to the floor using a notched trowel, covering a manageable area at a time. The size of the notches on the trowel should be appropriate for the size of the tiles being used.
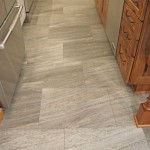
- Placing the Tiles: Firmly press each tile into the adhesive, ensuring full contact. Use a rubber mallet to gently tap the tiles into place and create a level surface. Insert tile spacers between the tiles to maintain consistent grout lines.
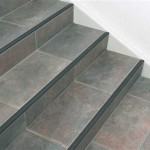
- Cutting Tiles: Use a tile cutter or wet saw to cut tiles to fit edges and corners. Measure carefully to ensure accurate cuts.
- Cleaning Excess Adhesive: Remove any excess adhesive from the tile surface and grout lines immediately using a damp sponge before it dries.
Grouting and Sealing
Grouting fills the spaces between the tiles, providing stability and preventing moisture penetration. Sealing protects the grout and tiles from stains and enhances their longevity.
- Applying Grout: After the adhesive has cured completely (typically 24 hours), apply the grout using a rubber grout float, pressing it firmly into the grout lines. Remove excess grout with a damp sponge.
- Cleaning Grout Haze: After the grout has partially dried, use a clean, damp sponge to remove any grout haze from the tile surface. Rinse the sponge frequently with clean water.
- Sealing the Grout: Once the grout has fully cured (typically 72 hours), apply a grout sealer to protect it from stains and moisture. Follow the manufacturer’s instructions for application and drying times.
- Optional Tile Sealing: For added protection, consider sealing the tiles as well, especially if using porous tiles like natural stone. Choose a sealer appropriate for the type of tile being used.

How To Install Interlocking Garage Floor Tiles Modutile Full Explanation

Here S How You Fit Interlocking Garage Floor Tiles Step By Quick Easy Gftc

How To Install Garage Floor Tiles Flooring Llc

How To Install Garage Floor Tiles Step By The Diy Playbook

How To Install Garage Flooring Ecotile Interlocking Floor Tiles In Small

Installing Garage Floor Tiles In An Angled Flexspec Modular Flooring

Tips To Prepare Your Garage Floor For Interlocking Tiles All Floors

How To Lay Garage Floor Tiles Gtools

Garage Floor Installation Guide Tiles Rolls And

Installing Garage Floor Tiles Step By Rubi Blog Usa
Related Posts