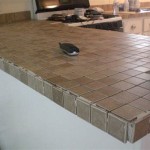
How To Lay Ceramic Tile In Kitchen: A Comprehensive Guide
Laying ceramic tile in a kitchen is a popular home improvement project that can significantly enhance the aesthetic appeal and functionality of the space. Ceramic tile is a durable, water-resistant, and relatively easy-to-maintain flooring option, making it well-suited for the demanding environment of a kitchen. This article provides a step-by-step guide on how to successfully lay ceramic tile in a kitchen, covering preparation, installation, and finishing touches.
Before embarking on the tiling project, meticulous planning and preparation are essential. This involves accurately measuring the kitchen area, selecting appropriate tiles and materials, and ensuring the subfloor is properly prepared to receive the new tiling. Neglecting these preliminary steps can lead to uneven tile surfaces, insufficient adhesion, and ultimately, a less-than-desirable finished product.
Key Point 1: Subfloor Preparation and Assessment
The condition of the subfloor is paramount to the longevity and stability of the tiled surface. The subfloor must be structurally sound, level, and free from any contaminants that could interfere with the adhesion of the tile mortar. Common subfloor options in kitchens include concrete slabs and wood underlayment (typically plywood or cement board). Each requires a specific approach to preparation.
For concrete subfloors, inspect for cracks, unevenness, and signs of moisture. Minor cracks can be filled with a concrete patching compound. Larger cracks may indicate structural issues that require professional evaluation and repair. Leveling irregularities can be addressed with a self-leveling compound, applied according to the manufacturer's instructions. It is critical to ensure the concrete is clean and free from dust, grease, or paint. A thorough cleaning with a degreaser followed by rinsing and drying is recommended. In some cases, applying a primer can improve the bond between the concrete and the tile mortar.
For wood subfloors, typically consisting of plywood or cement board over joists, ensure the sheathing is securely fastened to the joists. Any loose or damaged sheathing should be replaced. Plywood should be at least ¾ inch thick for adequate support. Cement board is often preferred for tiling projects as it provides a more stable and water-resistant surface. Cement board is installed over the plywood subfloor, screwed down every 6-8 inches. Seams between cement board sheets should be taped and mudded with thin-set mortar to create a smooth, continuous surface. The wood subfloor must also be checked for levelness, and any dips or unevenness should be corrected before proceeding with the tile installation.
Regardless of the subfloor type, ensuring it is clean and dry is crucial. Any residual moisture can cause the mortar to fail, leading to loose or cracked tiles. Use a moisture meter to verify the subfloor's moisture content is within acceptable limits before commencing the tiling process.
Before any installation verify that the floor is adequate enough to hold the added weight of ceramic tile for the longevity of the flooring. If there is concern have a structural engineer address any issues.
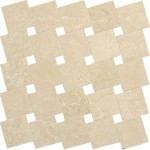
Key Point 2: Tile Layout and Cutting
Proper tile layout is essential for achieving a visually appealing and functional tiled floor. Before applying any mortar, dry-lay the tiles to determine the optimal arrangement and minimize the need for small, awkward cuts. Start by finding the center of the room – this can be achieved by snapping chalk lines from the midpoint of opposing walls. The intersection of these lines marks the center point. From this center point, lay out a row of tiles along each chalk line, using tile spacers to maintain consistent grout lines.
Adjust the layout as needed to avoid small slivers of tile along the walls. Ideally, the tiles along the perimeter should be at least half the size of a whole tile. If this is not achievable with the initial layout, shift the starting point slightly to achieve a more balanced and aesthetically pleasing appearance. Consider the placement of cabinets, appliances, and other features when planning the layout. The goal is to create a visually harmonious design that minimizes cuts around obstacles.
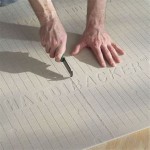
Once the layout is finalized, mark the position of each tile with a pencil. This will serve as a guide during the mortar application process. Also, identify and mark the tiles that require cutting. There are several tools available for cutting ceramic tiles, including manual tile cutters (snap cutters), wet saws, and nippers. Manual tile cutters are suitable for straight cuts, while wet saws are necessary for more complex cuts and hard-bodied tiles. Nippers can be used for small, intricate cuts or shaping tiles around curved surfaces.
When using a manual tile cutter, score the tile along the desired cut line and then apply pressure to snap the tile along the score. For wet saws, ensure the saw is properly set up with a sharp blade and a sufficient water supply. Guide the tile slowly and steadily through the blade, following the marked cut line. Always wear safety glasses and gloves when using tile cutting tools to protect against flying debris and sharp edges.
After cutting each tile, test its fit in the designated location before applying mortar. This allows for any necessary adjustments and ensures a precise and professional finish. Be sure to account for grout lines when making cuts.
Key Point 3: Mortar Application, Tile Setting, and Grouting
With the subfloor prepared and the tiles cut to size, the next step is to apply the mortar and set the tiles. Select a suitable thin-set mortar specifically designed for ceramic tile. Mix the mortar according to the manufacturer's instructions, using a clean bucket and a mixing paddle attached to a drill. The consistency should be similar to that of peanut butter – spreadable but not too runny. Allow the mortar to slake (sit undisturbed) for the recommended time before remixing and applying.
Using a notched trowel of the appropriate size (specified by the tile manufacturer), apply the mortar to the subfloor in small sections, typically no more than 2-3 square feet at a time. Hold the trowel at a 45-degree angle and apply even pressure to create uniform ridges in the mortar. These ridges provide a mechanical bond between the tile and the subfloor. Do not apply mortar to a larger area than can be tiled within the mortar's open time (the time during which the mortar remains workable).
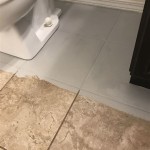
Immediately after applying the mortar, set the tiles in place, pressing firmly and evenly to ensure good contact with the mortar. Use tile spacers to maintain consistent grout lines between the tiles. Gently twist each tile slightly as it is being set to ensure full coverage with the mortar. Periodically check the levelness of the tiles using a level or spirit level. Tap down any tiles that are too high and add mortar under any tiles that are too low. Remove any excess mortar from the tile surfaces immediately with a damp sponge.
Allow the mortar to cure completely according to the manufacturer's instructions, typically 24-48 hours. Once the mortar is cured, it is time to apply the grout. Remove the tile spacers and clean any debris from the grout lines. Mix the grout according to the manufacturer's instructions, ensuring a smooth, consistent consistency.
Using a grout float, apply the grout to the tile surface, pressing it firmly into the grout lines at a 45-degree angle. Work in small sections, ensuring all grout lines are completely filled. Once the grout has been applied, remove the excess grout from the tile surface with a damp sponge, rinsing the sponge frequently in clean water. Use a circular motion to avoid pulling grout out of the grout lines. Allow the grout to haze over (a thin film will form on the tile surface), which typically takes about 15-30 minutes.
Polish the tile surface with a clean, dry cloth to remove the grout haze and reveal the clean tile surface. Depending on the type of grout used, it may be necessary to apply a grout sealer to protect the grout from staining and moisture penetration. Follow the manufacturer's instructions for applying the grout sealer.
Finally, install any baseboards or trim to cover the perimeter of the tiled floor and create a finished look. Caulk any gaps between the baseboards and the wall or floor with a paintable caulk. Allow the caulk to dry completely before painting.
Laying ceramic tile in a kitchen requires patience, attention to detail, and adherence to proper techniques. By carefully following these steps, it is possible to achieve a professional-looking and durable tiled floor that will enhance the beauty and functionality of the kitchen for years to come.

How To Tile A Floor Part 1 Preparation

How To Install A Tile Backsplash Part 1 Buildipedia Diy

How To Tile A Kitchen Floor Step By Guide For Beginners

Ceramic Tile Kitchen Floor Pros Cons And Best Designs Stone Depot

Best Tile For Kitchen Floor How To Make The Right Choice Welcome Rubi Tools Blog

The Complete Guide To Kitchen Floor Tile Why

How To Install A Tile Floor The Home Depot

Diy Flooring How We Changed Our Kitchen In 3 Days For Less Than 400

Flooring Install Tiles On Top Of Laminate Floor In Kitchen Home Improvement Stack Exchange

Kitchen Floor Tiles Ceramic Vinyl More The Tile
Related Posts