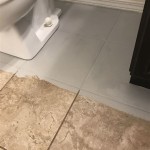
Installing bathroom floor tiles is a great way to make a big impact on the look and feel of your bathroom. It is a relatively easy task that can be done in a few hours with the right tools and materials. You can choose from a variety of styles, sizes, and colors to customize your bathroom floor. Here are some tips to help you lay bathroom floor tiles like a pro.
The first step in laying bathroom floor tiles is to prepare the area. This involves measuring the space, determining the layout, and ensuring the surface is even. If necessary, use a self-leveling compound to even out the surface. Once the area is prepared, it is time to start laying the tiles. It is important to ensure the tiles are laid in a straight line and that the grout lines are consistent.
Before laying the tiles, it is important to use a good quality tile adhesive. This will ensure the tiles stay in place and provide a strong bond. If there are any gaps between the tiles, use a caulk to fill them in. When applying the adhesive, use a trowel to spread it evenly and ensure proper coverage. Be sure to press down firmly on each tile to ensure it is fully adhered.
Once the adhesive has dried, it is time to grout the tile. Start by mixing the grout according to the manufacturer’s instructions and apply it to the joints between the tiles. Use a grout float to press the grout into the joints and remove any excess. Let the grout dry for the recommended amount of time before wiping away the excess with a damp cloth.
Finally, it is important to seal the grout lines to prevent staining and protect the tiles. Use a sealer specifically designed for tile and grout to ensure the best results. Follow the manufacturer’s instructions on how to apply the sealer and allow it to dry completely before using the bathroom again. With these tips, you should have no problem laying bathroom floor tiles like a pro.


Related Posts


