If you’re looking to upgrade the look and feel of your home, replacing the flooring is a great place to start. Tile floors are a classic choice, and they come in a variety of styles and colors. Plus, tile flooring is not too difficult to install, and this guide will walk you through the steps and help you lay a tile floor of your own.
To start, you’ll need to purchase the appropriate materials for your project. This includes the tiles themselves, as well as adhesive, grout, and any other necessary supplies. Make sure to measure the area you intend to tile, and calculate how many tiles you’ll need to cover it. You may also want to purchase a few extra tiles, just in case.
Next, you need to prepare the floor for the tiles. This involves removing any existing flooring and making sure the surface is clean and level. Once the area is prepped, you can begin to lay the tiles. Start in one corner, and work your way out. Make sure to use the adhesive to secure the tiles in place, and use a level to check that they are even.
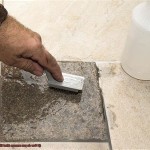
When the tiles are laid, you can start to grout the joints. Apply the grout with a rubber trowel, and make sure to wipe away any excess. Once the grout has dried, you can apply a sealant to the entire floor to help protect it. This will also help to make the tiles easier to clean and keep them looking great for years to come.
Finally, you can enjoy the look and feel of your new tile floor! With the right materials and some patience, you can easily lay a tile floor of your own. And with proper maintenance, your tile floor will stay looking beautiful for many years to come.


Related Posts


