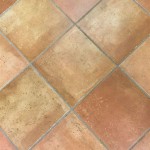
Installing wood flooring over tile can give your home an elegant, classic look. It is an easy project for the DIY enthusiast, and can be completed in just a few hours. With a few simple tools and materials, you can have a beautiful new wood floor in no time.
First, you need to prepare the area. Check the floor for any cracks or damage, and repair any imperfections. Make sure the tiles are firmly fixed to the floor, and there are no loose tiles. Vacuum the floor to remove any dirt or debris, then use a damp cloth to clean it.
Next, install the underlayment. This is a material that helps to reduce noise and moisture, and is often used under hardwood floors. Make sure the underlayment is level and firmly attached to the floor. If the underlayment is not level, you will need to use shims to level it out.
Now it’s time to install the wood flooring. If you are using pre-finished wood, you can simply lay it down and secure it with nails or staples. If you are using unfinished wood, you will need to sand and finish it according to the instructions. Once the wood is installed, you can add a sealant or varnish to protect it from wear and tear.
Finally, you can add trim or baseboards to finish off the look. You may also want to consider adding a transition strip between the wood flooring and the tile. This will help to create a seamless transition between the two materials. With these simple steps, you can give your home a classic look with the added bonus of easy maintenance.


Related Posts


