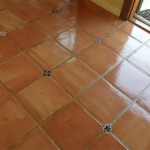
How To Install Tile Floor On Concrete Patio
Transforming a concrete patio with tile flooring offers an opportunity to enhance the aesthetic appeal and functionality of an outdoor living space. A well-tiled patio provides a durable, attractive surface for entertaining, relaxing, and enjoying the outdoors. This article outlines the necessary steps for successfully installing tile flooring on a concrete patio, ensuring a long-lasting and visually pleasing result. The process involves careful preparation, selection of appropriate materials, and meticulous installation techniques.
Key Point 1: Preparing the Concrete Patio Surface
Proper surface preparation is paramount to ensure the successful adhesion of tile to the concrete patio. Neglecting this stage can lead to tile cracking, detachment, and premature failure of the tiled surface. The preparation process encompasses cleaning, leveling, and addressing any existing damage to the concrete.
Cleaning the Surface: Begin by thoroughly cleaning the concrete patio surface. Pressure washing is highly recommended to remove dirt, debris, mold, mildew, and any loose particles. Stubborn stains, such as oil or grease, require specialized cleaning solutions designed for concrete. Follow the manufacturer's instructions carefully when using these cleaning agents, ensuring proper ventilation and wearing appropriate protective gear. After cleaning, allow the concrete to dry completely for at least 24 hours, depending on the weather conditions.
Leveling the Surface: Inspect the concrete patio for any unevenness, cracks, or depressions. These imperfections must be addressed before tiling to create a smooth and level substrate. Minor imperfections can be filled with a self-leveling concrete compound. Apply the compound according to the manufacturer's instructions, ensuring it is evenly distributed and allowed to cure fully. For larger cracks or significant unevenness, consider using a concrete patching compound or even a thin-set mortar to create a level surface. Feather the edges of the patching compound to blend seamlessly with the existing concrete.
Addressing Cracks: Cracks in the concrete patio should be addressed with a crack isolation membrane or by filling them with a flexible concrete crack filler. Hairline cracks might be acceptable, but wider cracks can telegraph through the tile and cause them to crack as well. A crack isolation membrane is a thin, flexible sheet that is adhered to the concrete surface before tiling. This membrane is designed to absorb movement in the concrete, preventing it from transferring to the tile. Alternatively, a flexible concrete crack filler can be used to fill the cracks. Choose a product specifically designed for exterior use and follow the manufacturer's instructions for application. Ensure the filler is completely cured before proceeding with the tiling process.
Applying a Primer: Once the surface is clean, level, and any cracks are addressed, apply a concrete primer. A primer helps to improve the adhesion of the thin-set mortar to the concrete surface. Choose a primer specifically designed for exterior concrete surfaces and follow the manufacturer's instructions for application. Typically, the primer is applied using a brush or roller, ensuring complete coverage of the entire patio surface. Allow the primer to dry completely before proceeding with the tiling process. This usually takes a few hours, depending on the primer and the weather conditions.
Key Point 2: Selecting Appropriate Materials
Choosing the right materials is crucial for the longevity and performance of the tiled patio. Factors to consider include the climate, the intended use of the patio, and the desired aesthetic. Selecting the wrong materials can lead to premature failure of the tiled surface and costly repairs.
Tile Selection: Opt for tiles specifically designed for outdoor use. These tiles are typically made from porcelain or other durable materials that are resistant to frost, moisture, and UV exposure. Porcelain tiles are particularly well-suited for outdoor patios due to their low water absorption rate, which minimizes the risk of cracking in freezing temperatures. Consider the slip resistance of the tile, especially if the patio is prone to getting wet. Look for tiles with a high coefficient of friction (COF) to minimize the risk of slips and falls. The aesthetic appeal of the tile is also important. Choose a tile that complements the overall design of the property and provides the desired look and feel for the patio.
Thin-Set Mortar: Choose a high-quality, polymer-modified thin-set mortar specifically designed for exterior use. This type of mortar provides superior adhesion and flexibility, which is essential for withstanding the expansion and contraction of the concrete and tile due to temperature fluctuations. Read the manufacturer's instructions carefully and mix the mortar according to the specified proportions. Avoid adding too much water, as this can weaken the mortar and lead to tile failure. Use a notched trowel to apply the thin-set mortar to the concrete surface, ensuring even coverage and proper bonding with the tile.
Grout: Select a grout designed for exterior use and that is resistant to staining and mildew. Epoxy grout is an excellent option for outdoor patios as it is highly durable, water-resistant, and resistant to staining. Cement-based grouts are also a viable option, but they may require sealing to protect them from moisture and staining. Choose a grout color that complements the tile and the overall design of the patio. Follow the manufacturer's instructions for mixing and applying the grout. Ensure the grout joints are completely filled and that excess grout is removed from the tile surface promptly.
Sealer: For porous tiles or cement-based grout, consider applying a sealer to protect the surface from moisture and staining. Choose a sealer specifically designed for the type of tile and grout used. Follow the manufacturer's instructions for application, ensuring the sealer is evenly distributed and allowed to cure fully. Sealing the tile and grout can significantly extend the life of the tiled patio and make it easier to maintain.
Tools and Equipment: Ensure you have all the necessary tools and equipment before starting the tiling process. This includes a tile saw, notched trowel, grout float, sponge, measuring tape, level, rubber mallet, safety glasses, and gloves. Investing in quality tools will make the tiling process easier and more efficient.
Key Point 3: Installing the Tile and Grout
Careful installation techniques are essential for achieving a professional-looking and long-lasting tiled patio. Proper tile placement, alignment, and grouting are crucial for the overall success of the project.
Layout and Planning: Before starting the tiling process, plan the layout of the tiles. Start by finding the center of the patio and laying out the tiles dry to visualize the pattern and ensure proper alignment. Consider the placement of expansion joints, which are necessary to accommodate the expansion and contraction of the concrete and tile due to temperature fluctuations. Expansion joints should be placed every 8-12 feet and along the perimeter of the patio. Make any necessary adjustments to the layout to minimize the need for small cuts and to ensure a visually appealing pattern.
Applying Thin-Set Mortar and Setting Tiles: Mix the thin-set mortar according to the manufacturer's instructions. Using a notched trowel, apply the mortar to the concrete surface one section at a time. Spread the mortar evenly, creating ridges that will help to bond the tile to the concrete. Place the tiles onto the mortar, pressing them firmly into place. Use a rubber mallet to gently tap the tiles to ensure they are fully seated in the mortar. Use tile spacers to maintain consistent grout lines. Check the level of each tile as you go, making any necessary adjustments to ensure a perfectly flat surface. Wipe away any excess mortar from the tile surface with a damp sponge.
Cutting Tiles: Use a tile saw to cut tiles to fit around edges, corners, and other obstacles. Wet tile saws are recommended for cutting porcelain tiles, as they help to prevent chipping and cracking. Wear safety glasses when using the tile saw to protect your eyes from debris. Make accurate measurements and cut the tiles carefully to ensure a clean and professional finish.
Grouting the Tiles: After the thin-set mortar has cured for at least 24 hours, remove the tile spacers and prepare the grout according to the manufacturer's instructions. Apply the grout to the tile surface, using a grout float to work it into the grout joints. Ensure the grout joints are completely filled. Remove excess grout from the tile surface with a damp sponge. Rinse the sponge frequently to avoid smearing the grout. After the grout has partially cured, use a clean, dry cloth to buff the tile surface and remove any remaining grout haze.
Curing and Sealing: Allow the grout to cure according to the manufacturer's instructions. This typically takes several days. During the curing process, keep the tiled surface clean and dry. After the grout has cured, apply a sealer to the tile and grout, if necessary. This will help to protect the surface from moisture and staining. Follow the manufacturer's instructions for applying the sealer. Allow the sealer to dry completely before using the patio. Regularly clean and maintain the tiled patio to keep it looking its best. Sweep or vacuum the surface regularly to remove dirt and debris. Use a mild detergent and water to clean the tile as needed. Avoid using harsh chemicals or abrasive cleaners, as these can damage the tile and grout.

How To Install Tile Over Concrete Greenbuildingadvisor
:max_bytes(150000):strip_icc()/can-you-install-tile-directly-on-concrete-1822600-04-458f7bb6c78348c1835cf8054ef36553.jpg?strip=all)
How To Install Tile Over Concrete

Concrete Patio Transformation 7 Steps To Diy A New Outdoor Oasis
How To Tile Onto Concrete Floors Porcelain Super

Concrete Patio Transformation 7 Steps To Diy A New Outdoor Oasis

Concrete Patio Transformation 7 Steps To Diy A New Outdoor Oasis

Can You Lay Outdoor Tiles Over Concrete Premier Porcelain

Concrete Patio Transformation 7 Steps To Diy A New Outdoor Oasis

How To Tile A Patio Art Renovation

How To Make A Tile Patio
Related Posts

