How to Install Tile Backsplash on Drywall
A tile backsplash can dramatically enhance the look of your kitchen or bathroom, adding a touch of elegance and practicality. Installing a tile backsplash on drywall is a manageable DIY project, provided you have the necessary tools and follow the proper steps. This article will outline the process in a clear and concise manner, enabling you to create a stunning backsplash that complements your space.
1. Preparation and Planning
Before embarking on the installation process, meticulous planning and preparation are crucial. The first step is to gather all the necessary tools and materials. This includes:
- Tile
- Tile adhesive
- Grout
- Grout sealant
- Tile spacers
- Notched trowel
- Level
- Tape measure
- Utility knife
- Pencil
- Sponge
- Bucket
- Safety glasses
- Gloves
- Dust mask
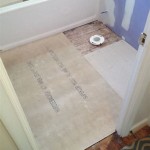
Once you have gathered the necessary materials, it's time to prepare the drywall surface. This involves:
- Cleaning the drywall to remove any dust, debris, or grease.
- Applying a waterproof membrane or sealant to protect the drywall from moisture.
- Laying out the tile pattern to determine the best arrangement and minimize cutting.
- Marking the tile layout on the drywall using a pencil and level.
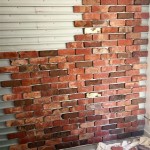
2. Installing the Tile
With the drywall prepared and the tile pattern established, you can begin installing the tiles. This process requires careful attention to detail and adherence to specific steps.
- Apply tile adhesive to the back of each tile using a notched trowel. Ensure the adhesive is spread evenly and covers the entire surface.
- Press the tile firmly onto the drywall, aligning it with the marked layout. Use spacers to ensure uniform spacing between tiles.
- Repeat the process for each tile, ensuring they are level and flush with the surrounding surface.
- Allow the adhesive to dry completely according to the manufacturer’s instructions. This typically takes 24 hours.
3. Grouting and Sealing
Once the adhesive has dried, you can proceed to grout the tile backsplash. This is a crucial step that fills the gaps between the tiles and enhances the aesthetic appeal.
- Remove the tile spacers.
- Mix the grout according to the manufacturer’s instructions to achieve the desired consistency.
- Apply the grout to the spaces between tiles using a rubber grout float.
- Remove excess grout with a damp sponge, ensuring the grout lines are clean and uniform.
- Allow the grout to dry completely, which typically takes 24 to 48 hours.
- Apply grout sealant to the grout lines to protect them from moisture and staining.
By following these steps, you can successfully install a beautiful and durable tile backsplash that adds value and style to your kitchen or bathroom. Remember, patience and attention to detail are key to achieving a professional-looking finish.

How To Install Tile Backsplash Fixthisbuildthat

How To Add Subway Tile Backsplash Over Drywall Transform Your Kitchen For 100

How To Prepare Drywall For A Tile Backsplash Mr Handyman

How To Prepare Drywall For A Tile Backsplash Mr Handyman

Backsplash Makeover Easy How To Guide

How To Install Tile Backsplash Fixthisbuildthat

How To Install A Subway Tile Kitchen Backsplash Young House Love

Subway Tile Backsplash Install Art Renovation

How To Install Subway Tile Backsplash Step By Guide

Can You Install A Ceramic Tile Backsplash On Drywall Wkrg