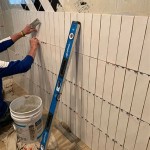
Adding a glass tile backsplash to your kitchen or bathroom can give it a modern, stylish look. Installing a glass tile backsplash can be difficult, but with the right tools, knowledge, and patience, you can create a look that will last. Here are some tips on how to install a glass tile backsplash in your home.
First, you need to prepare the surface. Make sure the wall is level and clean, and that there are no rough spots or holes. You may need to use a putty knife to scrape off any old paint or wallpaper, then sand the area to ensure a smooth surface. Once the surface is ready, it’s time to start laying out the tiles.
Next, you will want to create a template for the tiles. This can be done on paper or with a computer program. This will help you determine the size and shape of the tiles, as well as their placement. Once you have a template, you can start to lay out the tiles. Make sure to use spacers between the tiles to ensure a uniform look.
Once the tiles are in place, it’s time to start grouting. You will need to mix the grout according to the manufacturer’s instructions, then apply it evenly to the tiles. Make sure to remove any excess grout before it dries, then allow it to dry completely. You may also need to seal the grout to protect it from moisture and dirt.
Finally, you will need to add any finishing touches, such as trim or decorative pieces. These can be found at most home improvement stores. Once everything is in place, you can sit back and enjoy your new glass tile backsplash!


Related Posts


