How To Install Ceramic Tile On Concrete Floor
Installing ceramic tile over a concrete floor can significantly enhance the aesthetic appeal and durability of a space. This process, while achievable for a diligent DIYer, requires careful planning and execution to ensure a long-lasting and visually pleasing result. A properly installed tile floor resists moisture, withstands heavy traffic, and provides a surface that is easy to clean and maintain. The following guide outlines the steps involved in preparing the concrete subfloor, selecting the appropriate materials, and installing the ceramic tile with precision.
Preparing the Concrete Subfloor
The foundation of any successful tile installation is a properly prepared subfloor. The concrete surface must be clean, level, and structurally sound. Failure to adequately address these aspects will likely result in tile cracking, grout failure, and an overall unsatisfactory outcome. The initial step involves a thorough inspection of the existing concrete floor. Look for any signs of cracks, holes, or unevenness. Minor cracks (hairline cracks less than 1/8 inch wide) can often be filled with a crack isolation membrane or a concrete patch. Larger cracks, however, might indicate a more serious structural issue that requires professional assessment and repair before proceeding with tile installation.
Cleaning the concrete is crucial for ensuring proper adhesion of the thin-set mortar. Begin by sweeping or vacuuming the entire area to remove loose debris, dust, and dirt. Next, scrub the floor with a concrete cleaner specifically designed to remove grease, oil, and other contaminants. A stiff-bristled brush and plenty of clean water are essential for this step. Rinse the floor thoroughly and allow it to dry completely before proceeding. For stubborn stains or residue, consider using a degreaser or a diluted solution of muriatic acid, taking appropriate safety precautions such as wearing gloves, eye protection, and a respirator.
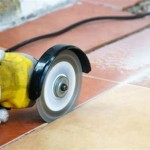
Leveling the concrete floor is another critical step. Even minor variations in the subfloor’s surface can cause tiles to sit unevenly, leading to future problems. Use a long level (at least six feet) to identify any high or low spots. High spots can be ground down using a concrete grinder or a diamond grinding wheel. Low spots can be filled with a self-leveling concrete compound. Follow the manufacturer's instructions carefully when mixing and applying the self-leveling compound. Allow the compound to cure fully before proceeding with the tile installation. This may take several days, depending on the product and environmental conditions.
Finally, consider applying a concrete primer to the surface. A primer helps to improve the bond between the concrete and the thin-set mortar. This is particularly important on porous concrete surfaces. Choose a primer specifically designed for use with tile installations and follow the manufacturer's instructions for application. Allow the primer to dry completely before proceeding to the next step.
Selecting the Right Materials
Choosing the correct materials is essential for a successful ceramic tile installation. The selection process should consider the specific application, the expected traffic volume, and the desired aesthetic. The primary materials include the ceramic tile itself, the thin-set mortar, the grout, and any supplementary products such as crack isolation membranes or sealants. Careful consideration of each material's properties will contribute to a durable and visually appealing finished product.
Ceramic tile comes in a wide variety of sizes, shapes, colors, and finishes. Porcelain tile, a subset of ceramic tile, is denser and more durable, making it a suitable choice for high-traffic areas or areas prone to moisture. Before purchasing tile, calculate the square footage of the area to be tiled and add a waste factor of at least 10% to account for cuts and breakage. It is generally advisable to purchase slightly more tile than needed to ensure a consistent dye lot and provide extra tiles for future repairs. When selecting the tile, consider its suitability for the intended use. For example, tiles with a high coefficient of friction are recommended for areas where slip resistance is important, such as bathrooms and kitchens.
Thin-set mortar, also known as dry-set mortar, is the adhesive used to bond the ceramic tile to the concrete subfloor. There are several types of thin-set mortar available, each formulated for different applications. Modified thin-set mortars contain polymers that enhance their bond strength, flexibility, and water resistance. These are generally recommended for most ceramic tile installations over concrete. Unmodified thin-set mortars are typically used for specific applications, such as setting moisture-sensitive natural stone. Choose a thin-set mortar that is specifically recommended for use with the type of tile being installed and the concrete subfloor. Read the manufacturer's instructions carefully before mixing and applying the thin-set mortar.
Grout fills the spaces between the tiles and helps to prevent water from penetrating the floor. There are two main types of grout: sanded grout and unsanded grout. Sanded grout is used for wider grout lines (typically 1/8 inch or wider) and provides greater durability. Unsanded grout is used for narrower grout lines and is less likely to scratch delicate tile surfaces. Epoxy grout is another option that offers superior stain resistance and durability, making it a good choice for high-traffic areas or areas prone to spills. Select a grout color that complements the tile and the overall design of the space. Consider using a grout sealant to protect the grout from stains and moisture.
Crack isolation membranes are designed to prevent cracks in the concrete subfloor from transmitting to the tile surface. These membranes are typically applied as a liquid or a sheet and can significantly reduce the risk of tile cracking. If the concrete subfloor has existing cracks or is prone to movement, a crack isolation membrane is highly recommended. Other supplementary materials may include tile spacers, which help to maintain consistent grout lines, and edge trim, which provides a finished edge around the perimeter of the tiled area.
Installing the Ceramic Tile
The actual installation of the ceramic tile requires careful planning, precise execution, and attention to detail. Begin by dry-laying the tiles to determine the best layout and minimize cuts. This involves placing the tiles on the floor without mortar to visualize the final arrangement. Start in the center of the room and work outwards, ensuring that there are equal-sized borders along the walls. Use tile spacers to maintain consistent grout lines. Adjust the layout as needed to avoid small slivers of tile along the edges or corners. Once satisfied with the layout, mark the position of the tiles with a pencil or chalk.
Mixing the thin-set mortar according to the manufacturer's instructions is crucial for achieving the proper consistency and bond strength. Use a mixing paddle attached to a drill to thoroughly combine the mortar and water. Avoid adding too much water, as this can weaken the mortar. Allow the mortar to slake (rest) for the recommended time before remixing and applying it to the floor. This allows the polymers in the mortar to fully activate.
Apply the thin-set mortar to the concrete subfloor using a notched trowel. The size of the notches on the trowel will depend on the size of the tile being installed. Hold the trowel at a 45-degree angle and apply the mortar in a consistent, even layer. Only apply enough mortar to cover a small area at a time (typically a few square feet) to prevent it from drying out before the tiles are set. Place the tiles onto the mortar, pressing them firmly and twisting them slightly to ensure good contact. Use tile spacers to maintain consistent grout lines. As you install the tiles, periodically check the level and alignment with a level and a straight edge. Make any necessary adjustments before the mortar sets.
Cutting ceramic tile can be accomplished using a wet saw or a tile nipper. A wet saw provides clean, precise cuts and is recommended for larger jobs or intricate cuts. A tile nipper can be used for smaller cuts or shaping tiles around obstacles. When cutting tile, always wear eye protection and follow the manufacturer's instructions for the cutting tool. After all the tiles have been installed, allow the thin-set mortar to cure for the recommended time (typically 24-48 hours) before proceeding with grouting.
Once the thin-set mortar has cured, remove the tile spacers and clean the grout lines with a utility knife or a grout saw. Mix the grout according to the manufacturer's instructions. Apply the grout to the tile surface using a grout float, pressing it firmly into the grout lines. Work in small sections and remove excess grout with the grout float. After a few minutes, use a damp sponge to wipe away the remaining grout from the tile surface. Rinse the sponge frequently in clean water. Be careful not to remove too much grout from the grout lines. Allow the grout to dry for the recommended time (typically 24-48 hours) before polishing the tile surface with a clean, dry cloth.
How To Lay Floor Tiles On Concrete Stonesuper
How To Tile Onto Concrete Floors Porcelain Super

How To Install Ceramic Tiles On Concrete Floor Tile Installation
:max_bytes(150000):strip_icc()/can-you-install-tile-directly-on-concrete-1822600-04-458f7bb6c78348c1835cf8054ef36553.jpg?strip=all)
How To Install Tile Over Concrete

How To Lay A Tile Floor On Concrete Diy Homeimprovement

Tiling Over A Ed Concrete Slab Fine Homebuilding

How To Lay Tile On Concrete With Pictures Wikihow

How To Install Ceramic Tiles On Concrete Floor Tile Installation

How To Lay Floor Tiles On Concrete Welcome The Rubi Tools Blog

How To Lay A Tile Floor On Concrete Diy Homeimprovement
Related Posts


