How To Install Ceramic Tile Backsplash In Bathroom
Installing a ceramic tile backsplash in a bathroom is a project that can significantly enhance the aesthetic appeal of the space while also providing a durable and water-resistant surface. This guide provides a detailed, step-by-step approach to installing a ceramic tile backsplash, suitable for homeowners with intermediate DIY skills. Proper preparation, careful execution, and attention to detail are crucial for achieving a professional-looking result.
Before commencing any work, it is essential to gather all necessary tools and materials. This proactive step ensures a smooth and efficient installation process, minimizing disruptions and potential delays.
The required tools include a tile cutter (either a manual snap cutter or a wet saw), a notched trowel (the size of the notch depends on the tile size specified by the tile adhesive manufacturer), a rubber grout float, a grout sponge, a bucket, a level, a measuring tape, a pencil, safety glasses, work gloves, a utility knife, a caulk gun, and a drill with mixing paddle attachment.
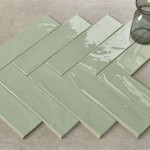
The materials needed comprise ceramic tiles (ensure sufficient quantity, accounting for cuts and breakage), tile adhesive (thin-set mortar), pre-mixed grout, tile sealant, caulk (silicone or acrylic latex), spacers, painter's tape, and drop cloths or plastic sheeting.
Surface Preparation and Planning
The foundation for a successful tile installation lies in meticulous surface preparation. A clean, level, and stable substrate is paramount for ensuring proper adhesion and a long-lasting backsplash.
Begin by thoroughly cleaning the existing surface. Remove any soap scum, mildew, grease, or other contaminants using a suitable cleaning solution. If the existing surface is painted, consider scuffing it with sandpaper to improve adhesion. For glossy or non-porous surfaces, a bonding primer may be necessary to ensure adequate thin-set mortar adhesion. Always consult the adhesive manufacturer's instructions for surface preparation recommendations.
Next, ensure the surface is level and free of imperfections. Use a level to identify any uneven areas. Minor imperfections can be corrected with thin-set mortar during tile installation. For significant irregularities, consider applying a leveling compound before tiling. This step is crucial for achieving a professional-looking, even backsplash.
Carefully measure the backsplash area using a measuring tape. Accurately record the length and height of the space. This measurement is essential for determining the amount of tile required and planning the layout. It is advisable to add approximately 10% to the tile quantity to account for cuts, waste, and potential breakage.
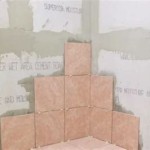
Plan the tile layout before applying any adhesive. This step allows for visualization of the final result and identification of any potential issues. Consider the placement of full tiles, cut tiles, and any decorative elements. Aim for symmetrical layouts, especially around focal points such as sinks and mirrors. Dry-lay a row of tiles along the bottom edge to determine the best starting point. Adjust the layout to minimize small cuts at the edges and corners. Mark the planned layout on the wall with a pencil, using a level to ensure straight lines.
Locate and mark the studs behind the wall. This information is useful for securing any mounting hardware for shelves or other accessories that may be installed on the backsplash later. A stud finder can aid in locating the studs accurately.
Applying Thin-Set Mortar and Setting the Tile
Once the surface is properly prepared and the tile layout is planned, the process of applying thin-set mortar and setting the tiles can commence. This stage requires careful attention to detail and adherence to the adhesive manufacturer's instructions.
Prepare the thin-set mortar according to the manufacturer's instructions. Generally, this involves adding water to the dry powder and mixing thoroughly using a drill with a mixing paddle attachment. Mix the mortar to a smooth, consistent consistency, similar to peanut butter. Avoid adding too much water, as this can weaken the adhesive bond. Allow the mortar to slake (rest) for the recommended time, then remix briefly before use.
Apply the thin-set mortar to the wall using a notched trowel. Hold the trowel at a 45-degree angle and spread the mortar evenly over a small section of the wall, typically an area that can be tiled within 15-20 minutes. The notched trowel creates ridges in the mortar, which enhance the adhesive bond with the tile. The size of the notch on the trowel should correspond to the recommendations provided by the adhesive manufacturer, which depend on the size and type of tile being used.
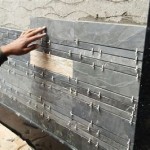
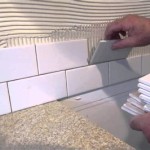
Press the ceramic tiles firmly into the thin-set mortar, using a slight twisting motion to ensure good contact. Work from the bottom up, following the planned layout. Use tile spacers between the tiles to maintain consistent grout lines. The size of the spacers depends on the desired grout line width. Ensure the tiles are level and aligned using a level. Periodically check the alignment of the tiles to ensure they remain straight and even.
As you work, carefully wipe away any excess thin-set mortar from the tile surfaces using a damp sponge. This prevents the mortar from hardening on the tile faces, which can make cleanup more difficult later. Pay particular attention to the grout lines, ensuring they are free of excess mortar.
For tiles that require cutting, use a tile cutter (either a manual snap cutter or a wet saw). A manual snap cutter is suitable for straight cuts, while a wet saw is recommended for curved cuts or more complex shapes. When using a wet saw, wear safety glasses to protect your eyes from water spray and debris. Cut the tiles slightly larger than needed and then carefully grind them down to the precise size using a tile nipper or a grinding stone. This technique allows for fine-tuning the fit and achieving a clean, professional edge.
Allow the thin-set mortar to cure completely according to the manufacturer's instructions. This typically takes 24-72 hours, depending on the type of mortar and the ambient temperature and humidity. Avoid disturbing the tiles during the curing process.
Grouting and Sealing
After the thin-set mortar has fully cured, the tile backsplash is ready for grouting. Grouting fills the spaces between the tiles, creating a seamless and water-resistant surface. Sealing the grout protects it from stains and moisture damage.
Remove the tile spacers before grouting. Ensure the grout lines are clean and free of any debris. Use a utility knife or grout removal tool to carefully remove any remaining thin-set mortar from the grout lines.
Prepare the grout according to the manufacturer's instructions. Pre-mixed grout is a convenient option, while powdered grout requires mixing with water. Mix the grout to a smooth, creamy consistency. Avoid adding too much water, as this can weaken the grout and cause it to crack.
Apply the grout to the tile backsplash using a rubber grout float. Hold the float at a 45-degree angle and spread the grout diagonally across the tiles, forcing it into the grout lines. Work in small sections, ensuring all grout lines are completely filled. Remove excess grout from the tile surfaces using the edge of the grout float.
After allowing the grout to set for the recommended time (typically 15-30 minutes), use a damp sponge to clean the tile surfaces. Rinse the sponge frequently in a bucket of clean water. Wipe the tiles in a circular motion to remove the grout haze. Be careful not to remove the grout from the grout lines. Repeat the cleaning process several times until the tile surfaces are clean and free of grout residue. Allow the grout to cure completely according to the manufacturer's instructions.
Once the grout has fully cured, apply a grout sealant to protect it from stains and moisture damage. Apply the sealant according to the manufacturer's instructions, using a foam brush or applicator. Allow the sealant to dry completely before exposing the backsplash to water or moisture. Reapply the sealant periodically to maintain its protective properties.
Caulking and Final Touches
The final step in installing a ceramic tile backsplash is caulking and adding any necessary finishing touches. Caulking seals the joints between the backsplash and adjacent surfaces, such as the countertop and the wall, preventing water from penetrating behind the tiles.
Apply a bead of caulk along the joints between the backsplash and the countertop, as well as along the joints between the backsplash and the wall. Use a caulk gun to apply the caulk evenly and smoothly. Choose a caulk that matches the color of the grout or the surrounding surfaces. Silicone caulk is recommended for areas exposed to water, while acrylic latex caulk is suitable for areas that are not frequently exposed to moisture.
Smooth the caulk bead with a wet finger or a caulk smoothing tool. This creates a clean, professional-looking seal. Wipe away any excess caulk with a damp cloth. Allow the caulk to dry completely according to the manufacturer's instructions.
Inspect the finished backsplash for any imperfections or areas that require touch-up. Fill any small gaps or cracks with grout or caulk. Clean the tile surfaces one final time to remove any remaining grout haze or adhesive residue.
Install any accessories, such as shelves or towel bars, that will be mounted on the backsplash. Use the stud markings to ensure the accessories are securely attached to the wall studs.
The installation of a ceramic tile backsplash involves a series of steps that need proper care and execution to achieve the best results. Patience and meticulousness are key to creating an aesthetically pleasing and durable backsplash that enhances the bathroom's functionality and visual appeal.

How To Install Backsplash Bathroom Tile Easy Simple

Small Bathroom Remodel Easy Diy Tile Backsplash Engineer Your Space

Install A Ceramic Tile Backsplash

How To Install A Tile Backsplash The Home Depot

L And Stick Tile How To Install On A Wall Porch Daydreamer

How To Lay Out Tile At Home With Ashley

How To Install A Perfect Tile Backsplash All Materials Tools And S Included

Orc Week 6 How To Tile Backsplash Olive June Home Diy Renovation Interior Design Inspiration

Tiling With Mussel Bound Honey Built Home

How To Install L And Stick Tile Backsplash The Diy Mommy
Related Posts