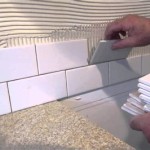
How to Install Ceiling Tiles Over Drywall
Ceiling tiles offer numerous advantages over traditional drywall ceilings. They provide excellent sound absorption, create a clean and modern aesthetic, and are often more budget-friendly. Installing ceiling tiles over drywall is a manageable DIY project, even for novice home improvers. This guide will provide a comprehensive overview of the necessary steps, materials, and tools to successfully execute this installation.
1. Preparing the Drywall Surface
Before embarking on the installation, it's crucial to ensure a smooth, clean surface. This step sets the foundation for a successful installation. Begin by removing any existing light fixtures, smoke detectors, or other obstructions. Next, inspect the drywall for imperfections such as cracks, holes, and uneven surfaces. These can be addressed with patching compound, joint compound, or drywall tape. Allow ample time for the patching materials to dry thoroughly. Once the surface is dry, apply a primer to create a uniform base for the ceiling tiles.
2. Choosing the Right Ceiling Tiles
The selection of ceiling tiles largely depends on personal preference and the desired aesthetic. There are various types of ceiling tiles available, each with its own unique benefits. Some popular options include:
- Acoustic tiles: These tiles are designed to absorb sound and are ideal for spaces that require noise reduction, such as home theaters or recording studios.
- Mineral fiber tiles: Durable and fire-resistant, mineral fiber tiles are often used in commercial settings but are suitable for residential spaces as well.
- Foam tiles: These tiles offer excellent sound absorption and are lightweight, making them a good choice for DIY projects. They are also available in numerous colors and designs.
When making your selection, consider the following factors:
- Size and shape: Choose tiles that complement the dimensions of your ceiling and the overall design aesthetic.
- Material: Opt for materials that suit your budget and performance requirements.
- Style and design: Ceiling tiles are available in a wide array of colors, patterns, and textures, allowing you to customize your ceiling to your liking.
3. Measuring and Marking the Ceiling
Accurate measurements and marking are essential for a neat, professional installation. First, determine the exact dimensions of your ceiling. Then, decide on the pattern you wish to create with the tiles. Common options include a staggered pattern or a straight grid pattern. Use a chalk line or pencil to mark the grid lines on the ceiling, ensuring they are parallel and perpendicular to the walls.
4. Installing the Ceiling Tile Grid
A ceiling tile grid provides the framework for holding the tiles in place. The most common grid systems use standard 2x2 or 2x4 wooden battens. These battens are secured to the drywall ceiling using screws or nails. The spacing of the battens should align with the chosen tile pattern. For example, if using 12x12 inch tiles, the battens should be spaced at 12 inch intervals.
When installing the grid, ensure that the battens are level and plumb. This will ensure that the tiles are installed evenly and flush with the ceiling surface. If necessary, use shims to adjust the height of the battens to ensure they are level.
5. Installing the Ceiling Tiles
With the grid in place, the next step is to install the ceiling tiles. Begin by placing the first tile in the corner of the room. Align the tile with the grid lines and press it gently into place. The tile should snap into the grid system, ensuring a secure fit. Continue installing the remaining tiles in a row, ensuring that each tile is properly aligned and securely fastened to the grid.
For tiles that do not have an integrated snap feature, you may need to use clips or adhesive to secure them to the grid. Follow the manufacturer's instructions for the specific tile type.
6. Finishing Touches
Once all the tiles have been installed, you can add finishing touches to complete the project. This may include installing a perimeter molding around the edges of the ceiling, which adds a decorative element and conceals any gaps between the tiles and the walls.
If you have any light fixtures or smoke detectors that were removed during the preparation phase, you can now reinstall them. Ensure that the fixtures are securely attached and connected to the electrical wiring.
Finally, take a step back and admire your newly installed ceiling tiles. With proper planning and execution, you can create a beautiful, functional, and stylish ceiling space that will enhance the overall aesthetics of your home.

Drywalling Over A Tile Ceiling

Ceiling Tile Installation Ceilings Armstrong Residential

Ceiling Tile Installation Ceilings Armstrong Residential

Drop Ceiling Tiles Installation Tips Diy Family Handyman

Drop Ceiling Installation How To Install A Homeserve Usa

How To Install A Drop Ceiling Diy For Beginners

How To Tile A Ceiling Tips And Guidelines Howstuffworks

How To Install Easycraft Ceiling Panels Kyal Kara

How To Easily Install A Drop Ceiling Ron Hazelton

How To Install Drywall Ceiling Howtospecialist Build Step By Diy Plans
Related Posts


