How to Install Bathroom Shower Wall Tile
Installing bathroom shower wall tile is a rewarding project that can significantly enhance the look and functionality of your bathroom. This comprehensive guide will equip you with the knowledge and steps to successfully install your shower wall tile. From preparing the surface to grouting, this step-by-step approach ensures a professional-looking finish.
1. Planning and Preparation
Before embarking on the installation, careful planning and preparation are crucial for a smooth and successful project. The first step involves gathering the necessary tools and materials. This includes a level, tape measure, tile cutter, grout float, trowel, bucket, sponge, mixing tub, safety glasses, gloves, and of course, the shower wall tile and mortar.
Next, determine the layout and pattern of the tile installation. Consider the size and shape of the shower stall and the desired aesthetic. Measure the walls accurately and mark out the tile placement. For a visually appealing finish, ensure that the tile lines align with the showerhead, fixtures, and any existing features in the bathroom.
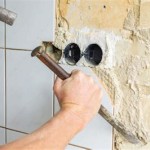
Prepare the shower walls for tile installation by removing any existing fixtures or trim. Thoroughly clean the surface with a degreaser to remove dirt, grime, and any residues that might affect the adhesion of the mortar. Ensure the surface is smooth and even, as any imperfections will be noticeable after the tiles are laid.
2. Installing the Tile
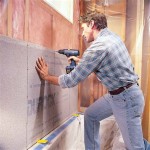
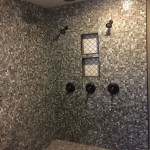
With the preparation complete, you can begin installing the tile. Start at a corner or a reference point, ensuring the first tile is perfectly level and plumb. Apply a thin layer of mortar to the wall using a trowel, creating a smooth and even bed for the tile. Use a notched trowel to create grooves in the mortar, which will help with drainage and prevent air pockets.
Carefully place the tile onto the prepared mortar bed, pressing firmly to ensure good adhesion. Use spacers between the tiles to maintain consistent grout lines. Level the tile with a level and adjust as needed. Continue installing the tiles in rows, ensuring that each tile is perfectly aligned and level with the previous one.
When installing tile around corners, cut the tiles to fit using a tile cutter. For intricate cuts, consider using a wet saw for precise and clean edges. As you work, regularly check the overall level and alignment, making any necessary adjustments along the way. Once the tiles are installed, allow them to dry completely before moving on to the next step.
3. Grouting and Sealing
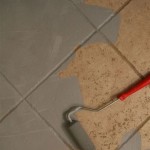
After the tiles have dried, it's time to grout the joints between the tiles. Mix the grout according to the manufacturer's instructions, ensuring a smooth and consistent consistency. Use a grout float to apply the grout to the joints, working at a 45-degree angle to ensure the grout fills the gaps completely.
Remove any excess grout with a damp sponge, wiping in a diagonal direction to prevent smearing. Once the grout has set slightly, use a grout sponge to clean the tile surface, removing any remaining residue. Allow the grout to cure completely before applying sealant.
Apply a sealant to the grout lines to protect them from water penetration and staining. This will help maintain the appearance and longevity of your shower wall tile. Allow the sealant to dry completely before using the shower.
4. Finishing Touches
With the grouting and sealing complete, your bathroom shower wall tile installation is nearing completion. To create a polished look, replace any fixtures or trim removed during preparation. Caulk any gaps between the tile and the surrounding surfaces to prevent water infiltration and enhance the overall aesthetics.
Enjoy your newly installed bathroom shower wall tile! The project may seem daunting, but with careful planning, preparation, and attention to detail, you can achieve a professional-looking finish that will elevate your bathroom's style and functionality.

The Complete Guide To Installing Tile On Shower Or Bathtub Walls

How To Install A Shower Tile Wall Bathroom

How To Prep And Install Diy Bathroom Shower Tile Lowe S

Part 1 How To Install Tile On Shower Tub Wall Step By

19 Pro Tips On Shower Tile Installation

Shower Tile Installation Step By Four Generations One Roof

Shower Tile Installation Step By Four Generations One Roof

Shower Tile Installation Step By Four Generations One Roof

How To Tile A Bathroom Shower Walls Floor Materials 100 Pics Pro Tips

Tiling A Walk In Shower Chapter 6 Wall Tile Installation Jlc
Related Posts