How To Install A Tile Shower Floor Drain
Installing a shower floor drain is a critical step in any tile shower construction project. A properly installed drain ensures effective water drainage, preventing leaks and water damage. This process requires careful planning, precision, and adherence to specific steps to achieve a watertight and durable result. This article provides a comprehensive guide to installing a tile shower floor drain, covering everything from selecting the right drain type to the final tiling process.
Before commencing any work, it is crucial to understand local plumbing codes and regulations. These codes often dictate specific requirements for drain placement, pipe size, and sealing methods. Failure to comply with these regulations can result in costly rework and potential fines. Contacting a local building inspector or a qualified plumber is recommended to ensure compliance.
The installation process can be broken down into several key stages: preparation, drain assembly and connection, waterproofing, mortar bed creation, and finally, tiling. Each stage requires meticulous attention to detail to ensure the long-term performance of the shower floor drain.
Selecting the Right Shower Drain
Choosing the appropriate shower drain is a crucial first step. Several types of shower drains are available, each with its own advantages and disadvantages. The most common types include standard shower drains, linear drains, and Schluter Kerdi drains. Each drain type requires a slightly different installation method.
Standard shower drains are typically round or square and are connected to a drainpipe using a clamping mechanism or a solvent weld. These drains are relatively inexpensive and easy to install, making them a popular choice for many homeowners. However, they often require more cuts in the tiles to accommodate the shape of the drain.
Linear drains, also known as trough drains, are long and rectangular drains that are typically installed along a wall. These drains offer a sleek and modern look and can accommodate a larger volume of water. Linear drains also allow for the use of larger tiles with fewer cuts, simplifying the tiling process. They are generally more expensive than standard drains due to their increased complexity.
Schluter Kerdi drains are part of a comprehensive waterproofing system designed to integrate seamlessly with Schluter’s Kerdi membrane. These drains feature a special flange that is bonded to the Kerdi membrane using thin-set mortar, creating a watertight seal. This approach simplifies the waterproofing process and is often preferred by professional tile installers. The Kerdi system is known for its reliability and longevity.
Consider the overall design of the shower, the desired flow rate, and the budget when selecting a shower drain. Matching the drain to the desired tile size and aesthetic is also an important factor. Smaller mosaic tiles often work best with standard drains, whereas larger format tiles might be better suited to linear drains.
Preparing the Subfloor and Drain Connection
Prior to installing the shower drain, the subfloor must be properly prepared. The subfloor should be clean, level, and structurally sound. Any loose or damaged areas should be repaired or replaced before proceeding. Remove any debris, paint, or coatings that could interfere with the adhesion of the mortar bed and waterproofing membrane.
The drainpipe must be properly sized and positioned to align with the shower drain. Ensure that the drainpipe extends slightly above the subfloor to allow for proper connection to the drain. Use appropriate fittings and couplings to create a secure and watertight connection. Apply pipe dope or Teflon tape to the threads of the fittings to prevent leaks. The drainpipe should be supported adequately to prevent it from moving or shifting during the installation process.
For standard shower drains, the drain body is typically connected to the drainpipe using a clamping mechanism and some kind of waterproofing agent like plumbers putty or silicone caulk. Follow the manufacturer's instructions carefully to ensure a proper seal. For solvent weld drains, use the appropriate primer and solvent cement to create a strong and watertight bond. Allow the solvent cement to fully cure before proceeding. For Schluter Kerdi drains, the drain flange is attached to the drainpipe using a clamping mechanism, and the membrane is bonded to the flange with thin-set mortar.
After connecting the drain to the drainpipe, test the connection for leaks by running water through the drain. Carefully inspect the connections for any signs of leaks and make any necessary adjustments. This step is important to identify and correct any problems early in the installation process before the mortar bed and tiling are installed. It is recommended to do this test for at least 15 minutes.
Waterproofing and Mortar Bed Installation
Waterproofing is a critical step in shower construction. Failure to properly waterproof the shower can result in leaks, mold growth, and structural damage. Several waterproofing methods are available, including liquid membranes, sheet membranes, and integrated systems like the Schluter Kerdi system. Select a waterproofing method that is compatible with the chosen shower drain and tiling materials.
Liquid membranes are applied in multiple coats to create a seamless waterproof barrier. Follow the manufacturer's instructions carefully to ensure proper application and coverage. Pay particular attention to corners, seams, and penetrations, as these areas are most vulnerable to leaks. Allow the liquid membrane to fully cure before proceeding.
Sheet membranes are pre-fabricated sheets that are bonded to the subfloor using thin-set mortar. These membranes offer a consistent and reliable waterproof barrier. Overlap the seams and seal them with a seam sealant to ensure a watertight seal. Sheet membranes can be more challenging to install than liquid membranes, particularly in complex shower designs.
The Schluter Kerdi system provides an integrated waterproofing solution that is specifically designed for tile showers. The Kerdi membrane is bonded to the subfloor and walls using thin-set mortar, creating a seamless and watertight barrier. The Kerdi system also includes pre-formed corners, curbs, and niches to simplify the waterproofing process.
After waterproofing the shower floor, install a mortar bed to create a sloped surface that directs water towards the drain. The mortar bed should be made of a mixture of Portland cement, sand, and water. The slope should be approximately ¼ inch per foot to ensure proper drainage. Use a level and straightedge to ensure that the slope is consistent and even.
The mortar bed should be approximately 1 ½ to 2 inches thick at the drain and slightly thicker at the edges of the shower floor. Compact the mortar bed firmly and allow it to cure for at least 24 hours before proceeding. This allows the mortar to harden and cure properly, providing a stable base for the tile.
Some installers prefer to use a pre-sloped shower pan, which eliminates the need to create a mortar bed. These pans are made of lightweight materials and are designed to provide a consistent slope towards the drain. Pre-sloped shower pans can save time and effort, but they may not be suitable for all shower designs.
Allow the mortar bed to fully cure before proceeding with tiling. The curing process can take several days, depending on the temperature and humidity. Keep the mortar bed moist during the curing process to prevent it from cracking. Covering the mortar bed with plastic sheeting is one way to retain moisture.
Tiling and Grouting
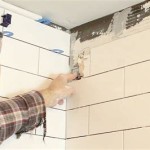
Once the mortar bed is fully cured, tiling can begin. Select a tile that is appropriate for shower floors and install it using thin-set mortar. Apply the mortar evenly to the back of the tile and press it firmly into the mortar bed. Use tile spacers to maintain consistent grout lines.
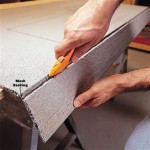
Begin tiling at the center of the shower floor and work outwards. This ensures that the tiles are evenly distributed and that any cuts are made at the edges of the shower floor. Use a tile saw to make accurate cuts around the drain and at the edges of the shower floor.
When tiling around the drain, ensure that the tiles slope slightly towards the drain to facilitate water drainage. Use a tile nipper to make small adjustments to the tile edges to achieve a smooth and consistent slope. Ensure that the tile edges are flush with the drain flange or grate.
After the tile has been installed, allow the thin-set mortar to cure for at least 24 hours before grouting. This allows the mortar to fully harden and bond the tiles to the mortar bed.
Choose a grout that is specifically designed for wet environments, such as epoxy grout or cement-based grout with a mildew inhibitor. Epoxy grout is more expensive than cement-based grout but is more resistant to water damage and staining. Cement-based grout is more porous and may require regular sealing to prevent water penetration.
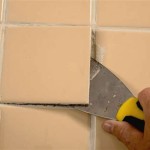
Apply the grout evenly to the grout lines using a grout float. Press the grout firmly into the grout lines to ensure that they are completely filled. Remove excess grout from the tile surface using a damp sponge.
After the grout has dried, clean the tile surface with a grout haze remover. This will remove any remaining grout residue and leave the tile surface clean and polished. Allow the grout to fully cure before using the shower. The curing process can take several days, depending on the type of grout used.
Seal the grout lines with a grout sealer to protect them from water damage and staining. Apply the sealer evenly to the grout lines using a brush or applicator. Allow the sealer to dry completely before using the shower. Reapply the grout sealer periodically to maintain its effectiveness.
Installing a tile shower floor drain requires careful planning, precision, and attention to detail. By following these steps and adhering to local plumbing codes, a leak-proof and durable shower floor can be created. It is always recommended to consult with a qualified professional if unsure about any aspect of the installation process.

3 Shower Pan Choices For A Solid Tile Floor Installation Fine Homebuilding

How To Build A Tile Shower Floor Pan Liner And Drain Diy

The Right Way To Install Shower Pan Liners Fine Homebuilding

The Tile Journal Of Hamilton In Woodstock Ga

Here S How Install A New Shower Stall With Tile Floor

Tile Shower Pan Dusche Badezimmer Grundriss Badezimmerideen

Let S Install A Linear Shower Drain

Site Built Shower Pans Fine Homebuilding

How To Install A Linear Shower Drain Tile Pro Depot

How To Build A Tile Shower Floor Pan Liner And Drain Diy
Related Posts