Installing a tile shower floor is a great way to make your bathroom look more stylish and luxurious, but it can seem like a daunting task. With careful planning and some simple tools, you can complete your tile shower floor installation with ease. Here is a step-by-step guide to help you get started.
First, measure the area of your shower floor to determine the size and shape of the tiles you will need. Once you have the measurements, you can purchase the appropriate tiles for your project. Make sure to factor in any cuts you may need to make for the tiles to fit correctly.
Next, you will need to prepare the area for installation. Start by removing the existing shower floor and any other materials that are in the way. Make sure to clean the area thoroughly to remove all dirt and debris before proceeding. Once the area is clean and ready to go, you can begin laying down the tile.
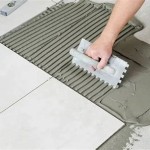
Now, it’s time to start laying the tiles. Begin by laying down a layer of thin-set mortar over the subfloor. Then place the tiles one at a time onto the mortar, using a trowel to press them down and make sure they are secure. Once the tiles are all in place, use a level to make sure the tiles are all even before moving on.
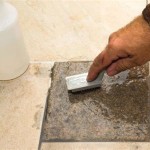
Finally, the last step is to grout the tiles. Start by mixing the grout and spreading it over the tiles with a rubber float. Make sure to push the grout into the joints between the tiles, then use a damp sponge to wipe away any excess grout. Allow the grout to dry completely before using the shower floor.
Installing a tile shower floor may seem like a big job, but with the right preparation and tools, it is an achievable task. By following these simple steps, you can create a beautiful and functional tile shower floor in no time.


Related Posts


