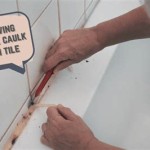
How to Fix Broken Wall Tiles in the Bathroom: A Step-by-Step Guide
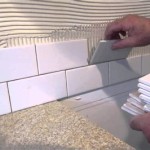
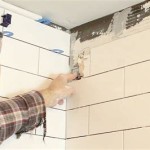
Maintaining a pristine bathroom is essential for both aesthetics and hygiene. However, accidents happen, and it's not uncommon for wall tiles to become cracked or chipped. While it may seem like a daunting task, fixing wall tiles in the bathroom is a relatively straightforward process that can be accomplished with the right tools and a little patience. ### Essential Tools and Materials Before you begin, gather the necessary tools and materials: * Flathead screwdriver or putty knife * Hammer or utility knife * Grout saw or multi-tool * New wall tile * Tile adhesive * Grout * Sponge or grout float * Bucket and water ### Step 1: Remove the Damaged Tile * Use the flathead screwdriver or putty knife to gently pry up the damaged tile from one corner. * Be careful not to apply too much force, as you might damage the surrounding tiles. * If the tile is firmly attached, use the hammer or utility knife to score around the edges and then pry it up. ### Step 2: Clean the Surface * Once the damaged tile is removed, use the grout saw or multi-tool to remove any remaining grout or adhesive from the wall surface. * Wipe down the area with a damp sponge or cloth to ensure it's clean and free of debris. ### Step 3: Apply Tile Adhesive * Spread a thin layer of tile adhesive onto the back of the new tile using a notched trowel. * Ensure the adhesive is evenly distributed and covers the entire surface. ### Step 4: Install the New Tile * Carefully align the new tile with the surrounding tiles. * Press down firmly on the tile to secure it in place. * Use a spacer or level to ensure the tile is level with the others. ### Step 5: Apply Grout * Prepare the grout according to the manufacturer's instructions. * Using a sponge or grout float, apply the grout between the tiles. * Press the grout into the joints, ensuring it fills the gaps completely. ### Step 6: Remove Excess Grout * Once the grout has dried slightly, use a damp sponge to remove any excess grout from the surface of the tiles. * Rinse the sponge frequently to prevent smearing. ### Step 7: Clean and Seal * Allow the grout to cure completely, which usually takes several hours to a day. * Once cured, clean the tiles with a damp cloth to remove any remaining grout residue. * Apply a sealant to the grout joints to prevent stains and moisture damage. ### Tips for Success * Use tiles that are similar in size and color to the existing tiles. * Allow the adhesive and grout to dry completely before using the bathroom. * If the damaged tile is large or the area is extensive, it's best to seek professional help from a qualified tiler. * Regular cleaning and maintenance will help keep your bathroom tiles looking their best for years to come.
How To Fix Shower Tiles Falling Off Wall Diy

Repair Fallen Tile Reinstall Shower With Simple Fix Re Install Bath No Grout

How To Remove Bathtub Shower Wall Tiles

How To Install Wall Tile In Bathroom Howtospecialist Build Step By Diy Plans

How To Tile A Bathroom Wall With Wickes

How To Install Bathroom Wall Tile The Rta

Part 1 How To Install Tile On Shower Tub Wall Step By

How To Prepare Uneven Walls And Floors Tile

How To Quickly Repair Bathroom Shower Tiles 6 Steps

Bathroom Floor Tiles Install And Wall Design
Related Posts

