How To Fix Loose Tiles In Shower
Loose tiles in a shower can quickly escalate from a minor annoyance to a significant problem, leading to water damage, mold growth, and costly repairs. Addressing the issue promptly and effectively is crucial for maintaining the structural integrity and aesthetic appeal of the shower enclosure. This article provides a comprehensive guide on how to identify loose tiles, the reasons behind their occurrence, and the step-by-step process for repairing them.
Identifying Loose Tiles and Assessing the Damage
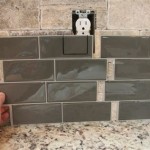
The initial step in resolving loose tile issues involves accurate identification and thorough assessment. A visual inspection of the shower walls and floor is paramount. Look for tiles that appear shifted, cracked, or discolored. Pay close attention to grout lines, as crumbling or missing grout often indicates underlying problems. To physically check for looseness, gently tap each tile with a rubber mallet or the handle of a screwdriver. A hollow sound signals that the tile has detached from the substrate. Mark any loose tiles for easy reference during the repair process.
Once loose tiles are identified, evaluate the extent of the damage. Check adjacent tiles for similar signs of looseness or damage. Probe the grout lines around the affected area to determine the condition of the surrounding grout. If multiple tiles are loose or if the substrate behind the tiles is visibly damaged (e.g., crumbling cement board, rotting wood), the repair process may be more extensive and require professional assistance. Document the damage with photographs for insurance purposes or when seeking professional advice.
Furthermore, it is crucial to identify the source of the moisture that likely caused the tile detachment. Examine the showerhead, faucet, and grout lines for leaks. Ensure adequate ventilation in the bathroom to minimize moisture buildup. Addressing the underlying cause of the problem is essential to prevent recurrence after the repairs are completed.
Understanding the Causes of Loose Shower Tiles
Several factors can contribute to tiles becoming loose in a shower environment. Water intrusion is a primary culprit. Over time, water can seep through cracked grout or damaged sealant, penetrating the substrate behind the tiles. This constant exposure to moisture weakens the adhesive bond between the tile and the substrate, eventually leading to detachment.
Another common cause is improper installation. If the tiles were not correctly installed initially, or if the wrong type of adhesive was used, the bond may not be strong enough to withstand the constant exposure to water and temperature fluctuations in a shower. The substrate must also be properly prepared before tile installation. A dirty, uneven, or unstable substrate will prevent the adhesive from bonding effectively.
Thermal expansion and contraction can also play a role. As the shower is used, the tiles and substrate undergo cycles of heating and cooling. This repeated expansion and contraction can stress the adhesive bond, causing it to weaken and eventually fail. The type of tile used, the quality of the adhesive, and the overall design of the shower system all contribute to how well the tiles withstand these thermal stresses.
Finally, physical impact can loosen tiles. Dropping heavy objects on the shower floor or bumping into the walls can crack tiles or weaken the adhesive bond. While this is less frequent than water damage or improper installation, it is still a potential cause to consider.
Step-by-Step Guide to Repairing Loose Shower Tiles
Repairing loose shower tiles involves several steps, from removing the damaged tiles to applying fresh adhesive and grout. Safety is paramount; wear safety glasses and gloves throughout the process.
1. Preparing the Area: Before commencing any repair work, protect the surrounding area by covering the shower floor and nearby fixtures with drop cloths. This will prevent debris and adhesive from damaging the surfaces. Ensure adequate ventilation in the bathroom by opening windows or using a fan. Gather all the necessary tools and materials, including a utility knife, grout removal tool, small pry bar or chisel, rubber mallet, notched trowel, sponge, bucket, adhesive, grout, and sealant.
2. Removing the Loose Tile(s): Use a utility knife to carefully score the grout lines around the loose tile(s). This will help to prevent damage to adjacent tiles during removal. Employ a grout removal tool or a specialized grout saw to remove the grout surrounding the tile(s). Work slowly and carefully to avoid chipping or cracking the neighboring tiles. Once the grout is removed, use a small pry bar or chisel to gently lift the loose tile(s) from the substrate. Be prepared for resistance; the tile adhesive may still be partially bonded. If necessary, use a rubber mallet to tap the pry bar or chisel to loosen the tile. Clean the back of the removed tile and the substrate, removing old adhesive, grout, and debris with a scraper or wire brush.
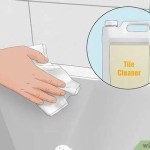
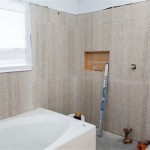
3. Preparing the Substrate: Inspect the substrate for any signs of damage or deterioration. Remove any loose or crumbling material. If the substrate is damaged, it may need to be repaired or replaced before proceeding. Small cracks can be filled with a patching compound. If the substrate is severely damaged, consider consulting a professional. Clean the substrate thoroughly with a damp sponge to remove any dust or debris. The surface should be clean, dry, and free of any contaminants that could interfere with the adhesive bond.
4. Applying Adhesive and Setting the Tile(s): Select an appropriate thin-set mortar or tile adhesive designed for wet environments. Follow the manufacturer's instructions for mixing the adhesive. Using a notched trowel, apply a thin, even layer of adhesive to the back of the tile(s). The notched trowel will create ridges in the adhesive, providing a better bond. Press the tile(s) firmly into place on the prepared substrate. Ensure that the tile(s) are level with the surrounding tiles. Use tile spacers to maintain consistent grout lines. Gently tap the tile(s) with a rubber mallet to ensure proper adhesion and alignment. Remove any excess adhesive from the grout lines with a damp sponge. Allow the adhesive to dry completely according to the manufacturer's recommendations, typically 24-48 hours.
5. Applying Grout: Once the adhesive is fully cured, mix the grout according to the manufacturer's instructions. Apply the grout to the grout lines using a grout float. Work the grout into the joints with a diagonal motion, ensuring that they are completely filled. Remove any excess grout from the tile surfaces with the grout float. Allow the grout to set for a few minutes, then use a damp sponge to wipe away the excess grout from the tile surfaces. Rinse the sponge frequently to avoid smearing the grout. After the initial cleaning, allow the grout to dry slightly, then use a clean, dry cloth to buff the tile surfaces to remove any remaining grout haze. Allow the grout to cure fully, typically 48-72 hours, before exposing the shower to water.
6. Sealing the Grout: After the grout has fully cured, apply a grout sealer to protect it from moisture and stains. Follow the manufacturer's instructions for application. Apply the sealer evenly to the grout lines using a brush or applicator. Allow the sealer to penetrate the grout for the recommended time, then wipe away any excess with a clean cloth. Sealing the grout will help to prevent water from seeping behind the tiles and causing future problems.
7. Applying Sealant: Apply a bead of silicone sealant along the edges where the tiles meet the shower pan or wall. This will create a watertight seal and prevent water from penetrating behind the tiles. Choose a sealant that is specifically designed for use in wet environments and that is resistant to mold and mildew. Apply the sealant evenly and smoothly, using a sealant tool or your finger to create a neat finish. Allow the sealant to cure fully before exposing the shower to water.
By following these steps carefully, most loose shower tiles can be successfully repaired, preventing further damage and extending the life of the shower enclosure. However, in cases of extensive damage or uncertainty, seeking professional assistance is always recommended.

Repair Fallen Tile Reinstall Shower With Simple Fix Re Install Bath No Grout

How To Fix Shower Tiles Falling Off Wall Diy

How To Fix Loose Shower Tiles Renovator Secrets

How To Fix A Loose Tile In The Bathroom Floor

How To Prevent Expensive Bathroom Shower Tile And Grout Repair Promaster Home Handyman

How To Repair Broken Tile Part One

How To Repair Tile Falls Off Shower Wall Ceramic D I Y

Loose Ed Tiles

How To Diy Repair Your Leaking Shower Without Removing Tiles United Trade Links

How To Replace A Broken Tile Soap Dish In Shower
Related Posts