How To Fix Loose Floor Tiles Without Removing Them
Loose floor tiles represent a common household problem, often leading to unsightly gaps, tripping hazards, and potential damage to the subfloor. Addressing this issue promptly prevents further deterioration and costly repairs. While complete tile replacement presents one solution, several methods exist to fix loose floor tiles without the need for removal, saving time and resources. This article explores these non-invasive techniques, providing a comprehensive guide for homeowners and professionals alike.
The underlying cause of loose tiles usually stems from inadequate adhesion between the tile and the subfloor. This can be due to several factors, including improper installation techniques, insufficient mortar or adhesive, movement in the subfloor, or moisture damage compromising the bonding agent. Identifying the extent of the problem and the specific cause is crucial before attempting any repair.
Before starting any repair work, it is essential to gather the necessary tools and materials. These may include a utility knife, grout removal tool (if necessary), vacuum cleaner, thin-set mortar adhesive, adhesive applicator (syringe or bottle), spacers, rubber mallet, damp sponge, and safety glasses. Choosing the correct type of adhesive is crucial for a lasting repair. Consider the type of tile (ceramic, porcelain, stone) and the environment (wet or dry) when selecting the adhesive.
Assessing the Damage and Preparing the Area
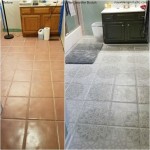
The initial step involves a thorough inspection of the affected area. Identify all loose tiles by gently tapping on each tile and listening for hollow sounds, which indicate a lack of adhesion. Mark these tiles for easy identification during the repair process. Evaluate the condition of the surrounding grout. If the grout is cracked, crumbling, or missing, it needs to be removed to provide access for the adhesive. Using a grout removal tool or a utility knife, carefully remove the grout around the loose tiles, taking care not to damage the adjacent tiles.
Once the grout is removed, thoroughly clean the area around and beneath the loose tiles. Use a vacuum cleaner to remove any loose debris, dust, and dirt that may be present. This ensures optimal adhesion of the new adhesive. Pay particular attention to cleaning the edges of the loose tiles and the exposed subfloor beneath. A slightly damp sponge can be used to wipe down the surfaces, but ensure they are completely dry before applying the adhesive. Residual moisture can weaken the bond and compromise the repair.
Inspect the subfloor for any signs of damage, such as cracks, rot, or unevenness. Address any significant subfloor issues before proceeding with the tile repair. Minor cracks can be filled with a suitable patching compound, while more extensive damage may require professional attention. A stable and level subfloor is essential for a successful and long-lasting tile repair.
Applying Adhesive Without Tile Removal
Several methods exist for applying adhesive beneath a loose tile without removing it. One common technique involves using a syringe or a specialized adhesive applicator bottle with a narrow nozzle. This allows for precise injection of the adhesive into the voids beneath the tile. Fill the syringe or applicator bottle with the chosen thin-set mortar adhesive. Carefully insert the needle or nozzle into the grout lines surrounding the loose tile, or into any existing cracks or gaps in the tile itself.
Slowly and steadily inject the adhesive beneath the tile, being careful not to overfill. Observe the tile as you inject the adhesive. You should see it gradually rise and settle back into its original position. Avoid applying excessive pressure, which could damage the tile or the subfloor. If adhesive starts to seep out from the grout lines or cracks, stop injecting and wipe away the excess immediately with a damp sponge. Continue injecting adhesive until the tile feels secure and no longer moves when pressed.
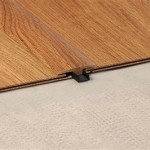
Another method involves carefully lifting the edges of the loose tile with a thin scraper or putty knife. Once a small gap is created, use a small trowel or spatula to apply adhesive beneath the tile. This method requires more dexterity and care to avoid damaging the tile. Apply a thin and even layer of adhesive to the subfloor and the underside of the tile. Press the tile firmly back into place and remove any excess adhesive that may squeeze out from the edges.
For larger or more uneven gaps, consider using shims or spacers to support the tile while the adhesive cures. Insert the shims or spacers around the edges of the tile to maintain its level and prevent it from sinking or shifting. Ensure that the shims are evenly distributed and do not apply excessive pressure to any one point on the tile. The shims should be removed after the adhesive has fully cured, as per the manufacturer's instructions.
Securing and Finishing the Repair
After applying the adhesive and securing the tile, it is crucial to allow sufficient time for the adhesive to cure properly. The curing time varies depending on the type of adhesive used and the ambient temperature and humidity. Consult the manufacturer's instructions for the recommended curing time. During the curing process, avoid walking on or applying any pressure to the repaired tile. This can disturb the adhesive and compromise the bond.
Once the adhesive has fully cured, remove any shims or spacers that were used to support the tile. Inspect the grout lines surrounding the repaired tile. If any grout was removed or damaged during the repair process, it needs to be replaced. Mix a small batch of grout according to the manufacturer's instructions. Apply the grout using a grout float or a similar tool, pressing it firmly into the grout lines. Remove any excess grout from the tile surface with a damp sponge.
Allow the grout to dry and cure according to the manufacturer's instructions. After the grout has cured, seal the grout lines with a grout sealer to protect them from moisture and stains. This will help prevent future problems and prolong the life of the repaired tile. Apply the grout sealer with a brush or applicator, following the manufacturer's instructions. Wipe away any excess sealer from the tile surface with a clean cloth. Allow the sealer to dry completely before exposing the repaired area to water or heavy traffic.
Finally, clean the entire area with a mild detergent and water to remove any remaining residue or debris. Inspect the repaired tile for any imperfections or unevenness. If necessary, use a fine-grit sandpaper to smooth out any rough edges or uneven surfaces. Apply a coat of tile polish or sealant to the repaired tile to restore its shine and protect it from future damage. Regular cleaning and maintenance will help prevent future problems and keep the floor looking its best.

How To Fix A Loose Floor Tile Without Removing It

Fixing Loose Floor Tiles And Why They In New Builds

How To Fix Loose Hollow Tile Floors Don T Remove Or Replace Just Drill Fill

How To Fix A Hollow Tile Without Removing The Step By

Repairing Loose Hollow Tiles On Underfloor Heated Areas Tsj

Method Surprised 50 Year Old Tiler Fix Loose Tiles Without Removing

Why Are My Floor Tiles Loose And How To Fix This A

Tile Repair Loose Tiles Part 1 How To Identify And The Proper Way Remove Them
.png?strip=all "How To Fix Loose Or Broken Ceramic Floor Tiles")
How To Fix Loose Or Broken Ceramic Floor Tiles

How To Repair Loose And Hollow Floor Tiles Without Removing Them
Related Posts