How To Fix Loose Ceramic Floor Tiles Without Removing Them
Loose ceramic floor tiles can be a significant nuisance, detracting from a room’s aesthetic appeal and potentially posing a safety hazard. Addressing this issue promptly is essential to prevent further damage and potential injuries. Fortunately, in many cases, it is possible to rectify loose ceramic floor tiles without the disruptive and costly process of removing and replacing them. This article will delineate several methods for effectively addressing loose tiles while minimizing disturbance to the surrounding floor.
Assessing the Extent of the Problem
Before attempting any repair, a thorough assessment of the situation is paramount. This involves identifying all loose tiles, determining the degree of looseness, and inspecting the surrounding grout and subfloor. Gently pressing down on each tile will reveal those that are unsecured. Note the extent to which each tile moves; some may only exhibit slight movement, while others may feel completely detached. A tapping sound often indicates a void beneath the tile. Additionally, examine the grout lines surrounding the loose tiles for cracks or crumbling, as this can contribute to the problem and will need to be addressed during the repair process. Any signs of water damage, such as discoloration or mold, should also be noted, as they may indicate a more serious underlying issue that requires professional attention.
The type of subfloor beneath the ceramic tiles also plays a crucial role in determining the best repair approach. Common subfloors include concrete, plywood, and existing tile. Concrete subfloors, while generally stable, can sometimes develop cracks or delamination. Plywood subfloors are susceptible to moisture damage, which can lead to warping and weakening. Existing tile subfloors may suffer from adhesive failure. Understanding the subfloor composition and condition will help in selecting the appropriate repair materials and techniques.
A visual inspection for any debris or obstructions beneath the loose tiles is also necessary. This can sometimes be accomplished by carefully lifting an edge of the tile and peering underneath with a flashlight. Any loose debris, such as crumbled grout or old adhesive, should be removed to ensure a clean surface for the new adhesive to bond to.
Methods for Repairing Loose Ceramic Tiles
Several methods can be employed to repair loose ceramic floor tiles without removal, each suited to different degrees of looseness and subfloor types. The following sections will explain some of these techniques in detail.
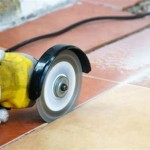
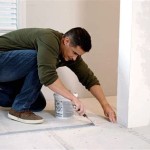
1. Grout Removal and Injection of Adhesive: This method is suitable for tiles that exhibit slight to moderate looseness and involves injecting adhesive beneath the tile through the grout lines. The initial step requires carefully removing the grout surrounding the affected tile(s). This can be achieved using a grout saw, oscillating multi-tool with a grout removal blade, or a specialized grout removal tool. Exercise caution to avoid damaging the adjacent tiles during this process. Once the grout has been removed, thoroughly clean the exposed area, removing any loose debris or residue using a vacuum cleaner or brush. This step is crucial for ensuring proper adhesion of the injected adhesive.
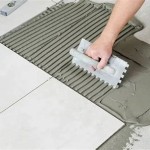
Next, select a suitable adhesive for ceramic tile repair. Options include thin-set mortar, epoxy grout, or specialized tile repair adhesives available in squeeze tubes or cartridges. For smaller gaps and minor looseness, a squeeze tube applicator is often sufficient, allowing for precise application. For larger gaps, a caulking gun may be necessary to inject the adhesive more effectively. Insert the nozzle of the adhesive applicator into the grout lines and carefully inject the adhesive beneath the tile, working around its perimeter. Avoid overfilling, as this can cause the tile to protrude above the surrounding surface. After injecting the adhesive, gently press down on the tile to ensure it is firmly seated and level with the adjacent tiles. Remove any excess adhesive that may squeeze out from the grout lines with a damp sponge. Allow the adhesive to cure according to the manufacturer's instructions, typically 24-48 hours. Once the adhesive has fully cured, apply fresh grout to the grout lines, following the manufacturer's instructions for mixing and application. Use a grout float to press the grout into the joints, and then wipe away any excess with a damp sponge. Allow the grout to dry and then buff the tiles with a clean cloth to remove any remaining haze.
2. Injecting Adhesive Through Small Holes: This method provides a more direct approach for applying adhesive beneath the tile, particularly when the grout lines are narrow or difficult to remove. Using a drill with a small masonry bit (typically 1/8 inch or 3/16 inch), carefully drill one or two small holes through the grout lines at strategic locations around the loose tile. Exercise extreme caution to avoid drilling through the tile itself. Once the holes have been drilled, use a vacuum cleaner to remove any dust or debris from the holes and the surrounding area. As with the previous method, select a suitable adhesive for ceramic tile repair. Thin-set mortar mixed to a thin consistency, epoxy grout, or specialized tile repair adhesives can be used. Using a syringe or a small squeeze bottle with a narrow nozzle, carefully inject the adhesive through the drilled holes, ensuring that it spreads evenly beneath the tile. Gently press down on the tile to ensure it is firmly seated and level with the adjacent tiles. Remove any excess adhesive that may squeeze out from the holes or grout lines with a damp sponge. Allow the adhesive to cure according to the manufacturer's instructions. Once the adhesive has fully cured, fill the drilled holes with color-matched grout or epoxy to conceal them. Allow the grout to dry and then buff the tiles with a clean cloth.
3. Loose Tile Adjustment with Shims and Adhesive: Sometimes a loose tile might not only be loose, but also sitting slightly lower than its neighbors, creating a lip. This method addresses both issues simultaneously. Begin by carefully cleaning around the loose tile, removing any loose grout or debris. Next, use small shims, such as plastic tile spacers or thin pieces of cardboard, to gently lift the loose tile to the same level as the surrounding tiles. Place the shims strategically under the edges of the tile to achieve a level surface. Once the tile is properly aligned, follow the adhesive injection process described in the previous methods, either by removing grout or drilling small holes. Inject the adhesive beneath the tile, ensuring it fills the void created by the shims. Allow the adhesive to cure according to the manufacturer's instructions. After the adhesive has fully cured, carefully remove the shims. Fill the resulting gaps with grout or epoxy, matching the color of the existing grout. Allow the grout to dry and then buff the tiles with a clean cloth.
Key Considerations and Best Practices
Several key considerations should be kept in mind to ensure a successful and long-lasting repair. These include surface preparation, adhesive selection, and proper curing.
Surface Preparation: Adequate surface preparation is crucial for achieving a strong bond between the adhesive and the tile and subfloor. Before applying any adhesive, thoroughly clean the area beneath the loose tile, removing any loose debris, dust, or old adhesive residue. A vacuum cleaner or brush can be used for this purpose. If necessary, lightly dampen the surface with a sponge to remove any lingering dust particles. For concrete subfloors, consider applying a bonding agent to improve adhesion. Bonding agents are available at most hardware stores and are designed to create a stronger bond between concrete and adhesives. Ensure that the bonding agent is fully dry before applying the adhesive.
Adhesive Selection: Choosing the right adhesive is essential for a durable repair. Consider the type of subfloor, the size and weight of the tile, and the moisture conditions of the area. Thin-set mortar is a versatile option suitable for most ceramic tile repairs, particularly on concrete subfloors. Epoxy grout provides excellent water resistance and is ideal for areas prone to moisture, such as bathrooms or kitchens. Specialized tile repair adhesives offer convenient application and are often formulated for specific types of tiles and subfloors. Always refer to the manufacturer's instructions for proper mixing and application techniques.
Proper Curing: Allowing the adhesive and grout to cure properly is critical for achieving a strong and long-lasting repair. Follow the manufacturer's instructions for curing times, which can vary depending on the type of adhesive and grout used. Generally, allow at least 24-48 hours for the adhesive to fully cure before applying any weight or traffic to the repaired area. Avoid exposing the repaired area to moisture during the curing process. For grout, follow the manufacturer's instructions for sealing, which can help protect the grout from staining and water damage.
In conclusion, repairing loose ceramic floor tiles without removing them is a feasible and often cost-effective solution. By carefully assessing the extent of the problem, selecting the appropriate repair method and materials, and adhering to best practices for surface preparation, adhesive application, and curing, it is possible to restore the integrity and appearance of the tiled floor. However, if the looseness is extensive, coupled with widespread grout damage, or if water damage is suspected beneath the tiles, consulting with a professional tile contractor is recommended.

How To Fix A Loose Floor Tile Without Removing It

Fixing Loose Floor Tiles And Why They In New Builds

Method Surprised 50 Year Old Tiler Fix Loose Tiles Without Removing

Repairing Loose Hollow Tiles On Underfloor Heated Areas Tsj

How To Fix Loose Hollow Tile Floors Don T Remove Or Replace Just Drill Fill

Why Are My Floor Tiles Loose And How To Fix This A
.png?strip=all "How To Fix Loose Or Broken Ceramic Floor Tiles")
How To Fix Loose Or Broken Ceramic Floor Tiles

Removing Popped Tiles And Putting Them Back Down

Floor Tiles Repairing Tubes Kits Syringes Fix A

Fixing S In Tile Without Replacing Them
Related Posts