How To Fix Grout In Shower Tiles
Shower grout, a crucial component in maintaining a waterproof and aesthetically pleasing bathroom, is often susceptible to damage over time. The constant exposure to water, humidity, cleaning products, and temperature fluctuations causes grout to crack, crumble, discolor, or even foster mold and mildew growth. Addressing damaged grout promptly is essential to prevent water penetration, which can lead to costly structural damage behind the tiles and contribute to unhealthy indoor air quality. This article provides a comprehensive guide on how to fix grout in shower tiles, encompassing preparation, removal, repair, and prevention strategies.
Identifying Grout Damage and Assessing the Scope of Work
Before embarking on any grout repair project, a thorough inspection is necessary to determine the extent of the damage. Minor imperfections, such as small cracks or discoloration affecting a limited area, may only require spot repairs. However, widespread crumbling, deep cracks, or significant mold infestation might indicate a more extensive problem, potentially necessitating the complete removal and replacement of the grout in the affected area. Consider these points when assessing the damage:
Cracks: Fine hairline cracks may seem innocuous, but they can allow water to seep behind the tiles. Larger, deeper cracks are a more immediate concern and should be addressed promptly.
Crumbling: Grout that is disintegrating or easily crumbles under pressure indicates significant deterioration and compromised structural integrity.
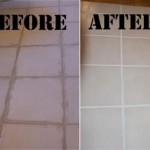
Discoloration: Stains and discoloration, particularly if they are persistent despite cleaning efforts, may indicate mold or mildew growth embedded within the grout.
Missing Grout: Areas where grout is entirely missing create direct pathways for water infiltration and must be addressed immediately.
Tile Looseness: Pay attention to any tiles that feel loose or wobbly. This could indicate that the grout has failed to provide adequate support and that water damage might have compromised the adhesive beneath the tiles.
Once the assessment is complete, gather the necessary tools and materials. The specific items required will depend on the type and extent of the repair. Common tools include a grout saw or oscillating tool with a grout removal blade, a utility knife, a stiff-bristled brush, sponges, buckets, safety glasses, a dust mask, and gloves. Necessary materials typically include grout, grout sealer, cleaning solutions (such as bleach or oxygen bleach diluted in water), and potentially tile adhesive if any tiles need re-setting.
Grout Removal Techniques
Removing damaged grout is a meticulous process that requires patience and care to avoid damaging the surrounding tiles. Several methods can be employed, each with its own advantages and disadvantages.
Grout Saw: A manual grout saw is a handheld tool with an abrasive blade designed to grind away grout. It is a relatively inexpensive option and provides good control, making it suitable for small areas or intricate patterns. However, it can be time-consuming and physically demanding to use, particularly for larger projects. When using a grout saw, apply consistent pressure and work along the grout line in short, overlapping strokes. Avoid pressing too hard, as this can scratch or chip the tiles.
Oscillating Tool with Grout Removal Blade: An oscillating tool equipped with a grout removal blade offers a more efficient and less physically strenuous alternative to a manual grout saw. The oscillating motion of the blade quickly removes grout without requiring excessive force. It is important to use a blade specifically designed for grout removal, as other types of blades may damage the tiles. When using an oscillating tool, hold it at a low angle and move it along the grout line in a controlled manner. Be careful not to apply too much pressure, as this can cause the blade to skip or jump, potentially damaging the surrounding tiles.
Utility Knife: A utility knife can be useful for removing loose or crumbling grout, especially in areas where the grout lines are very narrow or uneven. Carefully score along the edges of the grout line with the knife to loosen the grout, then use a small scraper or dental pick to remove the debris. This method is best suited for small, localized areas of damage.
Regardless of the method chosen, it is crucial to wear safety glasses and a dust mask to protect your eyes and respiratory system from grout dust. After removing the grout, thoroughly vacuum or sweep the area to eliminate any remaining debris.
Grout Repair and Application
Once the old grout has been removed, the area is ready for new grout application. Proper preparation and application techniques are crucial for achieving a durable and aesthetically pleasing result.
Cleaning the Joints: Before applying new grout, thoroughly clean the grout joints with a damp sponge and remove any remaining dust or debris. Ensure the joints are free of any residues from cleaning products.
Mixing the Grout: Prepare the grout according to the manufacturer's instructions. Most grout products are available in pre-mixed or powder form. If using powdered grout, add water gradually while mixing with a trowel or mixing stick until a smooth, consistent paste is achieved. The consistency should be similar to that of peanut butter. Avoid adding too much water, as this can weaken the grout and make it more prone to cracking.
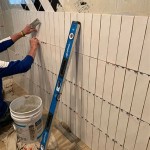
Applying the Grout: Use a grout float to apply the grout to the joints. Hold the float at a 45-degree angle and press the grout firmly into the joints, working diagonally across the tiles. Ensure that all joints are completely filled with grout. Remove excess grout from the tile surfaces with the float, again working diagonally. Wipe the tiles with a damp sponge to remove any remaining grout haze. Rinse the sponge frequently in a bucket of clean water.
Curing the Grout: Allow the grout to cure according to the manufacturer's instructions. This typically involves keeping the grout moist for a specified period of time, usually 24 to 72 hours. This can be achieved by misting the grout with water periodically or covering it with damp cloths. Proper curing is essential for the grout to achieve its full strength and durability.
Sealing the Grout: After the grout has fully cured, apply a grout sealer to protect it from water penetration and stains. Grout sealers are available in penetrating and surface-coating formulations. Penetrating sealers are absorbed into the grout pores, while surface-coating sealers form a protective layer on the surface of the grout. Choose a sealer that is appropriate for the type of grout used and follow the manufacturer's instructions carefully. Apply the sealer with a brush or applicator pad, ensuring that all grout lines are thoroughly coated. Wipe off any excess sealer from the tile surfaces with a clean cloth. Allow the sealer to dry completely before exposing the grout to water.
Preventative Measures for Grout Maintenance
Preventing grout damage is far more efficient and cost-effective than repeatedly repairing it. Implementing a few simple maintenance practices can significantly extend the lifespan of shower grout and maintain its appearance.
Regular Cleaning: Clean the shower regularly with a mild detergent and water to remove soap scum, dirt, and other debris. Use a stiff-bristled brush to scrub the grout lines. Avoid using abrasive cleaners, as these can damage the grout and make it more susceptible to staining.
Proper Ventilation: Ensure that the bathroom is well-ventilated to reduce humidity levels. Run the exhaust fan during and after showering to remove excess moisture. Consider opening a window to further improve ventilation.
Squeegee After Each Use: Use a squeegee to remove excess water from the shower walls and floor after each use. This will help to prevent the buildup of soap scum and mildew.
Address Leaks Promptly: Repair any leaks in the shower, faucets, or showerhead immediately. Leaks can contribute to water damage and promote mold growth in the grout.
Re-Sealing: Reapply grout sealer every one to two years, or as recommended by the manufacturer, to maintain its protective properties. This will help to keep water from penetrating the grout and staining it.
By following these guidelines, homeowners can effectively fix and maintain shower grout, ensuring a watertight and aesthetically pleasing bathroom environment for years to come.

How To Prevent Expensive Bathroom Shower Tile And Grout Repair Promaster Home Handyman

How To Remove And Replace Grout In A Shower Diy For Beginners

Is Ed Grout A Problem

Quick Fix Repair Ed Bathroom Grout

How To Prevent Expensive Bathroom Shower Tile And Grout Repair Promaster Home Handyman

How Do I Repair Ed Grout On Shower Walls Hometalk

How To Fix Grout S Diy Nonprofit Home Inspections

How To Fix Shower Tiles Falling Off Wall Diy

How To Fix Ing Grout Between Shower Bunnings Work Community

Can I Put New Grout Over My Old
Related Posts