How to Fix Broken Floor Tiles in the Bathroom: A Comprehensive Guide
Maintaining a bathroom in pristine condition requires attention to every detail, including the floor tiles. Broken or cracked tiles not only detract from the aesthetic appeal of your bathroom but also pose potential safety hazards. This guide will provide you with a comprehensive understanding of how to fix broken floor tiles in the bathroom, ensuring a seamless and visually pleasing finish.
Materials Required:
* Replacement tiles * Tile adhesive * Grout * Tile spacers * Trowel * Float * Grout sponge * Safety glassesStep-by-Step Instructions:
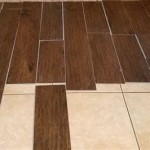
- Remove the Broken Tile: Carefully remove the broken tile using a hammer and chisel. Wear safety glasses for protection. Clean the area thoroughly to remove any remaining tile fragments or debris.
- Prepare the Surface: Level the surface of the subfloor using a thin layer of tile adhesive. Use a trowel to spread the adhesive evenly and create a smooth base for the new tile.
- Apply Tile Adhesive: Apply a thick layer of tile adhesive to the back of the replacement tile using a trowel. Be sure to spread the adhesive evenly and avoid creating air pockets.
- Place the New Tile: Position the replacement tile on the prepared surface and apply gentle pressure to ensure proper bonding. Use tile spacers to maintain consistent spacing between tiles.
- Grout the Tile: Once the adhesive has dried, mix grout according to the manufacturer's instructions. Apply the grout to the joints between tiles using a float. Fill the joints completely and remove any excess grout.
- Clean the Grout: After the grout has set, use a damp grout sponge to remove any haze or excess grout from the tiles. Rinse the sponge frequently to prevent the grout from staining the tiles.
- Seal the Grout: To protect the grout from moisture and stains, apply a grout sealer. Use a brush or sponge to apply the sealer to the joints and allow it to dry completely.
Tips:
* Choose replacement tiles that match the size, color, and texture of the existing tiles. * Allow the adhesive to dry completely before grouting. * Use a level to ensure the new tile is installed level with the surrounding tiles. * If the broken tile is located near the edge of the floor, consider removing a larger section of tiles to create a clean and seamless repair. * Wear safety glasses and ensure the work area is well-ventilated when using tools and chemicals.Conclusion:
Fixing broken floor tiles in the bathroom is a manageable task that can be completed with the right materials and techniques. By following the steps outlined in this guide, you can restore the beauty and functionality of your bathroom floor, ensuring a safe and aesthetically pleasing space for years to come.

How To Repair Ed Floor Tiles Without Replacing Them

Solved How To Repair Ed Chipped Tiles Surface Masters

How To Manage Ed Tile Joints Pidilite Roff
.png?strip=all)
How To Fix Loose Or Broken Ceramic Floor Tiles

5 Ways To Patch Tile

How To Repair Chipped Or Broken Tile And Replace Grout

Ed Bathroom Floor Tiles Is There A Way To Repair Hometalk

How To Fix Tile Problems Chips Scratches And S Walls Floors

Why Ed Tiles In Your Shower Are A Bad Sign Leaky Showers

Home Dzine Bathrooms Fix Chipped Or Ed Tiles
Related Posts


