How to Fix Basement Ceiling Tiles
Basement ceiling tiles, often made of mineral fiber or similar materials, can suffer damage from various sources, including water leaks, impacts, and general wear and tear. Addressing damaged tiles promptly not only improves the aesthetic appeal of the basement but also helps prevent further damage to the ceiling structure and potentially mitigates issues like mold growth. This article provides a comprehensive guide on how to identify, evaluate, and repair or replace damaged basement ceiling tiles.
Identifying the Problem
The first step in fixing basement ceiling tiles is to accurately identify the type and extent of the damage. Common issues include water stains, sagging, cracks, holes, and loose or missing tiles. A thorough inspection of the entire ceiling is crucial for an accurate assessment. Identifying the source of any water damage, if present, is paramount before attempting any repairs. Ignoring the underlying cause will only lead to a recurrence of the problem.
Water Stains: Water stains are usually indicative of a leak above the ceiling. The color and extent of the stain can provide clues about the severity and duration of the leak. Fresh, light-colored stains suggest a recent or ongoing leak, while dark, extensive stains indicate a long-standing or more severe issue. Check pipes, ductwork, and the foundation above the affected area for any signs of water intrusion.
Sagging Tiles: Sagging tiles can be caused by water absorption, excessive humidity, or a weakening of the suspension grid. Tiles that are visibly bowing or drooping are a clear sign of structural compromise. The grid system itself should also be inspected for any signs of rust, bending, or detachment from the ceiling joists.
Cracks and Holes: Cracks and holes can result from physical impacts, such as bumping furniture or tools against the ceiling. Small cracks might be repairable, but larger holes usually necessitate tile replacement. The edges of cracks and holes should be examined for any crumbling or flaking, which could indicate further degradation of the tile material.
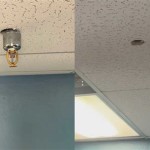
Loose or Missing Tiles: Loose tiles may be due to damaged grid clips or improper installation. Missing tiles obviously leave gaps in the ceiling, potentially exposing wiring, ductwork, or insulation. Addressing missing tiles promptly is important for maintaining the fire resistance and acoustic properties of the ceiling.
Once the type and extent of the damage have been identified, the necessary materials and tools can be gathered. This preliminary assessment is critical for a successful repair.
Preparing for the Repair
Proper preparation is essential for a safe and effective repair process. This involves gathering the necessary tools and materials, protecting the work area, and taking appropriate safety precautions.
Tools and Materials: The required tools and materials will vary depending on the type of repair being performed. However, a basic toolkit should include a utility knife (for trimming tiles), a tape measure, a level, safety glasses, gloves, a dust mask, a ladder or step stool, a putty knife (for patching small holes), and matching replacement tiles. For small repairs, patching compound or caulk might also be needed.
Protecting the Work Area: Before starting any work, cover the floor directly underneath the work area with drop cloths or plastic sheeting. This will protect the flooring from dust, debris, and potential spills. It is also advisable to move any furniture out of the immediate vicinity to prevent accidental damage.
Safety Precautions: Safety should be a top priority throughout the repair process. Wear safety glasses to protect the eyes from falling debris. A dust mask is essential for preventing the inhalation of airborne particles, especially when working with older tiles that may contain asbestos (consult a professional for testing and removal if asbestos is suspected). Gloves will protect the hands from dirt, dust, and potential irritants. Ensure the ladder or step stool is stable and properly positioned before climbing.
Proper preparation not only streamlines the repair process but also minimizes the risk of accidents and ensures a cleaner, more efficient outcome.
Repairing or Replacing Tiles
The method for repairing or replacing basement ceiling tiles depends on the nature and severity of the damage. Minor damage can often be repaired, while more significant damage usually necessitates tile replacement. The following sections outline the procedures for each scenario.
Repairing Minor Damage (Cracks and Small Holes): Small cracks and holes can often be repaired using patching compound or caulk. First, clean the area around the damage with a damp cloth to remove any loose debris. Use a putty knife to apply a thin layer of patching compound or caulk to the crack or hole, ensuring that it is completely filled. Smooth the surface with the putty knife to create a seamless finish. Allow the patching compound or caulk to dry completely according to the manufacturer's instructions. If necessary, lightly sand the repaired area with fine-grit sandpaper to blend it with the surrounding tile surface. If desired, the repaired area can be painted to match the color of the existing tiles.
Replacing Damaged Tiles: Replacing a damaged tile is a relatively straightforward process. First, locate the damaged tile and carefully lift it out of the suspension grid. This may require gently flexing the tile to disengage it from the grid clips. If the tile is stuck, use a utility knife to score along the edges to loosen it. Once the damaged tile is removed, inspect the grid system for any damage or corrosion. If the grid clips are broken or damaged, replace them before installing the new tile. Insert the new tile into the grid system, ensuring that it is properly aligned and securely seated. Gently push the tile up into the clips until it is flush with the surrounding tiles.
Addressing Water-Stained Tiles: While painting over water stains might seem like a quick fix, it is generally not recommended without addressing the underlying cause of the leak. Painting will only temporarily mask the stain, and the problem will likely recur if the leak persists. If the leak has been resolved and the tile is otherwise in good condition, it may be possible to paint the stained area. Use a stain-blocking primer to prevent the stain from bleeding through the paint. Apply two coats of primer, allowing each coat to dry completely before applying the next. Then, apply two coats of paint that matches the color of the existing tiles. Ensure the paint is specifically designed for use on ceiling tiles.
Dealing with Sagging Tiles: If the tiles are sagging due to excessive humidity, improving ventilation in the basement can help. Installing a dehumidifier or increasing airflow can reduce moisture levels and prevent further sagging. If the sagging is due to water damage, the source of the leak must be addressed and the damaged tiles replaced. In some cases, sagging can be caused by a weakening of the suspension grid. If this is the case, the grid system may need to be reinforced or replaced.
Cutting Replacement Tiles: Occasionally, replacement tiles may need to be cut to fit around pipes, ductwork, or other obstructions. Measure the area where the tile needs to be cut and mark the dimensions on the replacement tile. Use a utility knife and a straight edge to score the tile along the marked lines. Gently snap the tile along the scored lines. For more precise cuts, a drywall saw or a specialized tile cutter can be used. Always wear safety glasses when cutting tiles to protect your eyes from flying debris. Ensure the cut edges are clean and smooth before installing the tile.
Special Considerations for Asbestos: Older basement ceiling tiles may contain asbestos. Asbestos is a hazardous material that can cause serious health problems if inhaled. If you suspect that your ceiling tiles contain asbestos, do not attempt to remove or repair them yourself. Contact a qualified asbestos abatement professional to handle the removal and disposal of the tiles safely. Disturbing asbestos-containing materials can release fibers into the air, posing a health risk. Proper testing and remediation are essential.
By following these steps, damaged basement ceiling tiles can be effectively repaired or replaced, restoring the appearance and integrity of the basement ceiling.

Diy How To Update Old Ceiling Tile Pink Little Notebookpink Notebook

Basement Ceiling Ideas Installation

Replacing Drop Ceiling Tiles
Diy Ceiling Tiles Replace Damaged Project Arrow Fastener

How To Replace A Drop Ceiling The Lilypad Cottage

Ceiling Tile Installation Ceilings Armstrong Residential

Diy Coffered Ceilings With Moveable Panels Renovation Semi Pros

Updating An Old Ceiling Ceilings Armstrong Residential

Drop Ceiling Tiles Installation Tips Diy Family Handyman

Stunning Suspended Ceiling You Can Diy Home With Krissy
Related Posts