```html
How to Fix a Tile Floor
Tile floors, while durable and aesthetically pleasing, are susceptible to damage over time. Cracks, chips, loose tiles, and grout deterioration are common issues that can detract from the overall appearance and structural integrity of the floor. Addressing these problems promptly is essential to prevent further damage and maintain the floor's longevity. This article provides a comprehensive guide on how to fix various tile floor issues, providing detailed instructions and practical advice.
Identifying the Problem
Before undertaking any repair work, it is crucial to accurately identify the specific problem affecting the tile floor. This involves a thorough inspection to determine the type and extent of the damage. Common issues include cracked tiles, chipped tiles, loose tiles, damaged grout, and efflorescence.
Cracked tiles can range from hairline fractures to more significant breaks that compromise the tile's structural integrity. Chipped tiles involve small pieces of the tile surface breaking off, often around the edges. Loose tiles are characterized by movement or instability when pressure is applied. Damaged grout can manifest as crumbling, cracking, or discoloration. Efflorescence appears as a white, powdery substance on the tile surface, typically caused by moisture migrating through the underlying substrate.
A careful visual examination, combined with tactile assessment (e.g., gently pressing on tiles to check for looseness), will help pinpoint the specific issue and guide the subsequent repair process. Taking photographs of the damaged areas can also be helpful for reference and for consulting with professionals if necessary.
Repairing Cracked or Chipped Tiles
The approach to repairing cracked or chipped tiles depends on the severity of the damage. Minor cracks and chips can often be addressed using epoxy-based repair kits specifically designed for tile. These kits typically include a color-matching epoxy compound, applicator tools, and instructions for use. The epoxy fills the crack or chip, creating a durable and aesthetically pleasing repair.
To begin, thoroughly clean the damaged area and remove any loose debris. Apply the epoxy compound according to the manufacturer's instructions, ensuring it fills the void completely. Use the applicator tools to smooth the surface and remove any excess epoxy. Allow the epoxy to cure fully, as specified by the manufacturer, before subjecting the repaired area to foot traffic.
For more extensive cracks or chips that significantly compromise the tile's structural integrity, replacement is often the most appropriate solution. This involves carefully removing the damaged tile and installing a new one in its place. Matching the replacement tile to the existing floor is crucial to ensure a seamless and aesthetically pleasing result.
To remove the damaged tile, carefully score the grout lines around the tile using a grout saw or utility knife. This will help to prevent damage to the surrounding tiles. Use a hammer and chisel to gently break up the tile, working from the center outwards. Once the tile is broken into manageable pieces, remove them carefully, taking care not to damage the underlying substrate.
Before installing the new tile, thoroughly clean the area and apply a layer of thin-set mortar to the substrate. Carefully position the new tile, ensuring it is level with the surrounding tiles. Use tile spacers to maintain consistent grout lines. Allow the thin-set mortar to cure fully before grouting the new tile.
Addressing Loose Tiles
Loose tiles indicate that the bond between the tile and the substrate has failed. This can be caused by a variety of factors, including improper installation, moisture exposure, or substrate movement. Repairing loose tiles involves removing the tile, cleaning the area, and re-setting the tile with fresh mortar.
Similar to removing a cracked tile, carefully score the grout lines around the loose tile using a grout saw or utility knife. Gently pry the tile from the floor using a putty knife or similar tool. Take care not to damage the tile or the surrounding tiles.
Once the tile is removed, thoroughly clean the tile and the underlying substrate. Remove any loose mortar or debris. Apply a fresh layer of thin-set mortar to the substrate. Carefully position the tile, ensuring it is level with the surrounding tiles. Use tile spacers to maintain consistent grout lines. Allow the thin-set mortar to cure fully before grouting the tile.
In some cases, loose tiles may be caused by a more significant underlying problem, such as a damaged or unstable substrate. If this is the case, it may be necessary to address the underlying issue before re-setting the tile. This could involve repairing or replacing the substrate to provide a solid and stable foundation for the tile floor.
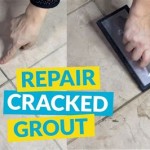
Repairing Damaged Grout
Damaged grout can detract from the appearance of a tile floor and can also allow moisture to penetrate the underlying substrate. Repairing damaged grout involves removing the old grout and applying new grout. This is a relatively straightforward process that can significantly improve the appearance and longevity of the tile floor.
Use a grout saw or grout removal tool to carefully remove the old grout. Work slowly and deliberately to avoid damaging the surrounding tiles. Remove all loose and crumbling grout, ensuring the grout lines are clean and free of debris.
Once the old grout is removed, thoroughly clean the grout lines. Use a vacuum cleaner to remove any remaining dust and debris. Wipe the grout lines with a damp sponge to remove any lingering residue.
Mix the new grout according to the manufacturer's instructions. Apply the grout to the grout lines using a grout float. Work the grout into the grout lines, ensuring they are completely filled. Remove any excess grout from the tile surface using the grout float.
Allow the grout to set for a few minutes, then use a damp sponge to wipe the tile surface clean. Rinse the sponge frequently to remove any grout residue. Allow the grout to cure fully, as specified by the manufacturer, before subjecting the grouted area to moisture or foot traffic.
Applying a grout sealer after the grout has cured is highly recommended. Grout sealer helps to protect the grout from staining and moisture penetration, extending its lifespan and maintaining its appearance.
Addressing Efflorescence
Efflorescence, the white, powdery substance that sometimes appears on tile floors, is caused by moisture migrating through the substrate and dissolving mineral salts. As the moisture evaporates, the salts are deposited on the surface of the tile.
The first step in addressing efflorescence is to identify and eliminate the source of the moisture. This could involve repairing leaky pipes, improving ventilation, or addressing drainage issues. Without addressing the source of the moisture, the efflorescence will likely return.
Once the moisture source has been addressed, the efflorescence can be removed using a specialized efflorescence cleaner. These cleaners are typically acidic and are designed to dissolve the mineral salts. Follow the manufacturer's instructions carefully when using an efflorescence cleaner.
Apply the cleaner to the affected area and allow it to dwell for the recommended time. Scrub the area with a brush or sponge to loosen the efflorescence. Rinse the area thoroughly with clean water and allow it to dry completely.
In severe cases of efflorescence, it may be necessary to remove and replace the affected tiles and substrate. This is a more involved process but may be necessary to completely eliminate the problem.
Preventing efflorescence involves controlling moisture levels and ensuring proper drainage. Using a vapor barrier beneath the tile floor can help to prevent moisture from migrating through the substrate. Regularly cleaning the tile floor and addressing any leaks promptly can also help to prevent efflorescence from occurring.
```
How To Fix Ed Tile The Home Depot
.png?strip=all "How To Fix Loose Or Broken Ceramic Floor Tiles")
How To Fix Loose Or Broken Ceramic Floor Tiles

Fixing Loose Floor Tiles And Why They In New Builds

How To Fix A Loose Floor Tile Without Removing It

How To Fix Loose Hollow Tile Floors Don T Remove Or Replace Just Drill Fill

How To Fix Ed Tile The Home Depot

Six Simple Steps For Replacing Tile Marshalltown

How To Repair Ed Floor Tiles Without Replacing Them

Tile Grout Repair 5 Steps To Fully Ed True Value Hardware

How To Fix Ed Tile The Home Depot
Related Posts