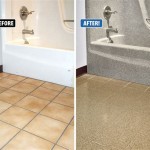
How to Change Bathroom Shower Tile
Replacing bathroom shower tiles can be a daunting task, but with the right tools and knowledge, it is achievable. This guide will walk you through the process of removing old tiles, preparing the surface, and installing new tiles for a fresh and updated shower.
1. Removing Old Tiles
The first step is to remove the existing tiles. This process requires caution and proper tools:
- Safety Gear: Wear safety glasses and gloves to protect yourself from debris and sharp edges.
- Tools: You will need a hammer, chisel, grout removal tool, utility knife, and a bucket for debris collection.
- Start at the Edges: Begin by removing the tiles from the outer edges of the shower stall. Use the chisel and hammer to gently tap the tile until it breaks.
- Remove Grout: Once the tiles are removed, use a grout removal tool to scrape off the remaining grout. This will make it easier to remove the tiles and ensure a level surface for the new tiles.
- Carefully Remove Remaining Tile: Once the grout is removed, use the chisel and hammer to remove the remaining tiles, working carefully to avoid damaging the underlying shower wall.
2. Preparing the Surface
After removing the old tiles, it's crucial to prepare the surface for the new tiles. This involves:
- Clean the Surface: Thoroughly clean the shower wall with a brush and soapy water to remove any remaining grout, adhesive, or debris. Allow the surface to dry completely before proceeding.
- Check for Unevenness: Inspect the surface for any unevenness or bumps. If necessary, use a leveling compound to smooth out the surface. This ensures that the new tiles will be installed evenly.
- Apply Waterproof Membrane: Before installing the new tiles, apply a waterproof membrane to the shower wall. This is crucial for preventing water damage and leaks, especially in areas exposed to moisture.
3. Installing New Tiles
Once the surface is prepared, you can start installing the new tiles. Follow these steps:
- Choose the Right Tile Adhesive: Select a tile adhesive that is suitable for the type of tiles you are installing, the shower environment, and the substrate. Read the manufacturer's instructions carefully.
- Spread Adhesive: Apply the tile adhesive to the shower wall using a notched trowel. The size of the notch will depend on the size of the tiles.
- Position Tiles: Start by placing the tiles in the corner and work your way outward. Ensure that the tiles are level and evenly spaced. Use spacers to maintain consistent gaps between tiles.
- Press Firmly: Apply firm pressure to each tile to ensure good adhesion to the adhesive.
- Allow to Dry: Allow the adhesive to dry completely according to the manufacturer's instructions before proceeding to the next step.
- Grout the Tiles: Once the adhesive is dry, apply grout to the spaces between the tiles. Use a grout float to spread the grout evenly and remove excess grout.
- Clean Excess Grout: Wipe away any excess grout with a damp sponge. Allow the grout to dry completely before sealing it.
- Seal the Grout: Apply a grout sealer to protect the grout from stains and water damage.
By carefully following these steps, you can successfully replace the tiles in your shower and enjoy a fresh, updated look. Remember, safety is paramount. Always wear appropriate safety gear and consult a professional if you are unsure about any part of the process.

How To Remove Bathtub Shower Wall Tiles

Diy Shower Remodel Start To Finish Part 1 Of 2

Repair Fallen Tile Reinstall Shower With Simple Fix Re Install Bath No Grout

Diy Shower Remodel Start To Finish Part 1 Of 2

Semi Diy Bathroom Remodel Replacing A Tub Surround The Bathtub Tile

How To Replace Damaged Shower Surround Tile

The Complete Guide To Installing Tile On Shower Or Bathtub Walls

Tips On How To Remove Old Shower Tile Ugly Duckling House

How To Tile Bathroom Shower Tub Surround And Niche A Z

How To Install A Shower Tile Wall Bathroom
Related Posts


