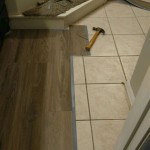
When it comes to tiling a room or outdoor space, it’s important to have an accurate measurement of the square footage you’ll need. Measuring the square footage of a room or outdoor area is not as difficult as it may seem. This guide will provide you with the steps necessary to make sure you’re accurately calculating the square footage for your next tiling project.
The first step is to measure the length and width of the tiling area. To do this, use a tape measure to find the length and width of each wall in the room. Once you have your measurements, you can begin to calculate the square footage of the space. To do this, you’ll need to multiply the length and width of the room together. For example, if you have a room with a length of 12 feet and a width of 10 feet, the square footage will be 120 feet.
The next step is to measure the area of any irregularly shaped spaces. This includes corners, alcoves, and any other areas that don’t have a standard four-sided shape. To measure these areas, use a piece of string to trace the shape of the area. Once you have the shape traced, measure the length of the string with a tape measure. This will give you the square footage of the irregularly shaped area.
The last step is to add up all of the measurements you have taken. This will give you the total square footage of the space you’ll be tiling. Once you have the total square footage, you can accurately calculate the amount of tile you’ll need to complete your project. It’s important to make sure that you have the correct measurements, as having too few or too many tiles will affect the overall outcome of the project.
By following these steps, you should have an accurate measurement of the square footage you’ll need for your tiling project. Remember to take your time and make sure all of your measurements are correct. This will ensure that your tiling project is a success!


Related Posts


