How To Achieve a Perfect Grout for Your Shower Tiles
A well-maintained shower is a sanctuary, offering a refreshing escape from the day's stress. However, the beauty of your shower can be diminished by unsightly, discolored, or cracked grout. Fortunately, achieving a perfect grout finish is within reach with careful planning and execution. This article will guide you through the process, covering the crucial steps for achieving a flawless grout application that enhances the aesthetics and longevity of your shower.
Preparation is Key
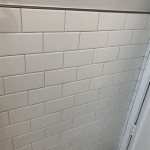
The foundation of a perfect grout lies in meticulous preparation. Before applying any grout, the surface must be clean, dry, and free of any debris. Begin by thoroughly cleaning the tiles and the area where the grout will be applied. Use a grout cleaner to remove any existing residue, soap scum, or other contaminants. Afterward, rinse the area thoroughly and allow it to dry completely. After cleaning, ensure that the tiles are completely dry to prevent grout from becoming discolored or cracking.
Next, check the gap between the tiles. The grout lines should be consistent and uniform. If the gaps are irregular or too wide, consider using a grout spacer to achieve a more professional finish. Proper spacing ensures that the grout adheres evenly to the tiles, preventing gaps and uneven surfaces.
Choosing the Right Grout
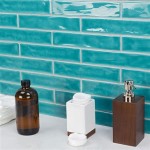
The selection of the right grout is crucial for a successful installation. Consider factors like the color, type, and size of the tiles, as well as the level of traffic and humidity in the shower area. For showers, epoxy grout is the preferred choice due to its superior water resistance, durability, and stain resistance. It is also less porous than cement-based grout, making it more resistant to mold and mildew growth. However, epoxy grout tends to be more expensive and requires a specialized cleaning process. If you're working with larger tiles, you can opt for a wider grout line to enhance the visual appeal. A wider grout line can create a more modern and minimalist aesthetic, while a narrower grout line provides a classic and timeless look.
Applying Grout with Precision
Once the surface is prepared and the grout is chosen, it's time to apply the grout. Use a grout float or a trowel to apply the grout diagonally across the grout lines, ensuring complete coverage. Work in small sections to prevent the grout from drying out before you can smooth it. Apply gentle but firm pressure to press the grout into the joints. After applying the grout, immediately remove any excess using a damp sponge. This step is crucial because removing excess grout before it dries prevents unwanted stains and ensures a clean finish.
After the initial cleaning, allow the grout to dry for approximately 15 minutes. Then, perform a final cleaning with a damp sponge, wiping away any remaining haze or residue. As the grout dries, it will become harder and less susceptible to smudging, making the final cleaning easier and more effective. Continue cleaning the grout every 15 minutes until all haze is removed.
Sealing for Enhanced Protection
Once the grout is thoroughly dry, sealing it is essential for long-term protection. Grout sealer creates a protective barrier that repels water, stains, and mold growth. It also enhances the grout's color and appearance, maintaining its shine for years to come. Apply the sealer carefully, following the manufacturer's instructions. Allow the sealant to dry completely before using the shower.
Regular maintenance plays a crucial role in preserving the appearance of your shower's grout. Avoid harsh abrasive cleaners that can damage the grout. Use a pH-neutral cleaner specifically designed for tile and grout to remove soap scum, mildew, and dirt without compromising the sealant. By following a regular cleaning routine, you can extend the life of your grout and ensure its continued beauty.
Preventing Cracked Grout
Cracked grout is a common problem that can detract from the overall aesthetic of your shower. To prevent cracked grout, it's crucial to consider factors like the type of grout used and the installation process. For example, using epoxy grout can significantly reduce the likelihood of cracking due to its superior strength and durability. Additionally, ensure that the tiles are properly supported and that the grout is evenly applied to prevent stress points that can lead to cracking.
In addition to these steps, it's also important to avoid using harsh chemicals or abrasive cleaners on the grout, as these can weaken the grout and make it more susceptible to cracking. If cracks do appear, you can repair them using a grout repair kit or by applying a fresh layer of grout. However, it's essential to address the underlying cause of the cracking to prevent it from recurring.

25 Year Contractor Uses 14 Techniques For A Perfect Grout Job Everytime

How To Grout Tile A Beginner S Guide The Created Home

4 Types Of Grout Used In Bathrooms And Kitchens Shower Repairs

How To Grout Tile A Beginner S Guide

What Is The Best Grout To Use In A Shower Tile Doctor

What Is The Best Grout To Use In A Shower Tile Doctor

How To Choose The Best Grout Color For Your Bathroom

Refresh Your Bathroom Tile With Grout Paint Arched Manor

How To Choose The Best Grout Color For Your Bathroom

Getting The Grout Right Brownstone Boys
Related Posts