How To Accurately Calculate Tile Installation Costs Per Square Foot
Calculating the cost of tile installation per square foot requires a thorough understanding of the various factors contributing to the overall expense. This calculation is crucial for budgeting purposes, enabling homeowners and contractors to accurately estimate the financial commitment involved in a tiling project. Inaccurate estimations can lead to unexpected expenses, project delays, and potential financial strain. A precise calculation empowers informed decision-making, ensuring the project aligns with budgetary constraints and achieves the desired aesthetic. This article provides a comprehensive guide to accurately calculating tile installation costs per square foot, outlining each component contributing to the final figure.
Key Point 1: Material Costs: Breaking Down the Tile and Essential Supplies
The material cost forms a significant portion of the overall tile installation expense. This encompasses the price of the tiles themselves, as well as the necessary supplies for a successful installation. A detailed breakdown of these costs is essential for an accurate calculation.
Tile Selection and Pricing: The type of tile selected has a direct impact on the per-square-foot cost. Ceramic and porcelain tiles are generally more affordable than natural stone options such as marble, granite, or slate. The size of the tile also influences the cost; larger tiles typically require less labor for installation but may have a higher per-piece price. It is important to obtain quotes from multiple suppliers to compare prices and identify the most cost-effective option while maintaining the desired aesthetic and quality. Consider factors such as tile durability, water resistance, and suitability for the intended application (e.g., floor, wall, shower) when making a selection.
Essential Supplies: Beyond the tiles themselves, several other materials are necessary for proper installation. These include:
- Thin-set Mortar: This adhesive bonds the tiles to the subfloor or wall. The type of thin-set mortar required depends on the tile material and the substrate. Modified thin-set mortars are generally recommended for larger tiles and natural stone.
- Grout: This fills the spaces between the tiles, preventing water penetration and providing structural integrity. The type of grout (e.g., sanded, unsanded, epoxy) depends on the tile type and the width of the grout lines.
- Backer Board: Used as a substrate for tile installations, especially in wet areas like bathrooms and kitchens. Cement backer board is a common choice due to its water resistance and stability.
- Sealant: Applied to grout lines and around fixtures to prevent water damage and staining.
- Cutting Tools: Tile saws or manual tile cutters are necessary for cutting tiles to fit the space.
- Spacers: These ensure consistent grout lines between tiles.
- Other Supplies: Buckets, sponges, trowels, measuring tools, and safety equipment (e.g., gloves, safety glasses) are also essential.
Accurately estimating the quantity of each material is critical to avoid shortages or excessive waste. Consult with a tile supplier or experienced installer to determine the appropriate amounts based on the project’s scope and dimensions. Adding a buffer (typically 10-15%) to the estimated material quantities is advisable to account for cuts, breakage, and variations in tile size.
Key Point 2: Labor Costs: Understanding the Factors Influencing Installation Rates
Labor costs represent a substantial portion of the total tile installation expense. These costs are affected by several factors, including the complexity of the installation, the installer's experience, and regional labor rates. Understanding these variables is essential for accurately estimating the labor component of the project.
Complexity of the Installation: Intricate patterns, custom cuts, and challenging layouts increase the time and effort required for installation, thus raising labor costs. Simple, straightforward installations, such as a basic square tile layout, will generally have lower labor rates. Consider the following factors when assessing the complexity of the installation:
- Tile Size and Shape: Smaller tiles and unusual shapes (e.g., mosaic, hexagonal) often require more time to install than larger, square or rectangular tiles.
- Pattern: Complex patterns (e.g., herringbone, chevron) demand precise cuts and alignment, increasing the labor time.
- Substrate Preparation: Uneven or damaged subfloors require additional preparation, such as leveling or patching, which adds to the labor cost.
- Obstacles: Installations around fixtures, pipes, or corners require careful cutting and fitting, increasing the labor time.
Installer Experience and Expertise: Experienced and highly skilled tile installers typically charge higher rates than less experienced or novice installers. However, the expertise of a seasoned installer can ensure a higher quality installation, minimizing the risk of errors and future problems. It's crucial to vet potential installers by reviewing their portfolio, checking references, and verifying their licensing and insurance. A reputable installer will provide a detailed quote that outlines the scope of work and the associated labor costs.
Regional Labor Rates: Labor rates for tile installation vary significantly depending on the geographic location. Metropolitan areas with a higher cost of living generally have higher labor rates than rural areas. Researching prevailing labor rates in the project's location is essential for obtaining an accurate estimate. Contacting several local tile installers and requesting quotes can provide valuable insights into the current market rates.
Obtaining Multiple Quotes: Always obtain multiple quotes from different tile installers to compare prices and services. A detailed quote should include a breakdown of the labor costs, the scope of work, and the estimated timeline for completion. Be wary of excessively low bids, as they may indicate substandard workmanship or hidden costs. Ensure that all quotes are based on the same scope of work and materials to facilitate a fair comparison. Clarify any ambiguities or discrepancies in the quotes before making a decision.
Key Point 3: Additional Costs: Accounting for Hidden Expenses in Tile Installation
Beyond the material and labor costs, several additional expenses can impact the overall tile installation budget. Failing to account for these hidden costs can lead to unexpected financial burdens and project delays. These expenses include subfloor preparation, demolition and removal, delivery charges, and potential repairs.
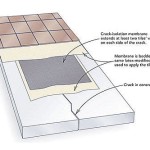
Subfloor Preparation: The condition of the subfloor is critical for a successful tile installation. Uneven, damaged, or unstable subfloors require preparation before tiling can begin. This may involve leveling the subfloor with self-leveling compound, patching cracks or holes, or reinforcing the subfloor with additional plywood or backer board. The cost of subfloor preparation can vary depending on the extent of the damage and the type of materials required. A thorough inspection of the subfloor is essential to identify any potential issues and accurately estimate the preparation costs.
Demolition and Removal: If existing flooring needs to be removed before tile installation, demolition and removal costs should be factored into the budget. This may involve removing old tile, vinyl, carpet, or other flooring materials. The cost of demolition and removal depends on the type of flooring being removed, the size of the area, and the disposal fees at local landfills or recycling centers. Some contractors may include demolition and removal in their overall quote, while others may charge it as a separate line item.
Delivery Charges: The cost of delivering the tiles and other materials to the project site can also add to the overall expense. Many tile suppliers charge delivery fees based on the distance and the weight of the materials. Consider the delivery charges when comparing prices from different suppliers. In some cases, renting a truck and transporting the materials yourself may be more cost-effective, especially for smaller projects.
Potential Repairs: Unexpected issues can arise during tile installation, such as concealed damage to the subfloor or plumbing problems. These unforeseen issues may require additional repairs, which can add to the overall cost. It is prudent to set aside a contingency fund to cover potential repairs or unforeseen expenses. A contingency of 5-10% of the total project cost is generally recommended.
Calculating the Final Cost Per Square Foot: To calculate the final cost per square foot, add up all the material costs, labor costs, subfloor preparation, demolition and removal, delivery charges, and any other relevant expenses. Then, divide the total cost by the total square footage of the area being tiled. This calculation provides an accurate estimate of the cost per square foot, enabling informed budgeting and decision-making. Regularly monitor expenses throughout the project to ensure adherence to the budget and address any potential overruns promptly.
By carefully considering each of these factors, it is possible to develop a realistic budget for a tile installation project and avoid unexpected costs. This detailed approach ensures financial transparency and facilitates a successful and aesthetically pleasing outcome.

Tile Flooring Cost Estimation To Install Ceramic Floor

Flooring Cost Estimator In Gainesville Fl Estimate Florida Consulting

How Much Does It Cost To Install Tile Roof Estimate Florida Consulting

Floor Tile Calculator How To Measure Step By Guide

How To Calculate Floor Tiles And Skirting Estimating Costing Floortile Estimation

Floor Tiling Cost Guide 2025 How Much Does

How Much Does Ceramic Tile Installation Cost 2025

How To Calculate Tiles Needed For A Floor

What Will Be The Cost Of Tiling A Room Measuring 13 Ft By 16 If Square Tiles 2 Each And Measure 12 In Homework Study Com

Cost Of Porcelain Tile Flooring Floor Tiles Fixr
Related Posts