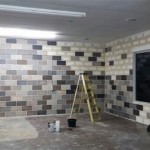
Fixing Loose Shower Tiles Without Removing Them
Loose shower tiles are a common problem that can detract from the appearance of your bathroom and potentially lead to more serious issues. While removing and re-grouting tiles is often the traditional solution, there are several methods for fixing loose shower tiles without removing them entirely. These methods can save you time, effort, and potentially even money, as they require minimal disruption to your bathroom.
Understanding the Causes of Loose Shower Tiles
Before attempting any repair, it's essential to understand the causes of loose shower tiles. Common reasons include:
- Poor Grout Application: Improperly applied grout can lead to gaps and weak bonds, allowing moisture to penetrate and loosen the tiles.
- Cracked or Damaged Grout: Over time, grout can crack or become damaged, especially in areas subjected to frequent water exposure. This can weaken the bond between the tile and the wall.
- Insufficient Adhesive: If the initial tile installation used insufficient adhesive, the tiles may not be adequately secured to the wall, leading to loosening.
- Water Damage: Continuous exposure to water can cause the underlying wall material to deteriorate, weakening its ability to hold the tiles in place.
Methods for Fixing Loose Shower Tiles
Once you've identified the cause of the loose tiles, you can choose the appropriate repair method. Here are three common approaches:
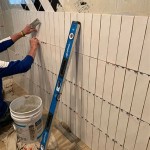
1. Re-grouting
Re-grouting is a simple and effective solution for loose tiles caused by cracked or damaged grout. This involves removing the old grout and applying fresh grout. This method can strengthen the bond between tiles and prevent moisture penetration. Here's a step-by-step guide:
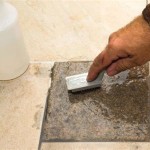
- Prepare the area: Clean the grout lines with a grout cleaner and remove any loose debris.
- Remove old grout: Use a grout removal tool or a utility knife to carefully remove the old grout, ensuring you don't damage the tiles.
- Apply new grout: Apply a thin layer of new grout, using a grout float to ensure even distribution. Wait for the grout to set according to the manufacturer's instructions.
- Clean excess grout: Remove excess grout with a damp sponge, taking care not to smudge the grout lines.
2. Using Tile Adhesive
If the issue is inadequate tile adhesive, applying a specialized tile adhesive can re-secure the loose tiles. This method works effectively for tiles that are slightly loose but not completely detached. Here's a step-by-step guide:
- Prepare the area: Clean the tile and the wall surface thoroughly to ensure a strong bond.
- Apply tile adhesive: Apply a thin layer of tile adhesive to the back of the loose tile, using a trowel or a caulking gun.
- Press the tile firmly: Press the tile firmly against the wall, ensuring it's level and flush with the surrounding tiles.
- Secure with weights: Use weights or clamps to hold the tile in place while the adhesive dries, following the manufacturer's instructions for curing time.
3. Using Epoxy or Construction Adhesive
For loose tiles that are significantly detached or for larger areas of concern, a stronger adhesive like epoxy or construction adhesive may be required. These adhesives are highly durable and can effectively re-secure loose tiles. Here's a step-by-step guide:
- Prepare the area: Clean the tile and the wall surface, ensuring they are dry and free of debris.
- Apply adhesive: Apply a small amount of epoxy or construction adhesive to the back of the tile and around its edges, focusing on areas where the bond is weak.
- Press the tile firmly: Gently press the tile back into place, ensuring it's level and flush with the surrounding tiles.
- Secure with weights: Use weights or clamps to hold the tile in place while the adhesive dries, allowing the manufacturer's recommended curing time.
Important Considerations
When fixing loose shower tiles, it's crucial to consider the following factors:
- Choose the right adhesive: Selecting the appropriate adhesive is essential for a successful repair. Consider the tile material and the underlying surface when choosing an adhesive.
- Apply adhesive sparingly: Applying too much adhesive can lead to excess dripping and a messy finish. Be cautious with the quantity of adhesive used.
- Ensure proper curing time: Allow sufficient curing time for the adhesive to fully dry before using the shower. This will ensure a strong and lasting bond.
- Address underlying issues: If loose tiles are a recurring problem, consider addressing underlying causes, such as moisture penetration or wall deterioration. This may require professional assistance.

Repair Fallen Tile Reinstall Shower With Simple Fix Re Install Bath No Grout

How To Fix A Loose Tile In The Bathroom Floor

How To Fix Loose Shower Tiles Renovator Secrets

How To Fix A Hollow Tile Without Removing The Step By

Method Surprised 50 Year Old Tiler Fix Tiles Without Removing

How To Fix Shower Tiles Falling Off Wall Diy

Fixing Loose Floor Tiles And Why They In New Builds

The 50 Year Old Tiler Surprised With This Quick Method Fix Loose Tiles Without Removing

How To Fix Loose Tiles Without Starting Over Tiling Advice

How To Fix Loose Hollow Tile Floors Don T Remove Or Replace Just Drill Fill
Related Posts