Effortless Floor Refresh with Self-Stick Vinyl Tiles: Transforming Your Home with Ease
Are you looking for a quick, affordable, and stylish way to refresh the look of your floors? Self-stick vinyl tiles offer a fantastic solution, transforming your home with minimal effort and hassle. These easy-to-install tiles are designed for do-it-yourselfers, providing a cost-effective alternative to traditional flooring options.
Self-stick vinyl tiles come in a wide variety of designs, from classic wood-look patterns to contemporary abstract prints. Whether you prefer the timeless elegance of marble or the cozy warmth of rustic barnwood, you're sure to find a style that complements your decor.
Benefits of Self-Stick Vinyl Tiles:
- Effortless Installation: Say goodbye to messy adhesives and complicated tools. Self-stick vinyl tiles feature a peel-and-stick backing, allowing you to install them quickly and easily without professional assistance.
- Cost-Effective: Compared to traditional flooring options like hardwood or tile, self-stick vinyl tiles are significantly more affordable, making them a budget-friendly way to update your floors.
- Durable and Long-Lasting: These tiles are designed to withstand heavy foot traffic and daily wear and tear, ensuring their beauty and functionality for years to come.
- Versatile: Self-stick vinyl tiles are suitable for a variety of rooms in your home, including kitchens, bathrooms, entryways, and bedrooms. Their versatility makes them a practical choice for any space.
How to Install Self-Stick Vinyl Tiles:
- Prepare the Floor: Start by thoroughly cleaning and drying the floor surface. Remove any dirt, debris, or wax to ensure proper adhesion.
- Remove Backing: Peel back a small portion of the protective backing from the corner of the tile.
- Align and Place: Carefully align the exposed adhesive edge with the desired location on the floor and gently press it down.
- Remove Remaining Backing: Remove the rest of the backing and continue pressing the tile firmly until it adheres securely to the floor.
- Repeat: Follow the same steps for each subsequent tile, ensuring they are flush and aligned with the previous ones.
Tips for a Seamless Installation:
- Clean Cuts: Use a sharp utility knife to make clean cuts for areas around corners or obstacles.
- Plan the Layout: Before starting, plan the layout of the tiles to avoid mistakes and ensure a cohesive design.
- Roll Heavy Objects: After installation, roll a heavy object, such as a piano or fridge, over the tiles to improve adhesion.
- Seal Edges: For areas like bathrooms and kitchens, apply a clear sealant to the edges of the tiles for added protection against moisture.
- Maintenance: Keep your self-stick vinyl tiles looking their best by sweeping or vacuuming regularly and using a damp mop with mild detergent for occasional cleaning.

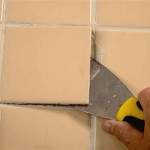
How To Grout L And Stick Tiles A Easy Floor Update 50 One Afternoon Of Work This Diy Life

How To Grout L And Stick Tiles A Easy Floor Update 50 One Afternoon Of Work This Diy Life

D C Fix Grey Wood L And Stick Floor Tiles 30 5cm X 1sqm Pack Bonprix

How To Grout L And Stick Tiles A Easy Floor Update 50 One Afternoon Of Work This Diy Life

D C Fix Vivid Stars L Stick Self Adhesive Rigid Vinyl Floor Tiles 30 5 X Cm Bonprix

30 48cm X Floor Pops Stellar Self Adhesive Vinyl Tiles

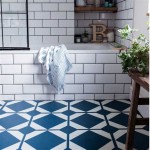
D C Fix Vintage Flowers L Stick Self Adhesive Rigid Vinyl Floor Tiles 30 5 X Cm Kaleidoscope

D C Fix Stencil Motif Green L Stick Self Adhesive Rigid Vinyl Floor Tiles 30 5 Cm X Freemans

Buy 30 48cm X Vintage L And Stick Vinyl Floor Tiles In

Diy L And Stick Vinyl Floor Tile Stickers The Turquoise Home
Related Posts


