Designing The Perfect Ceramic Tile Kitchen Floor Layout Plan (Free)
Ceramic tile remains a popular choice for kitchen flooring due to its durability, water resistance, and aesthetic versatility. A well-designed layout plan is crucial for maximizing these benefits while creating a visually appealing and functional kitchen space. Careful planning will consider not just the tile itself, but the overall flow of the kitchen, existing architectural features, and the desired aesthetic.
The process of designing a ceramic tile kitchen floor layout plan, even without relying on paid software or services, involves several key stages. It starts with measuring the space, choosing the appropriate tile, considering the layout pattern, and accounting for potential obstacles and variations in the existing floor. Accuracy and attention to detail are paramount for a successful and visually pleasing installation.
Determining the Kitchen Layout and Dimensions
The initial step is to accurately measure the kitchen's dimensions. Using a reliable measuring tape, record the length and width of the room, accounting for any irregularities or alcoves. It is important to measure at multiple points along each wall, as walls are not always perfectly straight or parallel. Transfer these measurements onto a scaled drawing. Graph paper or readily available free online drawing tools can be used to create a simple floor plan. The scale used should be clearly indicated (e.g., 1 inch = 1 foot).
On this initial floor plan, indicate the location of all fixed elements, such as cabinets, appliances (refrigerator, oven, dishwasher), islands, and plumbing fixtures. The placement of these elements will significantly influence the tile layout. Note the dimensions of each fixed element and its distance from surrounding walls. Also, mark the location of doorways, windows, and any structural features like columns or bulkheads.
The kitchen layout, whether it is a galley, L-shaped, U-shaped, or island-style, directly impacts the best tile layout. For smaller kitchens, a simple grid pattern might be the most efficient use of space. Larger kitchens offer more opportunities for complex patterns and creative designs. Pay attention to the "work triangle" concept, which involves the relative positioning of the sink, refrigerator, and stove, to ensure efficient workflow in the kitchen.
Consider the existing flooring material and its levelness. Uneven floors require additional preparation, such as leveling compounds, to ensure a smooth and even surface for the ceramic tiles. This preparation must be factored into the overall planning and potential cost estimation, but it is worth it to have the proper foundational installation.
Selecting the Appropriate Ceramic Tile
Choosing the right ceramic tile is fundamental to the success of the kitchen floor layout. Considerations include the tile's size, shape, color, finish, and durability. Smaller tiles, such as mosaics, are suitable for intricate patterns and smaller areas, while larger tiles can create a more seamless and modern look in larger kitchens. The choice should reflect the kitchen's overall style and aesthetic.
Ceramic tiles come in a variety of shapes, including square, rectangular, hexagonal, and even more complex geometric forms. The shape of the tile can significantly influence the visual impact of the floor. For example, rectangular tiles can be used to visually lengthen or widen a space, depending on their orientation. Hexagonal tiles can add a unique and eye-catching element to the kitchen floor.
The color and finish of the tile should complement the kitchen's cabinets, countertops, and backsplash. Light-colored tiles can brighten a small kitchen, while darker tiles can add warmth and sophistication to a larger space. Matte finishes are more slip-resistant than glossy finishes, making them a safer choice for kitchens. Textured tiles can also provide added grip.
Durability is a crucial factor in selecting ceramic tile for kitchen floors. The Porcelain Enamel Institute (PEI) rating system indicates a tile's resistance to abrasion and wear. For kitchen floors, a PEI rating of 3 or higher is recommended. Also, consider the tile's water absorption rate. Porcelain tiles have a lower water absorption rate than non-porcelain ceramic tiles, making them more resistant to staining and damage from spills.
Calculate the total square footage required for the tile installation. Add an extra 10-15% to account for cuts, waste, and potential breakage during installation. This overage is essential to ensure that there are enough tiles to complete the project without running short and potentially facing dye-lot variations in subsequent purchases.
Designing the Tile Layout Pattern
The tile layout pattern is the arrangement of the tiles on the floor. There are many patterns to choose from, each with its own visual effect and level of complexity. The most common patterns include a grid pattern, a staggered (brick) pattern, a diagonal pattern, and a herringbone pattern. More complex patterns, such as basketweave or pinwheel, require more planning and skill to install.
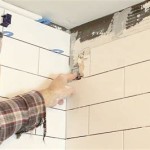
The grid pattern is the simplest and most straightforward layout. Tiles are aligned in straight rows and columns, creating a clean and uniform look. This pattern is suitable for both square and rectangular tiles and is relatively easy to install. However, it can sometimes appear somewhat plain or unremarkable.
The staggered (brick) pattern involves offsetting each row of tiles by half a tile's width. This creates a visually interesting and dynamic effect, reminiscent of a brick wall. It is particularly well-suited for rectangular tiles and can help to visually lengthen or widen a space. It is important to align the grout lines consistently for a professional finish.
The diagonal pattern involves laying the tiles at a 45-degree angle to the walls. This can make a small kitchen appear larger and more open. It requires more cuts and waste than a grid pattern, but the visual impact can be significant. Careful planning is essential to ensure that the diagonal lines are consistent and that the tiles are properly aligned.
The herringbone pattern is a sophisticated and elegant layout that involves arranging rectangular tiles in a V-shaped pattern. It is more complex to install than the other patterns and requires precise cuts and careful alignment. This pattern adds a touch of classic charm to the kitchen floor. It's generally recommended to hire a professional for this installation.
Before finalizing the layout pattern, consider the placement of grout lines. Grout lines can significantly affect the overall appearance of the floor. Choose a grout color that complements the tile color and the kitchen's overall design. Epoxy grout is more resistant to staining and mildew than cement-based grout, making it a good choice for kitchens.
Accounting for Obstacles and Variations
When designing the tile layout, consider any obstacles or variations in the kitchen floor. This includes doorways, cabinets, appliances, and plumbing fixtures. Plan how tiles will be cut and fitted around these obstacles to ensure a seamless and professional-looking finish. Avoid small, awkward pieces of tile in prominent areas, as they can detract from the overall appearance.
Doorways often require a threshold or transition strip to smoothly connect the tile floor to the adjacent flooring material. The threshold should be flush with both floor surfaces and should be securely installed to prevent tripping hazards. Select a threshold material that complements the tile and the surrounding decor.
Cabinets and appliances present unique challenges for tile installation. The tiles should be installed under the toe kicks of the cabinets to create a clean and finished look. Ensure that appliances can be easily moved in and out for maintenance or replacement. Consider using appliance rollers to protect the tile floor from scratches.
Plumbing fixtures, such as toilets and sinks, require careful cutting and fitting of tiles around their base. Use a tile saw with a diamond blade to make precise cuts. Seal the gaps between the tile and the fixtures with caulk to prevent water damage. Consider using escutcheon plates to cover any exposed plumbing pipes.
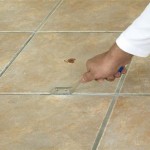
Variations in the existing floor level can also pose challenges. Use a leveling compound to create a smooth and even surface before installing the tiles. Address any cracks or imperfections in the subfloor to prevent them from telegraphing through the tile floor.
Finally, inspect the delivered tiles for any defects or color variations. It is advisable to lay out a small section of the tile on the floor to ensure that the color and pattern are to satisfaction before commencing with the complete installation. This proactive step can save valuable time and resources by identifying potential issues early on.

Top 5 Kitchen Layout Ideas And Tile Designs For Perfection

Kitchen Tiles Design Beautiful Affordable Tile

How To Choose Kitchen Floor Tiles In A Project Mir Mosaic

Ceramic Tile Kitchen Floor Pros Cons And Best Designs Stone Depot

Best Tile For Kitchen Floor How To Make The Right Choice Welcome Rubi Tools Blog

Best Floor Tiles For Kitchens

Enhancing Small Spaces Stylish Ceramic Tile Designs For House Kitchen Orientbell Tiles

15 Kitchen Wall Tile Designs Decorpot Home Interiors

Ceramic Tile Kitchen Floor Pros Cons And Best Designs Stone Depot

The Complete Guide To Kitchen Floor Tile Why
Related Posts