Creating the Perfect Tile Shower Panels
Transforming your shower space with tile shower panels is an ideal way to achieve a stylish and functional upgrade. With careful planning and attention to detail, you can create a custom shower that reflects your personal style and meets your practical needs.
1. Choosing the Right Tile
The type of tile you select will significantly impact the aesthetics and durability of your shower panels. Consider factors such as material, size, and texture. Ceramic and porcelain tiles are popular choices for their versatility, durability, and wide range of designs. Glass tiles offer a sleek, contemporary look and can add a touch of glamour. Natural stone tiles, like marble or granite, provide a luxurious and timeless appeal.
2. Creating the Perfect Layout
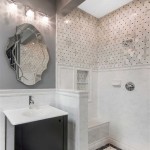
The layout of your tile shower panels is crucial for both functionality and aesthetics. Start by determining the size and shape of the panels, considering the dimensions of your shower space. Use a grid pattern for a classic look, or experiment with offset patterns or mosaic designs for a more creative touch. Plan the placement of any niches or shelves to ensure they align with the layout.
3. Preparing the Surface
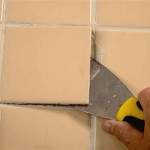
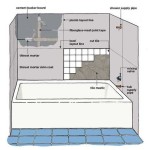
Thoroughly prepare the surface where the shower panels will be installed. Remove any existing tiles or wall coverings, ensuring the surface is level and free from any imperfections. Apply a bonding agent or cement board to create a strong and stable base for the tile panels.
4. Installing the Panels
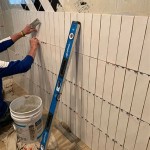
Use a thin-set mortar to adhere the tile panels to the prepared surface. Apply a generous amount of mortar to both the panels and the surface, and spread it evenly using a notched trowel. Carefully align and press the panels into place, ensuring they are level and square. Use spacers to maintain consistent spacing between the tiles.
5. Grouting and Sealing
Once the tiles are installed, apply grout to the joints using a grout float. Choose a grout color that complements the tiles and provides a waterproof seal. Allow the grout to cure completely before sealing it with a penetrating sealer. This will protect the tiles and grout from moisture and stains.
6. Finishing Touches
Complete your shower panels with finishing touches such as trim, corner guards, and a showerhead. Choose trim that matches the style of the tiles and provides a clean and finished look. Corner guards protect the edges of the panels from wear and tear. Select a showerhead that aligns with your desired water flow and spray pattern.
Conclusion
By following these essential steps, you can create tile shower panels that are not only beautiful but also durable and functional. Take your time in planning the project, selecting the right materials, and installing them with care. With proper maintenance and care, your tile shower panels will provide you with years of enjoyment and enhance the value of your bathroom.

The Best Tile For Shower Walls Lx Hausys

11 Materials For Shower Walls Luxurious And Budget Friendly Options

Shower Designs Featuring Large Format Tiles Daltile

Choosing The Best Tiles For A Walk In Tiled Shower

Shower Designs Featuring Large Format Tiles Daltile

Most Innovative Elegant Bathroom Shower Panels For Your Home

How To Choose Bathroom Tiles Bath Tune Up
Get Inspired With 15 Shower Design Ideas Floor Decor Blog

9 Tips To Select The Best Bathroom Wall Tiles For Your Home

Utile Shower Wall Panels By Maax Showers Usa
Related Posts

